
WooCommerce 8: A Six-Month Retrospective
WooCommerce is one of the most popular eCommerce plugins for WordPress and with good reason. Its…

WooCommerce is one of the most popular eCommerce plugins for WordPress and with good reason. Its…

WordPress plugins add functionality and features to your website, helping you customize it to your specific…

Jason Matheny is a delight to speak with, provided you’re up for a lengthy conversation about…

In today’s bustling world, distractions are as ubiquitous as air. To not get swept away by…

When it comes to diets there is so much conflicting information out there, it’s no wonder…

We all know how important website security is, right? We hope you said “yes” because it…

Two of the biggest deepfake pornography websites have now started blocking people trying to access them…

Every picture and video you post spills secrets about you, maybe even revealing where you live….

I was recently waiting for my nails to dry and didn’t want to smudge the paint,…

In the bustling heart of tech, where new ideas sprout faster than we can tend to…

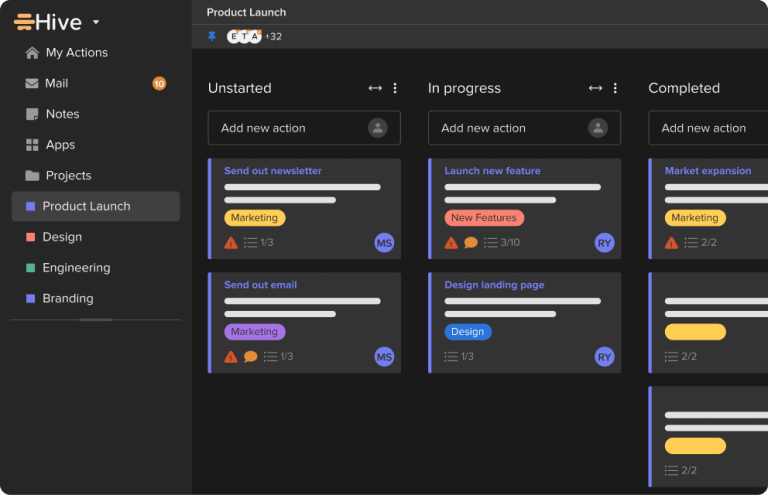
In the bustling landscape of today’s work environment, where demands are like tectonic plates — constantly…

Get your Laifen Wave electronic toothbrush now! ⬇️⮕ Official website: https://bit.ly/48JBKsr⮕ Amazon ABS White: https://amzn.to/3V4OHtq⮕ Amazon…

Last October, I received an email with a hell of an opening line: “I fired a…
Did you know that a staggering 1 in 8 people never feel under control at work?…

Are you a manager with a to-do list that seems to stretch for miles? You finalize…

Secure your privacy with Surfshark! Enter coupon code anastasi for an extra 3 months free at…
The other night I attended a press dinner hosted by an enterprise company called Box. Other…