We’ll take you through the process of creating a banner from scratch in a few minutes. We’ll do our best to make it for general purposes so you could use it to advertise almost any project of yours.
Here you will find a step by step tutorial that will teach you how to create a beautiful advertisement banner. You will absolutely be able to use this knowledge in your future projects. Are you ready?
Your Designer Toolbox
Unlimited Downloads: 500,000+ Web Templates, Icon Sets, Themes & Design Assets
DOWNLOAD NOW
Unlimited Downloads: 500,000+ Fonts, Web Templates, Themes & Design Assets
DOWNLOAD NOW
Step 1
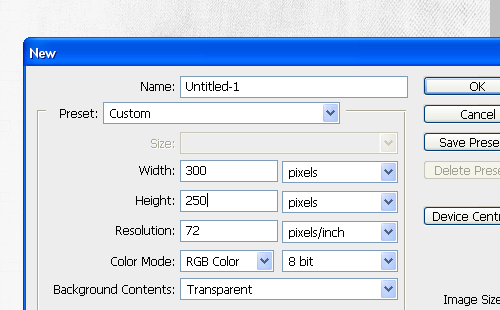
One of the most basic and common sizes for ad banners is: 300x250px. Open Adobe Photoshop and create a new document that’s larger than that. I’ve used a simple grunge texture on gray for the background.
Step 2
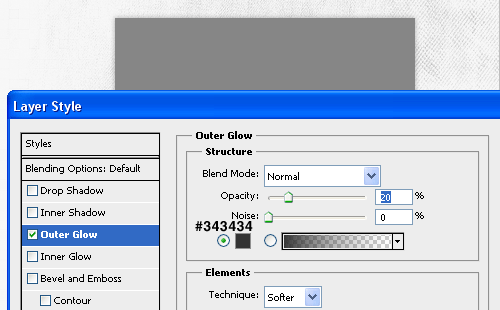
By using the Rectangle Tool (U), create a dark gray rectangle. As we said, the rectangle must be 300×250 pixels. Apply an Outer Glow effect to it (#343434).
Step 3
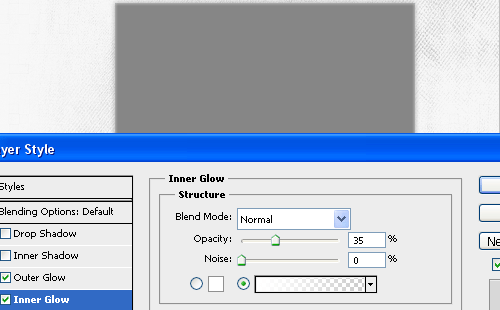
Apply an Inner Glow effect as well. Even if it looks blurry at the moment, the inner glow will be a nice touch to our rectangle when we finish it.
Step 4
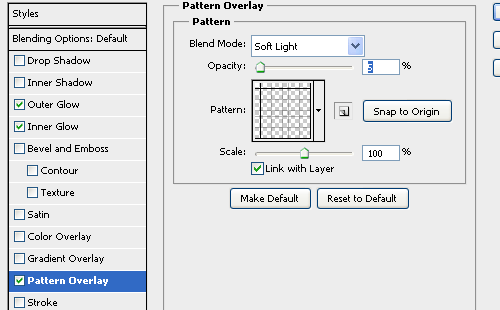
We will apply a seamless (transparent) pattern to our shape. We want it to be barely visible, that’s why I’ve set the blend mode to: Soft Light and the opacity to 5 percent. The pattern I used is a part of this set.
Step 5

We’ll finish the rectangle with a stroke effect. It must be 1px in size and darker than the base color of our rectangle.
Step 6
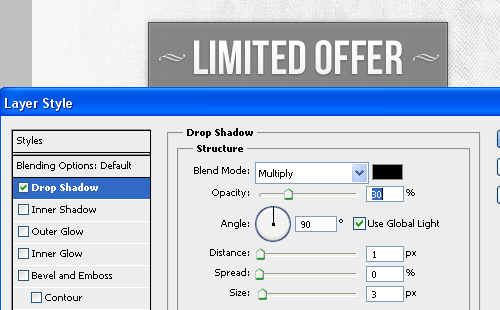
Grab any ornamental vector set you can find on the web. There are plenty of them available for free on the internet, with lots of elements. I used 2 identical ornamental shapes and placed them accordingly. For our headline, we will use the “Bebas Neue” font, 48px. Apply a drop shadow effect to the headline and to the ornamental shapes as well.
Step 7
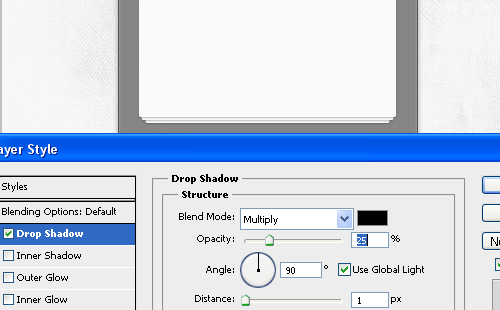
Grab the Rounded Rectangle Tool (U), set the radius to 2 pixels and create a shape of 260×125 pixels. Apply a drop shadow effect to it. You’ll have to duplicate the shape two times, and reduce the size of the first by 1 percent and the second one by 2 percent.
Step 8
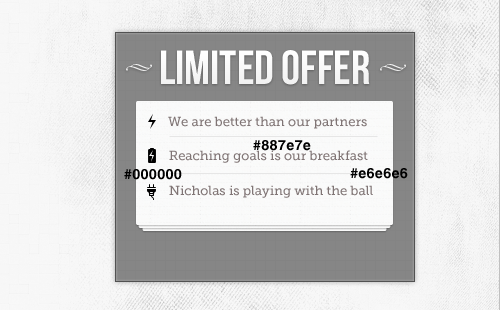
Input some text by using the “Museo Slab” font (#887e7e). Grab any 16×16 px icons from the IconSweets 2 set and place them accordingly. By using the Line Tool (U), create two subtle lines (#e6e6e6) which will work as dividers for the text strokes.
Step 9
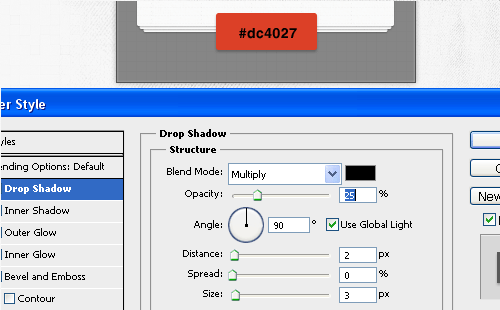
By using the Rounded Rectangle Tool (U), create a red shape (#dc4027). This will be the base for our call-to-action button. Apply a drop shadow effect.
Step 10
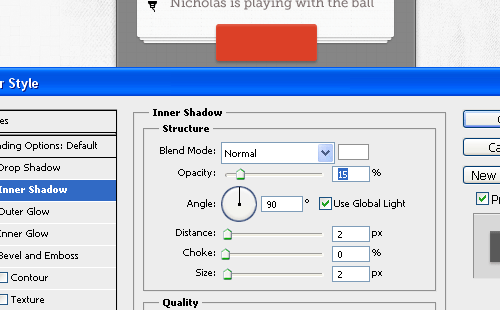
Apply a subtle inner shadow effect. Set the opacity to 15 percent.
Step 11
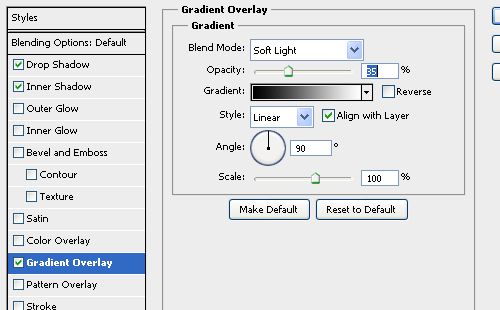
Apply a gradient overlay effect with a soft light blend mode applied. Set the opacity to 35%.
Step 12
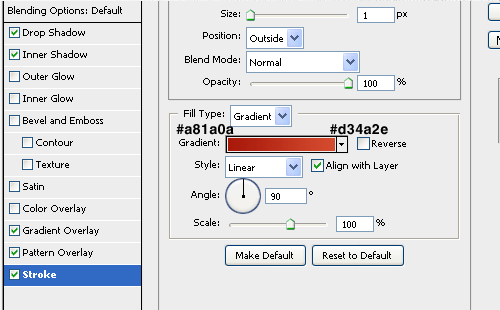
Finish the button by adding the stroke effect. Set the Fill Type as Gradient so you can apply a darker red color for the bottom part and a brighter one for the “first half” of the button.
Step 13
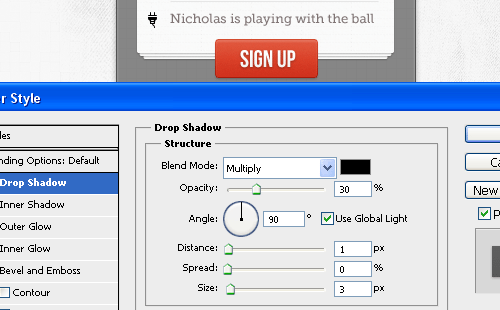
Use the “Bebas Neue” font again to input some text on the button. It can be whatever you’d like, I chose “Sign Up.” Apply some drop shadow to the text as well.
Step 14
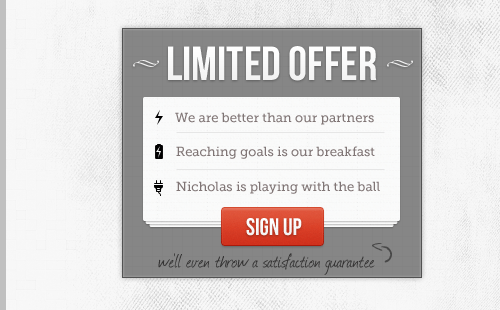
If you wanted to get PSD file, you can get it right here: Download PSD Here
Finish the button by adding some “hand-written” text under the CTA button. Use “Journal” to achieve that handwritten-like effect. It’s really easy to create the arrow as well. You will have to create any shape, like a slash and then use the “Warp Text” feature to achieve the desired result.
Now that you know how to create a banner, how about we create a retro banner together? Let’s go!
This post may contain affiliate links. See our disclosure about affiliate links here.