Advertisement
Designers are very familiar with Adobe Illustrator. This program is a professional alternative to design any project, from drawings to high-quality advertising work. Thanks to its powerful tools, designers can save valuable time working, and can even install additional content that helps them create a personalized experience, such as new fonts to quickly write novel texts. If you are new to using the program, you may want to know how to add fonts to Adobe Illustrator.
Since the software’s first release in 1987, Adobe Illustrator has become one of the benchmark programs in the design world. Compatible with Windows and Mac, nowadays it is included within the Adobe Creative Cloud package, so you will likely end up using it at some point.
Illustrator is an intuitive software perfect for working, so adding new fonts won’t be difficult. If you already have the program installed on your computer, be it Windows or Mac, these are the steps you must follow to add a new font.
How to add fonts to Illustrator – Using an external source
Table of Contents
- 1 How to add fonts to Illustrator – Using an external source
- 2 Illustrator font requirements
- 3 Remember to unzip the file
- 4 How to add fonts to Adobe Illustrator in Windows automatically
- 5 How to add fonts to Adobe Illustrator in Windows manually
- 6 How to add fonts to Adobe Illustrator on Mac OS X
- 7 Check the installation in Illustrator
- 8 Enjoy your new font
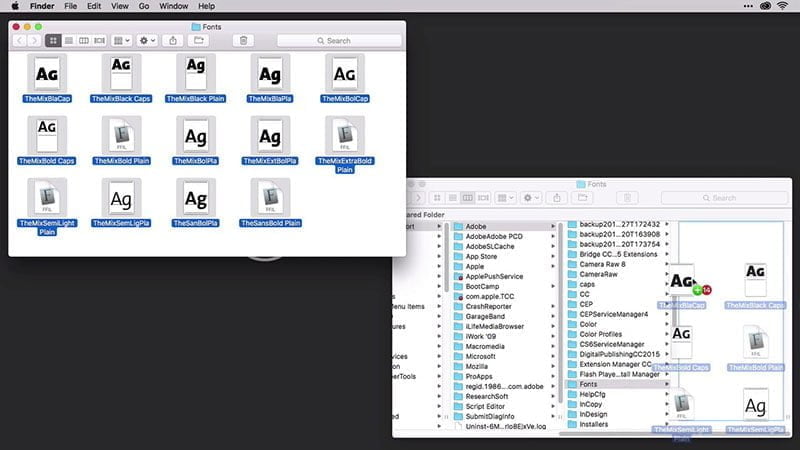

If you have already obtained the font you want to install on the internet, now you must add it to the program. The process is simple and can be done automatically or manually.
The only drawback that Illustrator presents is that it does not allow the installation of multiple fonts at the same time, but must be done one by one. Also, the fonts are not installed directly in the Adobe software but will be installed from another application.
Illustrator font requirements

/*div{padding-right:0!important;padding-bottom:10px}.ml-form-formContent.horozintalForm .ml-button-horizontal{width:100%!important}.ml-form-formContent.horozintalForm .ml-button-horizontal.labelsOn{padding-top:0!important}}
/*]]>*/
/**/
![]()
![]()
To add a font to Illustrator, it must meet various compatibility requirements. The software will not accept incomplete fonts, that is, missing some type of character or style. Therefore, if the collection does not have italic, bold, uppercase, and lowercase letters, you cannot add it.
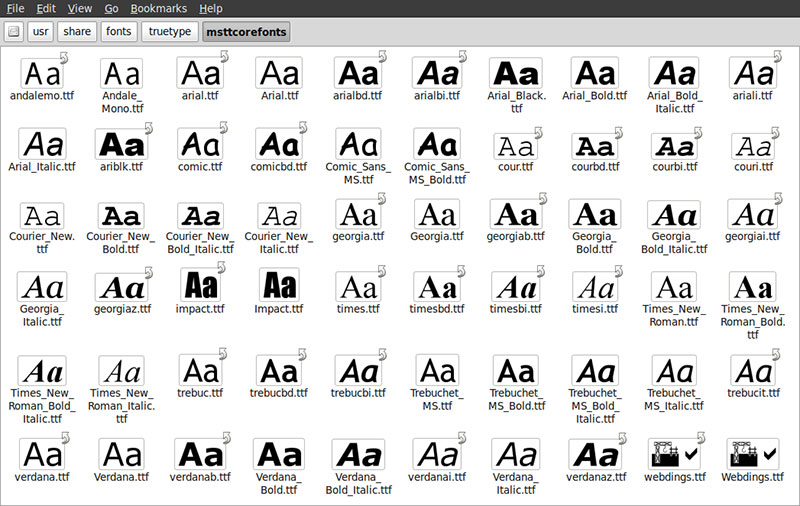
Regarding file compatibility, these can be in TTF, PFP, TFF, and OTF standards, so you will have no problem choosing.
Illustrator’s popularity makes it easy to get additional fonts for the program with a simple internet search. The number of free and paid alternatives are overwhelming, and almost all of them are overflowing with excellent quality.
Remember to unzip the file
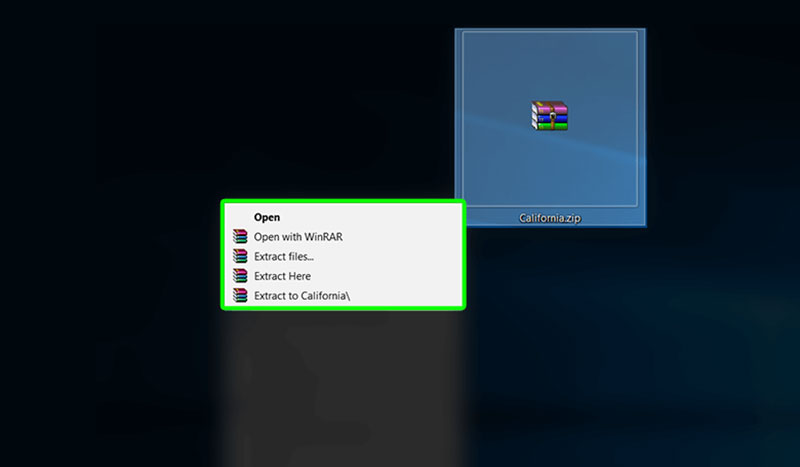

Although they are light files, most of the fonts you get on the internet will be compressed in ZIP or RAR files.
To unzip the contents of the file, you will need a program like WinRAR. Find the compressed file in your download folder and proceed to extract it. You can do this by going into the file and selecting what you want to extract, or by right-clicking on the file and choosing the “extract” option.
In both cases, you should have the font ready to install. You will need to remember where you placed the extracted file, so we recommend that you locate it on your desktop while installing it.
How to add fonts to Adobe Illustrator in Windows automatically
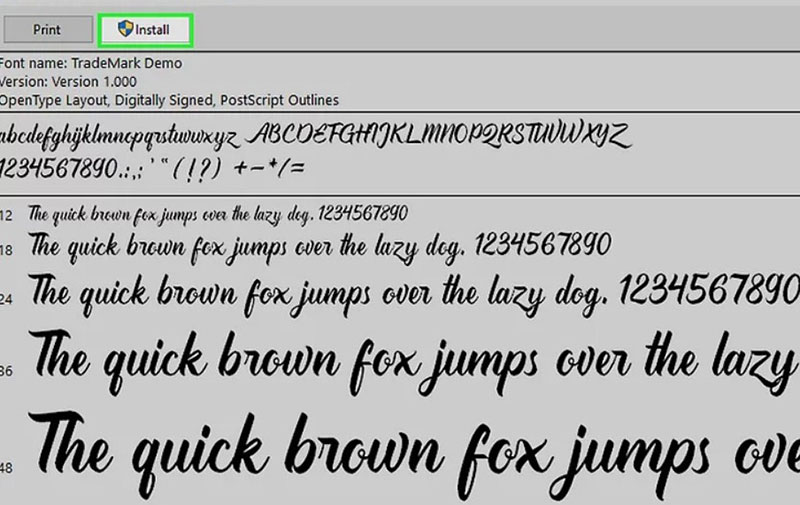

The first step will be to simply close the program. If Illustrator is running on your computer, the installation of the fonts will not take effect until you restart it.
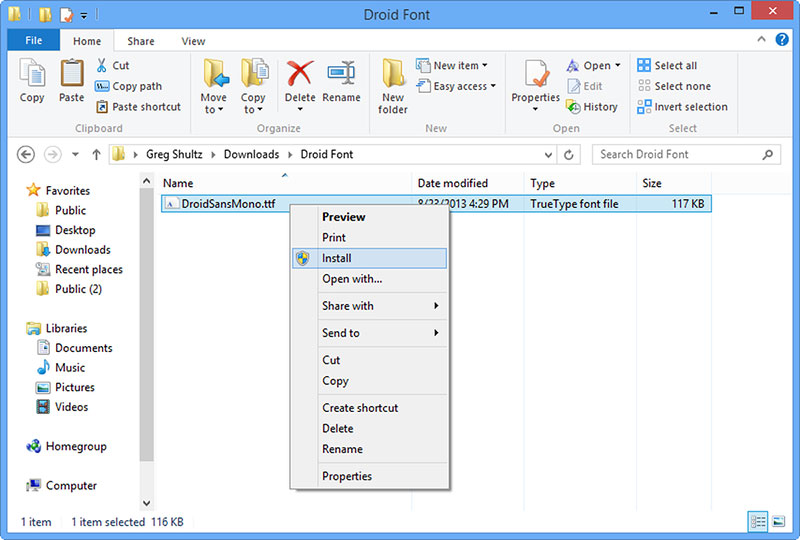
Windows should automatically recognize the file type, so right-clicking it should give you the option to install it. In these cases, you can select several files at the same time to speed up the process.

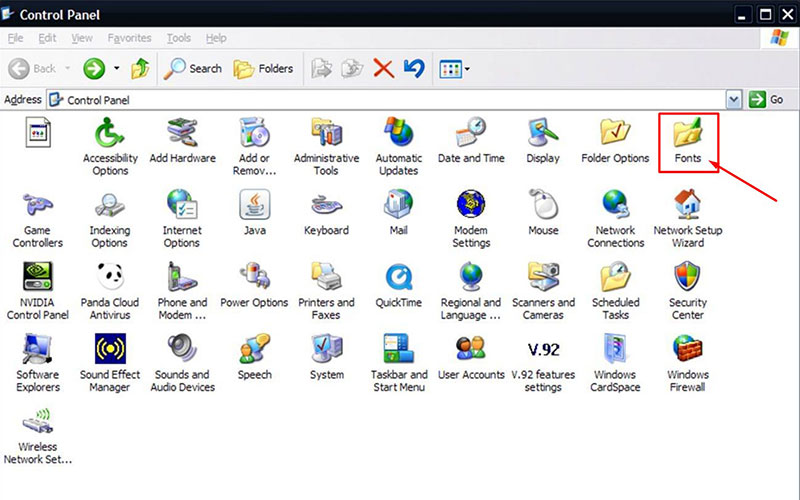
In case you do not get the option in the drop-down menu, you must install them from the Control Panel. On Windows XP, you can access it from “My Computer”. There you should get an option called “Fonts” from where you can install the files.

Advertisement
The Control Panel in Windows Vista operating systems onwards is located in the Start menu located in the lower-left corner. The “Fonts” option has been included in the “Appearance and Personalization” menu. In the Fonts list, you will find a button called “Install new font” from where Windows will guide you through the rest of the process.
How to add fonts to Adobe Illustrator in Windows manually
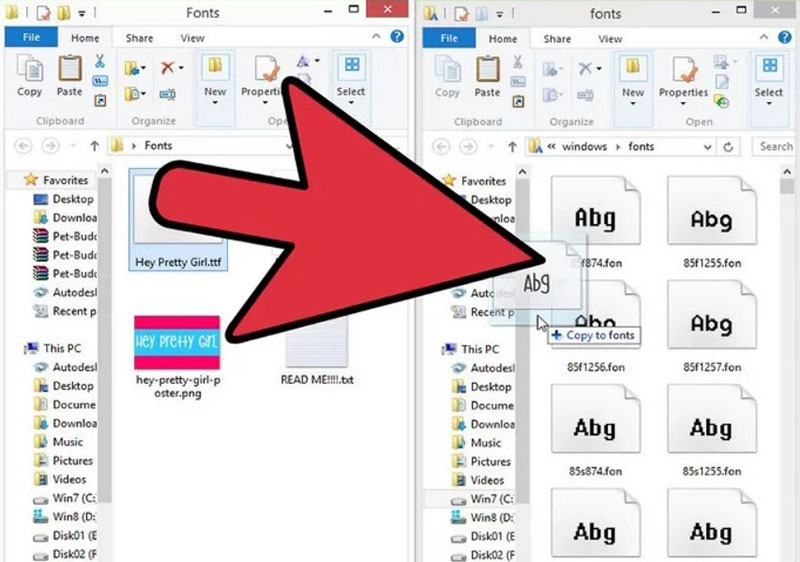

There is an alternative that allows you to install multiple fonts in TTF format directly in Windows. For this, you will have to find the folder where the operating system is installed and open the “Windows” folder.
Once inside, find the folder called “Fonts” which stores all the fonts installed on the system. Just copy and paste your TTF file into the folder and the font will be installed. To add files to the Windows folder you will need to have administrator privileges.
When you open Illustrator or any other program that allows adding texts, you should see the fonts you installed.
How to add fonts to Adobe Illustrator on Mac OS X
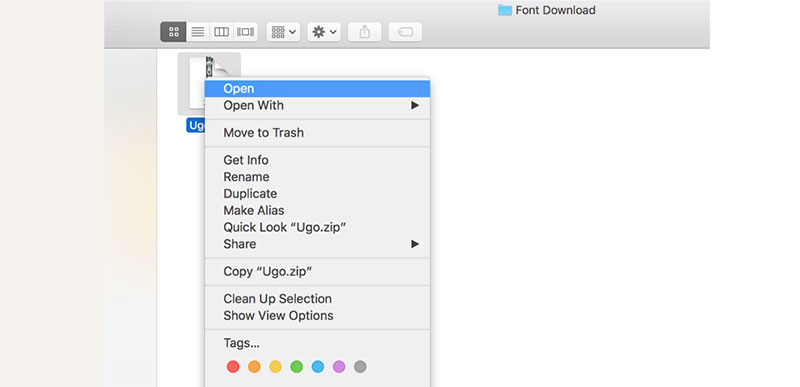

Although Mac OS X is a more closed operating system, adding fonts to Illustrator is equally simple.
The first step is to close all active applications, including those not related to Illustrator. Save what you are doing as you will need to restart the computer when the installation is complete.
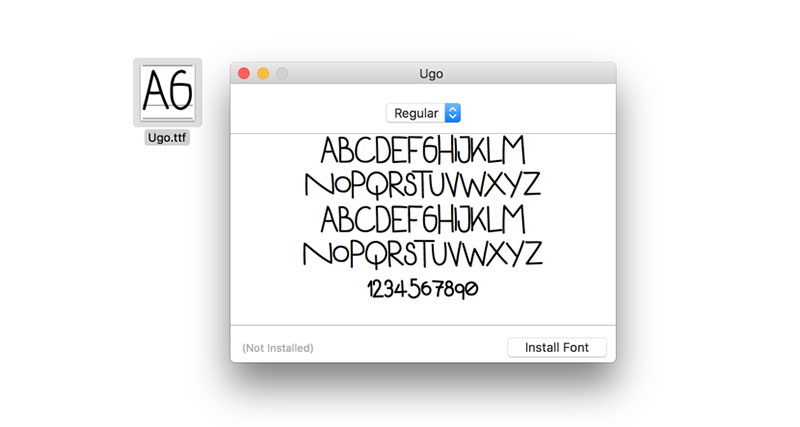
Mac OS X has an application called Font Book with which you can run TTF and OTF files. Just double click on the file and the application will give you the option to install the font. Now restart the computer and you will be able to start using your new font.

As with Windows, you can install fonts manually by placing them inside a system folder. On Mac, however, you have two locations to choose from.
In the Volume you want, go to the Library folder and then Fonts. In this folder, you can add fonts for any user to use, but you need administrator permissions to be able to install them.
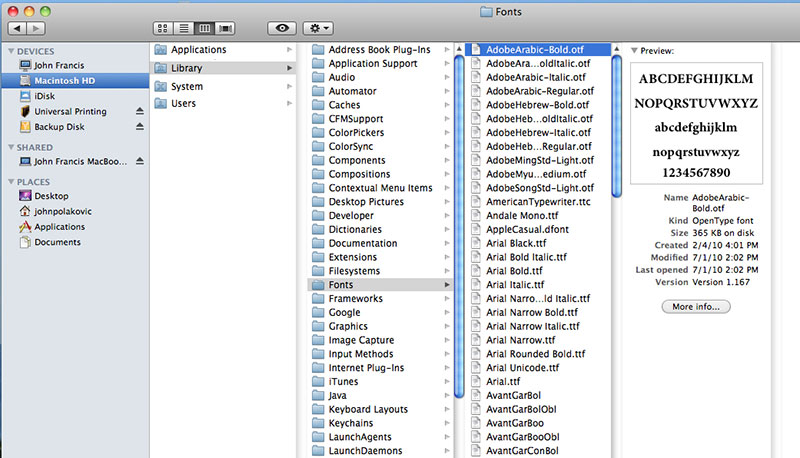

The second alternative allows you to install fonts exclusively for specific users. Again, in the Volume you want, go to the Users folder, find the folder with the user name where you want to install it, then Library, and finally Fonts. Copy and paste the corresponding file.
With the manual technique, you must also restart your computer for the changes to take effect.
Check the installation in Illustrator
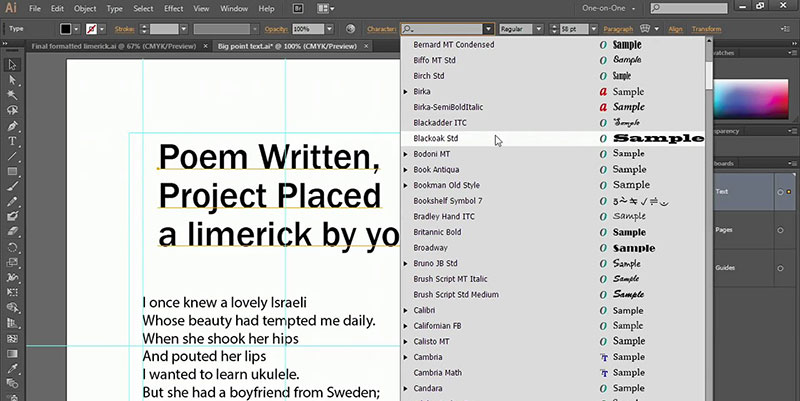

If you performed all the steps accordingly, then your new fonts should be ready to use. You can check it from any program that uses texts but to do it from Illustrator, you only have to press the T key to open the Type tool.
After you have created the text box, simply select the font from the “Character” drop-down menu.
Enjoy your new font

Now that you know how to add fonts to Adobe Illustrator, you can start downloading all the packages you want, and you can even use them in other applications on your computer.
If you are new to the program, here are some additional options that may be helpful when designing.
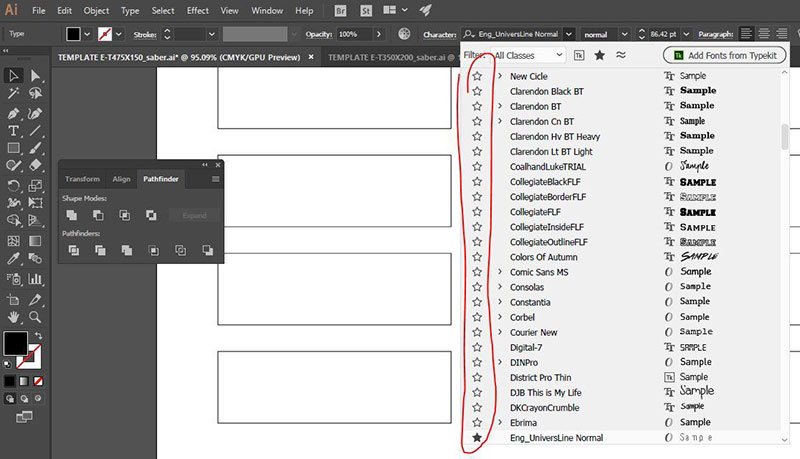
Although fonts are installed alphabetically by default, after Illustrator 2017 you can create a favorite list to easily find those letters you want. Just mark the star next to each name, just like a Google Chrome marker.
Additionally, Illustrator added a search option that shows you all the fonts that are similar to the one you are using. You can identify the option because it uses a wavy line icon.
Another Illustrator’s feature is the very practical way it displays special characters. From a glyph panel, similar to the one in Office, you can find any type of character you have installed that is not programmed on the keyboard.
Thanks to its Open Type compatibility, the variety of characters will only be limited by the imagination of its designer.
If you enjoyed reading this article about how to add fonts to Adobe Illustrator, you should read these as well:


