Prototyping is the process of turning a static mockup into an interactive and dynamic mockup (better known as a prototype). Bringing a static mockup to life is without doubt one of the most — if not the most — exciting step in the design workflow.
It’s also super important that developers understand the design’s user flow, and how it should feel and function. What better way to do that than by using Figma, the best design tool in the world according to the 2020 Design Tools Survey?
Prototyping with Figma is easy and enjoyable once you know how it works. Start off by duplicating this static mockup (click on Series of Interactions and then Duplicate to my drafts), and then throughout the tutorial we’ll add more and more functional fidelity. Your local copy should look like this:
Note: I’m assuming that you have at least a small amount of experience with modern UI design tools such as Figma or Sketch.
Step 1: Create a Horizontally Scrollable Frame
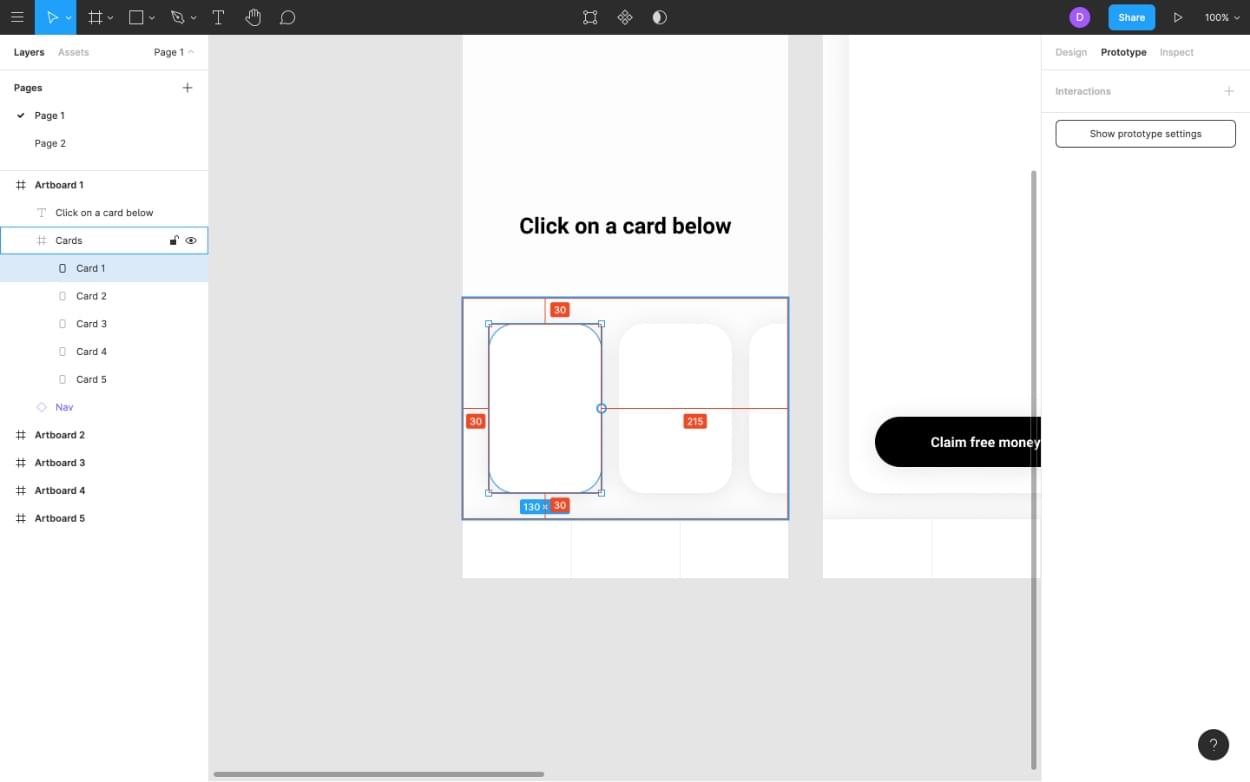
Let’s start with Artboard 1, making the selection of cards that overflow the viewport horizontally scrollable. This is one example of how we can make our mockups dynamic without having to create what Figma calls “Connections”. Connections direct us to new Artboards, but that’s not what we’ll be doing in Step 1.
Start by selecting Cards from the Layers Panel (left sidebar), and then from the Design Panel (right sidebar this time) change the Group option to Frame using the dropdown.
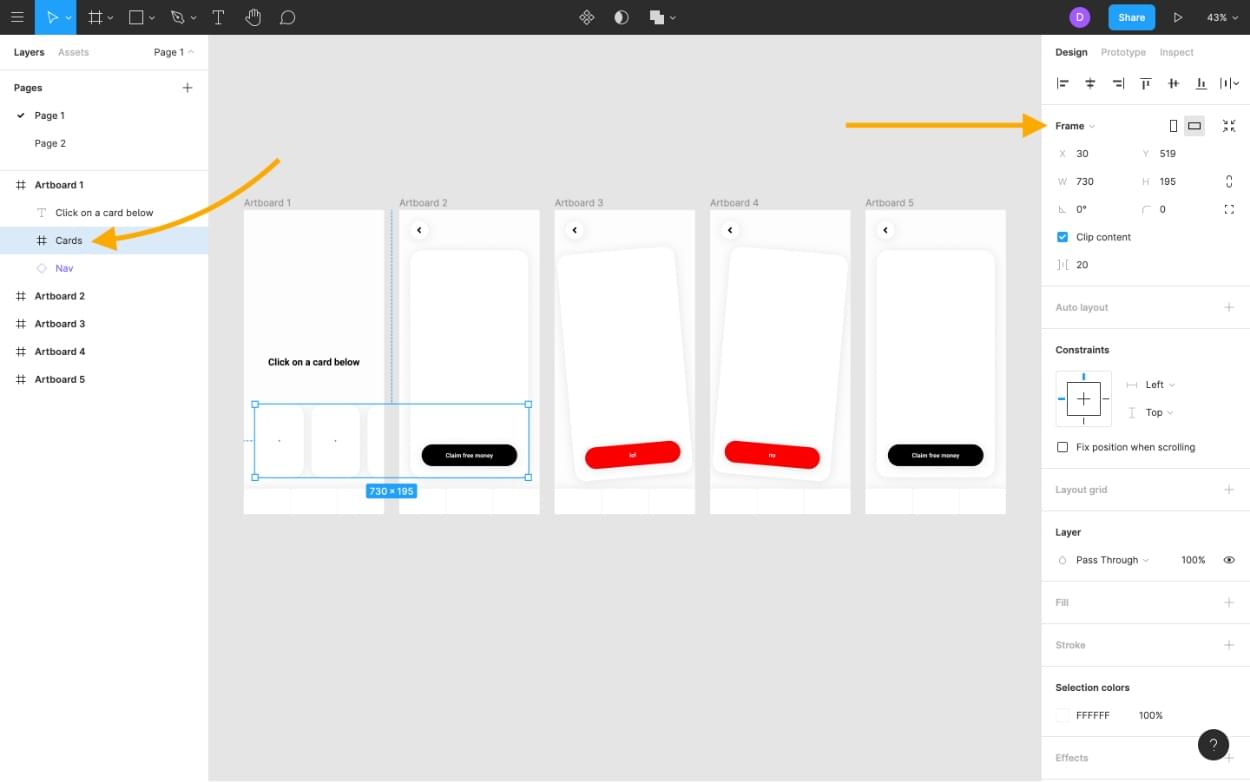
I won’t dive into this too much, but the main difference between a Group and a Frame is that Groups wrap their children tightly, whereas Frames can be any size. This means that:
- grouped children scale with the Group, whereas Framed children are a little more stubborn (a feature, not a bug)
- framed children become aligned relative to their Frame, whereas Grouped children are still relative to their Artboard
- frames can have overflowing content that can be scrolled horizontally or vertically (this is what we’ll be attempting)
Wait, does this mean that Artboards are actually Frames? Indeed: what other UI design tools call Artboards, Figma calls Frames. This is likely because, in Figma, Frames can be nested within other Frames, which is slightly different from what Artboards do in other tools like Sketch, Adobe XD, and so on.
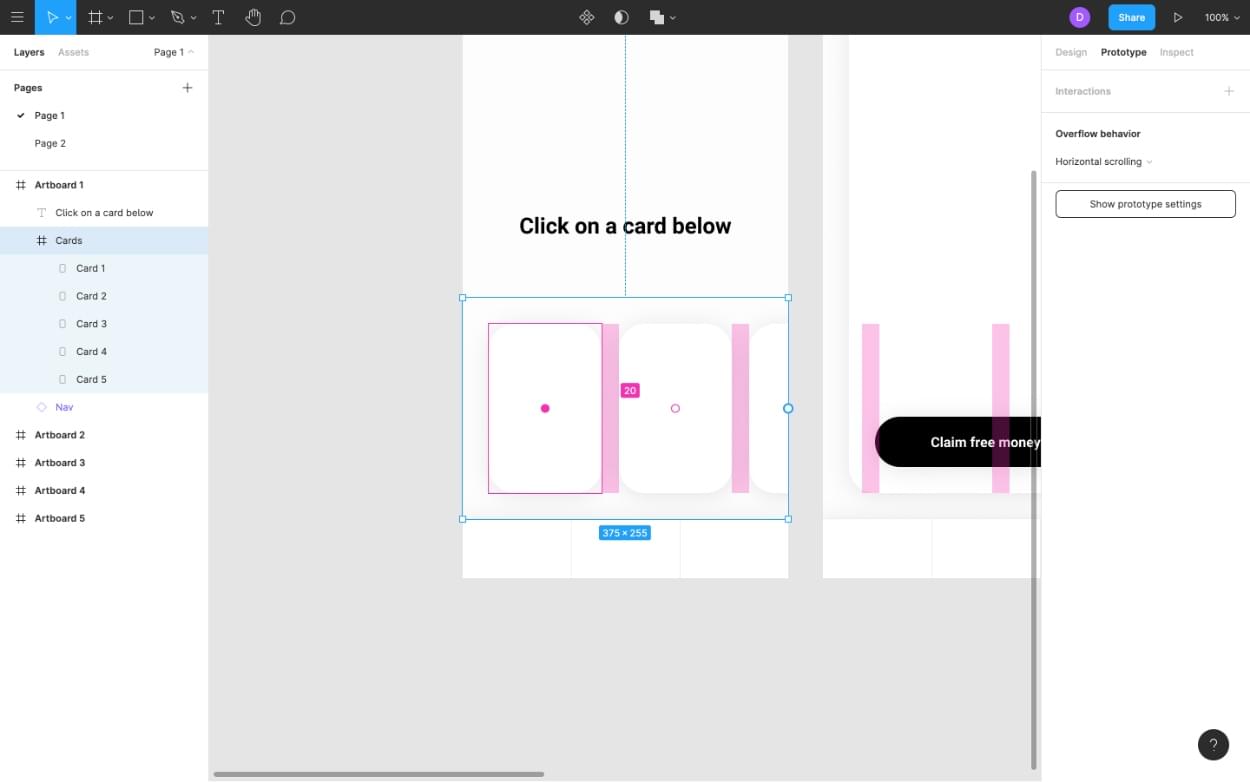
Switch to Prototype mode (⌥ + 9) where the Overflow behavior setting will now be available, and then change the dropdown option from No scrolling to Horizontal scrolling.
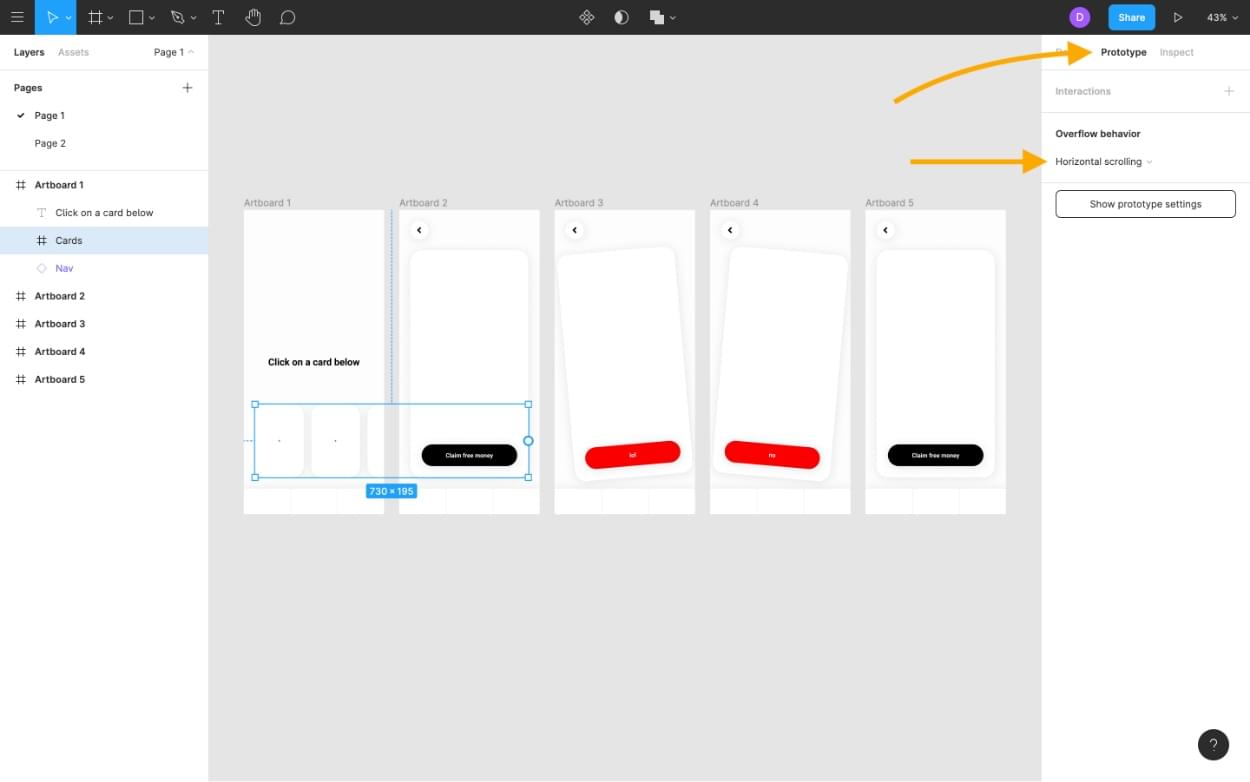
Now, you’ll notice that the shadows are oddly cut off by the newly converted Frame, but this is actually standard behavior for overflowing content, and it can be fixed relatively easily.
Since the shadow’s blur variable is 30 and Frames can be any size, we’ll need to resize the Frame to allow for an extra 30 spacing around its edges. It should be easy enough to Resize (shift + ⌘ + ↑↓←→) and Nudge (shift + ↑↓←→) the objects accordingly.
By the way, you might notice (if you click on the Frame) that the cards and their spacing can be rearranged quite easily. This isn’t relevant to the tutorial specifically, but still awesome.
Continue reading An Introduction to Prototyping with Figma on SitePoint.