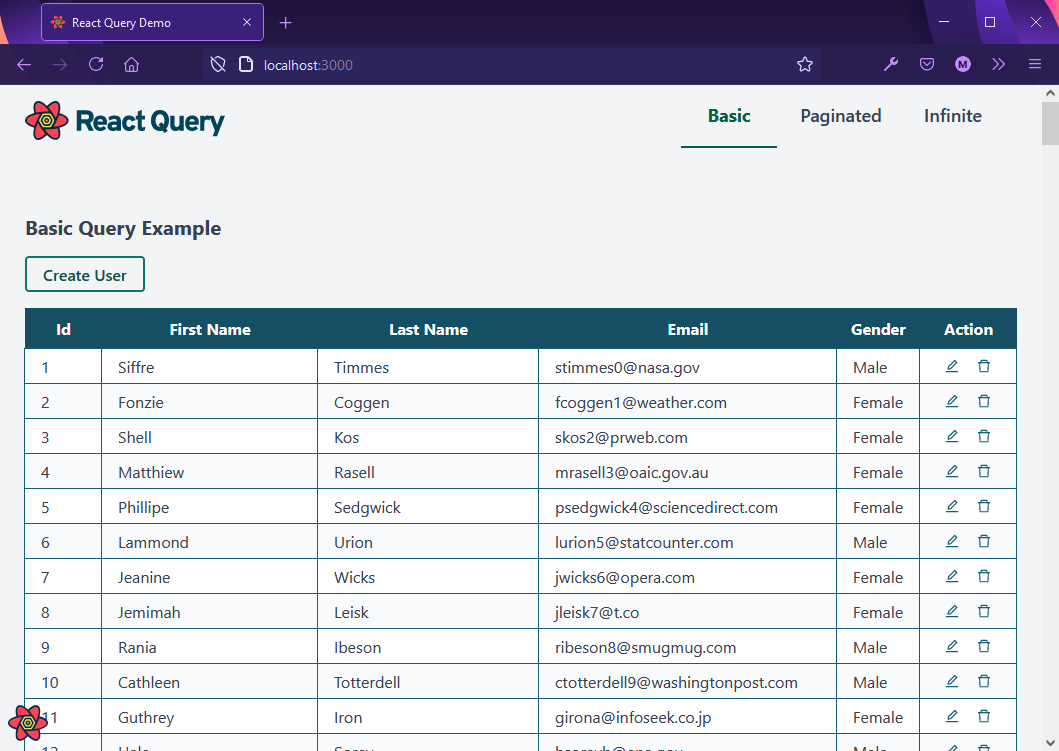
Building front-end CRUD applications often starts out easy then turns complicated as you continue adding features. For every API endpoint, you’ll need to deal with state management, synchronization, caching and error handling. In this article, you’ll learn about a library called React Query and how it can help resolve all those issues. The library describes itself as the “missing data-fetching library” providing “server state management” for React.
We’ll be using a complete React Query Demo project to learn about the main features the library provides. You’ll then be able to apply this knowledge into your own projects. First, let’s get acquainted with a number of items before commencing with project setup.
About React Query 3
Table of Contents
React Query is an open-source project created by Tanner Linsey. The latest major version, React Query 3, was officially released in December 2020. With this new version, new features were added and existing ones were improved.
You should be aware that there’s a number of breaking changes from React Query 2.x, which was quite popular before the new version came out. There’s a migration guide which clearly explains these changes, as you’ll probably come across a lot of outdated tutorials that were written for the older version.
The new version offers vast improvements and many of the bugs reported earlier have been resolved. Version 3, though ready for production, is still undergoing development as new bugs get squashed on a regular basis.
Prerequisites
This article is written for intermediate to advanced front-end developers who’ve grasped fundamental skills and knowledge in:
- React
- React Router
- React Hooks
- REST APIs Data Fetching
In your developer’s machine environment, you’ll need to have set up the following:
- Node.js
- Git
- A REST Client such as Postman, Insomnia or VS Code’s REST extension
With that out of the way, let’s get into setting up the demo project.
About the Project
The demo project that we will analyze is a React front-end application that displays data provided by a REST JSON API server. The app is only made up of five pages that showcase the React Query features we’ll be learning about. These features include:
- Basic Query
- Paginated Query
- Infinite Query
- Create Mutation
- Update Mutation
- Delete Mutation
React Query does provide many more features that unfortunately are outside the scope of this article. Below is a preview of the application we’ll be working with.

Project Setup
Before we start setting up, I think it’s best to briefly familiarize yourself with additional dependencies used in the project. These include:
- Vite: a very fast build tool
- WindiCSS: a very fast Tailwind CSS compiler
- React Hook Form: a form builder and validation library using React hooks
- React Modal: an accessible modal component
- Axios: a promise-based HTTP client for browsers
- JSON Server: a full, fake REST API server
To set up the React Query Demo application on your machine, execute the following instructions:
# Clone the project git clone git@github.com:sitepoint-editors/react-query-demo.git # Navigate to project directory cd react-query-demo # Install package dependencies npm install # Setup database file for `json-server` cp api/sample.db.json api/db.json # Start the `json-server` npm run json-server The database file used by json-server contains an array of users. When you execute npm run json-server, a fake API server is launched on port 3004. You can access users’ data via . Performing a GET request will yield the following sample JSON response:
[ { "id": 1, "first_name": "Siffre", "last_name": "Timm", "email": "stimmes0@nasa.govz", "gender": "Male" }, { "id": 2, "first_name": "Fonzie", "last_name": "Coggen", "email": "fcoggen1@weather.com", "gender": "Female" }, { "id": 3, "first_name": "Shell", "last_name": "Kos", "email": "skos2@prweb.com", "gender": "Female" } ] Next, start up the dev server that will run the front-end code:
# In another terminal, start the React dev server npm run dev Head over to your browser and open http://localhost:3000 to access the application. You should have an identical experience as shown in the preview above. Ensure you perform the following tasks in order to explore the application’s features thoroughly:
- Review the Basic Query page (home page).
- Visit the Paginated page and interact with the Previous and Next buttons
- Visit the Infinite page and interact with the Load more button.
- Go back to the Basic Query page and click the Create User button. You’ll be directed to the Create User page. Fill in the form and click the Save button.
- On the User Table, locate the Edit icon. Click on it. This will take you to the Edit User page. Make any changes you like, then hit the Save button.
- On the User Table, locate the Delete icon. Click on it. This will launch a modal dialog asking you to confirm your delete action. Click on the Delete button to to confirm.
Once we’ve completed all the above tasks, we can start doing a break down of the project. Do review the project structure so that you know where each component and view is located. I’ll be providing stripped-down versions of these throughout the article, so that you can understand the fundamentals of using React Query in your projects.
Note: stripped-down versions have classNames, local state and other UI components removed that aren’t the focus of the subject being discussed.
Installing React Query
React Query can be installed on a blank or existing React project using the following command:
npm install react-query The package comes with everything you need — including the Devtools utility feature, which we’ll explore at a later section. After installing the package, you’ll need to update your top-most component, — App.jsx — as follows:
import { QueryClient, QueryClientProvider } from "react-query"; function App() { const queryClient = new QueryClient(); return ( <QueryClientProvider client={queryClient}> /* place application containers/views here */ </QueryClientProvider> ); } export default App; Any child component of QueryClientProvider will be able to access hooks provided by React Query library. The hooks we’ll be using in this article are:
- useQuery
- useInfiniteQuery
- useMutation
- useQueryClient
Here’s an updated (simplified) version of App.jsx containing the child views that we’ll be using:
import { QueryClient, QueryClientProvider } from "react-query"; import BasicQuery from "./views/BasicQuery"; import InfiniteQuery from "./views/InfiniteQuery"; import PaginatedQuery from "./views/PaginatedQuery"; import CreateUser from "./views/CreateUser"; import EditUser from "./views/EditUser"; function App() { const queryClient = new QueryClient(); return ( <QueryClientProvider client={queryClient}> <Switch> <Route path="/" exact> <BasicQuery /> </Route> <Route path="/paginated"> <PaginatedQuery /> </Route> <Route path="/infinite"> <InfiniteQuery /> </Route> <Route path="/user/create"> <CreateUser /> </Route> <Route path="/user/edit/:id"> <EditUser /> </Route> </Switch> </QueryClientProvider> ); } export default App; Continue reading React Query 3: A Guide to Fetching and Managing Data on SitePoint.


