Svelte has received a lot of praise over the last two years and is far from being “just another frontend framework”. It won “breakthrough of the year” on the State of JS survey 2019, followed by topping the satisfaction rating in 2020. It was also voted the most loved web framework in the Stack Overflow 2021 survey.
Svelte appeals to developers with its combination of a small bundle size, very good performance, and ease of use. At the same time, it comes packed with a lot of goodies. A simple state management solution to build upon is already provided, as well as ready-to-use transitions and animations. This introductory tutorial will shed light on how does Svelte achieves this. The following tutorials in the series will go into more detail on how to implement applications with Svelte using the various possibilities Svelte provides.
The Svelte Backstory
Table of Contents
But first, a little back story on Svelte. Though it only entered the mainstream in the early 2020s, Svelte has been around for much longer.
The first commit to GitHub was in late 2016. Its creator is Rich Harris, an open-source wizard whose most prominent other invention is Rollup, a modern bundler. Rich Harris worked at the news magazine The Guardian as a graphics editor at the time. His daily routine was to create interactive visualizations for the website, and he wanted to have a tool that easily let him write these without compromising on bundle size or speed. At the same time, he wanted something approachable so other less tech-savvy colleagues would be able to create visualizations fast.
Out of these needs, Svelte was born. Starting from the news room, Svelte quickly gathered a small following in the open-source community. But it wasn’t until April 2019 where Svelte really got known to the world. This date marked the release of version 3, which was a complete rewrite with a focus on developer experience and approachability. Since then, Svelte’s popularity has risen a lot, more maintainers have joined the team, and Rich Harris has even joined Vercel to work on Svelte full-time.
For an in-depth tutorials into Svelte, and it’s differences to React and Vue, check out Svelte 3: A Radical Compiler-based JavaScript Framework.
Building a Simple Book List
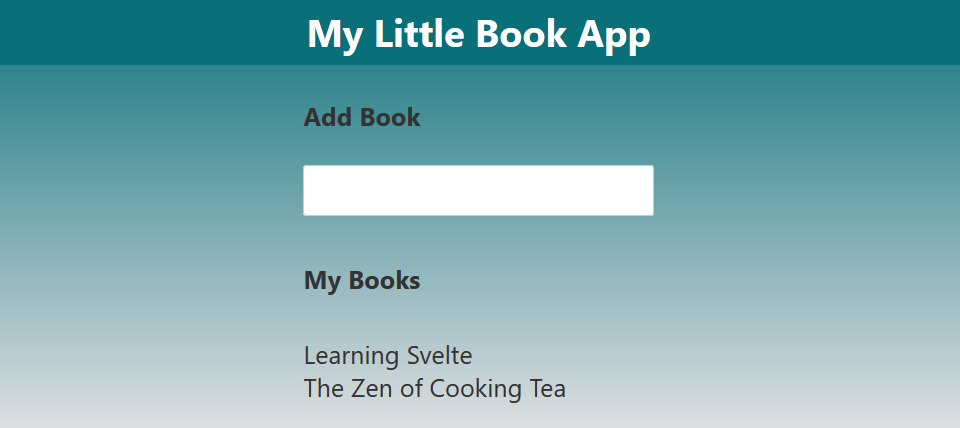
Let’s dive into Svelte! We’ll build a small book list that allows us to add and remove books from our reading list. The final result will look something like the image below.
We’ll start by scaffolding our project from a project template. We’ll use the official Svelte template. Alternatives would be to use a Vite-powered template or to use SvelteKit, a framework on top of Svelte for building full-fledged apps with built-in routing—but we’ll keep it as barebones as possible for this tutorial.
After downloading the template, switch to its folder and run npm install, which downloads all packages we need to get going. Then we’ll switch to App.svelte, where we’ll replace the contents with an HTML-only version to lay out the visuals we want:
<h4>Add Book</h4>
<input type="text" />
<h4>My Books</h4>
<ul> <li>A book</li>
</ul>
We can write the above code directly at the top level of the Svelte file; we don’t need to add any wrapper elements. Svelte’s syntax is a superset of HTML, so anything that is valid inside an HTML file is valid inside a Svelte file.
The question now is how to get the dynamic parts in there. We’ll start by adding a static list to the script and render that through a loop:
<script> let books = ['Learning Svelte', 'The Zen of Cooking Tea'];
</script> <label> <h4>Add Book</h4> <input type="text" />
</label>
<h4>My Books</h4>
<ul> {#each books as book} <li>{book}</li> {/each}
</ul>
We added a script tag in which we put our JavaScript logic related to the component. That logic is executed each time the component mounts. We also enhance the HTML with special Svelte syntax to create a loop and print the title of each book. As you can see, Svelte has distinct syntax for control flow blocks, unlike Vue or Angular, which add such functionality in the form of special attributes. This makes the code more readable, as you can more easily spot it. It also makes it unnecessary to create wrapper elements if you want to contain more than one top-level item within the control flow block.
The title of a book is outputted by surrounding the variable with curly braces. In general, whenever you encounter a curly brace within the template, you know you are entering something Svelte-related. We’ll look into the template syntax in more detail in Part 2 of this tutorial series.
Reacting to User Input
We can now render an arbitrary list of book titles, defined by our books variable. What about adding a new book? To do this, we need to enhance our logic in the <script> tag and connect it to the <input> element:
<script> let books = ['Learning Svelte', 'The Zen of Cooking Tea']; let newBook = ''; function addBook(evt) { if (evt.key === 'Enter') { books = [...books, newBook]; newBook = ''; } }
</script> <label> <h4>Add Book</h4> <input type="text" bind:value={newBook} on:keydown={addBook} />
</label>
<h4>My Books</h4>
<ul> {#each books as book} <li>{book}</li> {/each}
</ul>
We added a new variable called newBook, which should mirror the input value. To do that, we bind it to the <input> by writing bind:value={newBook}. This establishes a two-way binding, so every time the user enters text into the <input>, newBook updates, and if newBook is updated in the <script> tag, the display value of <input> changes. We could have done the same with simple dynamic attributes, but this way saves us some code—a thought pattern you’ll come across often in Svelte.
When the user presses enter, we want to add the new book title to the list. To do this, we add a DOM event listener. To tell Svelte to hook into the event, we just add a colon between on and the rest of the event name—so in this case it’s on:keydown. After that, we use the curly braces and place the name of the function inside. The function is called each time the event fires off. More on this template syntax can be found in Part 2 of this tutorial series.
The function to call in this case is addBook, in which we check the keyboard event, and if the user indeed pressed enter, we update the books variable. Notice the lack of a this context like we find in Angular or Vue 2, or the lack of special value objects like in Vue 3, or the lack of setState in React. Svelte doesn’t need extra syntax in this case to know that the variable has updated. This might feel like magic, but also like “just plain simple JavaScript” at the same time.
To understand how Svelte achieves this, we need to look under the hood. What does Svelte actually do with a .svelte file, and when does it process it? The answer: Svelte is actually a compiler! It does most of the work before your code is even loaded in the browser. Svelte parses the code and transforms it into regular JavaScript. During parsing, it’s able to see that variables like newBook are used in the template, so assignments to it will cause rerenders. The compilation output will therefore wrap these assignments with calls to a $$invalidate function, which will schedule a rerender of this exact component for the next browser paint. This is the secret to Svelte’s great performance: it knows in advance which parts could trigger rerenders and then only needs to do work in these exact places, surgically updating the DOM. It’s also the reason why the bundle sizes of Svelte applications are so small: everything that’s not needed just won’t be part of the output, so Svelte can leave out every part of its tiny runtime that isn’t needed. A Svelte Hello World! app has a bundle size of just 2.5KB!
The only thing to watch out for is that Svelte does only look for assignments. That’s why we need to do books = [...books, newBook]; or books.push(newBook); books = books;. Otherwise, Svelte wouldn’t know that books has updated.

Finishing Touches
We did it! We can now view and add books to our list! It doesn’t look that pretty, though, so let’s put some finishing touches to our UI. First, we’ll add some CSS to style our elements:
<!-- script and html code... --> <style> input { padding: 5px 10px; } li { list-style: none; } ul { padding: 5px 0; }
</style>
As you can see, we just add a <style> tag to our .svelte file and continue to write regular CSS in it. If you’re fearing that the code above will style all <input>, <li> or <ul> tags in the entire application, be assured that it won’t. Svelte scopes styles by default, so they only apply to the component they’re defined in. If you want to define something globally, wrap the selector with the :global function. If, for example, you’d like to style all <input>s in the application, the code would be :global(input) { padding: 5px 10px; }.
The styling is better now. Let’s finish it off with a transition for better UX: we want new list elements to fade in. To do that, we just need to reach for one of Svelte’s built-in transitions and animations and apply them:
<script> import { fade } from 'svelte/transition'; </script> <!-- input ... -->
<h4>My Books</h4>
<ul> {#each books as book} <li transition:fade>{book}</li> {/each}
</ul> <!-- styling ... -->
And that’s it! Just by importing one of the built-in transitions and applying it by adding transition:fade to the element, we get that smooth fade-in transition. Our mini app is now finished. This doesn’t contain the topbar and the background gradient yet, but it should be easy now for you to add this as well. This is the end result:
<script> import { fade } from 'svelte/transition'; let books = ['Learning Svelte', 'The Zen of Cooking Tea']; let newBook = ''; function addBook(evt) { if (evt.key === 'Enter') { books = [...books, newBook]; newBook = ''; } }
</script> <label> <h4>Add Book</h4> <input type="text" bind:value={newBook} on:keydown={addBook} />
</label>
<h4>My Books</h4>
<ul> {#each books as book} <li transition:fade>{book}</li> {/each}
</ul> <style> input { padding: 5px 10px; } li { list-style: none; } ul { padding: 5px 0; }
</style>
Architectural Considerations
We’ve seen how to write a little app in Svelte with just 32 lines of code. We’ve only scratched the surface, of course. A full-blown app needs some kind of state management, multiple components, and ways to integrate these components with each other.
For example, it would make sense to split out the display of one to-do item into a separate component, as we’ll add features like editing the name in-place or marking it as done. Having this all in one component would become hard to maintain over time. Luckily, using other components is as easy as importing it as a default import from another Svelte file and interacting with it in a similar way to what we’ve already seen with regular DOM elements. We’ll look into component interaction in more detail in Part 5 of this series.
Another example would be the management of to-dos. Right now, they’re handled inside the component and there’s no connection to a backend. If we were to add API calls, we would mix UI logic with backend interaction, which is generally better handled outside of components for better separation of concerns. We can use Svelte stores for this, which we’ll look at in Part 4.
As you can see, Svelte has solutions to all of our requirements, and we’ll look at them over the course of this series.
Ready, Set … Svelte?
So, is it safe to use Svelte for your next project? Your manager might ask if Svelte will be around in the years to come or burn out like previous frontend framework stars. There isn’t one big company backing Svelte’s entire development as there is for Angular and React, but Vue has already shown that this isn’t a problem. Moreover, as stated at the beginning, Rich Harris, the creator of Svelte, is now working on it full-time. With Svelte’s continuous rise in popularity, there’s no sign of it going anywhere in the years to come.
Another aspect of choosing a framework is the ecosystem and its tooling. The ecosystem is still small compared to React, but new libraries are coming out every day, and there are already a handful of very good component libraries. At the same time, since Svelte is so close to vanilla HTML and JavaScript, it’s very easy to integrate any existing regular HTML/JavaScript library into your codebase, with no need for wrapper libraries.
Regarding tooling, Svelte is looking pretty good. There’s an official VS Code extension that’s actively maintained, as well as an underlying language server that can be used by many other IDEs to integrate Intellisense. IntelliJ also has a plugin for Svelte and recently hired the creator behind it to work at JetBrains. There are also various tools for integrating Svelte with various bundlers. And yes, you can also use TypeScript with Svelte.
If you’re looking to build a full-blown website or web app, you might also be interested in checking out SvelteKit (See our Beginner’s Guide to SvelteKit). It provides a stellar development experience and comes with a flexible filesystem-based router. It also enables you to deploy to many different platforms like Vercel, Netlify, your own Node server, or just a good old static file server, depending on the features and needs of your application.
Quick Facts on Svelte
In brief, here are the important points to remember about Svelte:
- it has a full-time maintainer
- it has good tooling
- its features are stable
- its ecosystem is growing
- SvelteKit is available for building apps fast
Next Steps
Svelte is definitely ready to use for your next project!
This was the first part of 6 part series on SitePoint Premium. In Part 2, we’ll take a close look at the template syntax. In Part 3, we’ll look at reactive statements and how they help us react to variable changes or derive computed variables. Part 4 will look at stores, which will help us with logic outside and across Svelte files, and which we can also use for state management. Part 5 looks at various component interaction concepts. Finally, in Part 6, we’ll look into testing Svelte apps.
This series is also available on Amazon here: Svelte: A Beginner’s Guide.
We hope to have sparked your interest in Svelte!