Version control with Git has become a default in every modern developer’s tool belt. Commands like commit, push, and pull have made it into our fingers’ muscle memory. But relatively few developers know about the “more advanced” features in Git — and how incredibly valuable they can be! In this article, we’re going to explore “interactive rebase”, one of the most powerful tools in Git.
Why Interactive Rebase Should be Part of Every Developer’s Tool Belt
Table of Contents
In a nutshell, and without exaggeration, interactive rebase can help you become a better developer, by allowing you to create a clean and well-structured commit history in your projects.
Why is a well-structured commit history important? Just imagine the opposite: a hard-to-read commit history, where you have no idea what your colleagues actually did with their recent changes. More and more “dark corners” start to emerge in such as project, and you only understand the small parts that you worked on yourself.
Contrast this with a clean and well-structured commit history: it helps make a project’s codebase more readable and easier to understand. This is an essential ingredient for a healthy, long-lasting project!
What Interactive Rebase Can Do for You
Interactive Rebase helps you optimize and clean up your commit history. It covers many different use cases, some of which allow you to to the following:
- edit an old commit message
- delete a commit
- squash/combine multiple commits
- reorder commits
- fix old commits
- split/reopen old commits for editing
When to Use Interactive Rebase (and When Not To!)
Like a couple of other Git tools, interactive rebase “rewrites history”. This means that, when you manipulate a series of commits using interactive rebase, this part of your commit history will be rewritten: the commit’s SHA-1 hashes will have changed. They’re completely new commit objects, so to speak.
This fact calls for a simple but important rule to live by: don’t use interactive rebase (or other tools that rewrite history) on commits that you’ve already shared with your colleagues on a remote repository. Instead, use it to clean up your own, local commits — such as in one of your own feature branches — before merging them into a team branch.
The Basic Mechanism of an Interactive Rebase Operation
Although there are many different things that interactive rebase can be used for, the basic workflow is always the same. Once you’ve firmly understood this basic mechanism, interactive rebase will lose its air of “complex mystery” and become a valuable, accessible item in your tool belt.
Step 1: Where should you start the session?
The first question you need to answer is: “What part of my commit history do I want to manipulate?” This tells you where you should start your interactive rebase session. Let’s make a practical example and say we’d like to edit an old commit message (which is what we’ll actually do in practice in a moment).
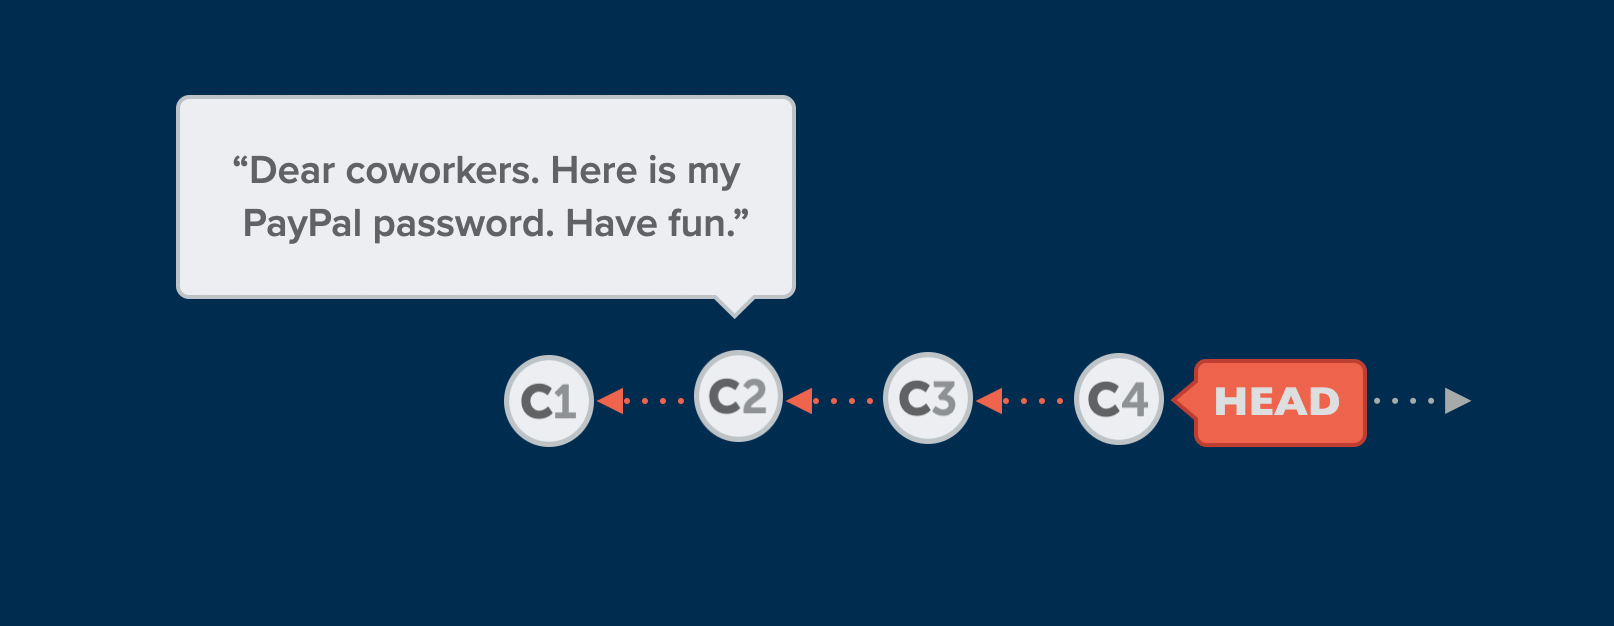
Our starting situation is pictured below, where we’re editing an old commit message via interactive rebase.

To be able to change the commit message in C2, we have to start our interactive rebase session at its parent commit (or even before that, if you want to). In this example case, we would use C1 as the starting point for our interactive rebase session.
Step 2: starting the actual session!
Starting the actual session is pretty simple:
$ git rebase -i HEAD~3 We’re using the git rebase command with the -i flag (to indicate we indeed want it to be “interactive”) and provide the base commit (that we came up with in our first step above). In this example, I’ve used HEAD~3 to specify the commit that’s “3 behind the HEAD commit”. Alternatively, I also could have provided a specific SHA-1 hash.
Step 3: telling Git what you want to do
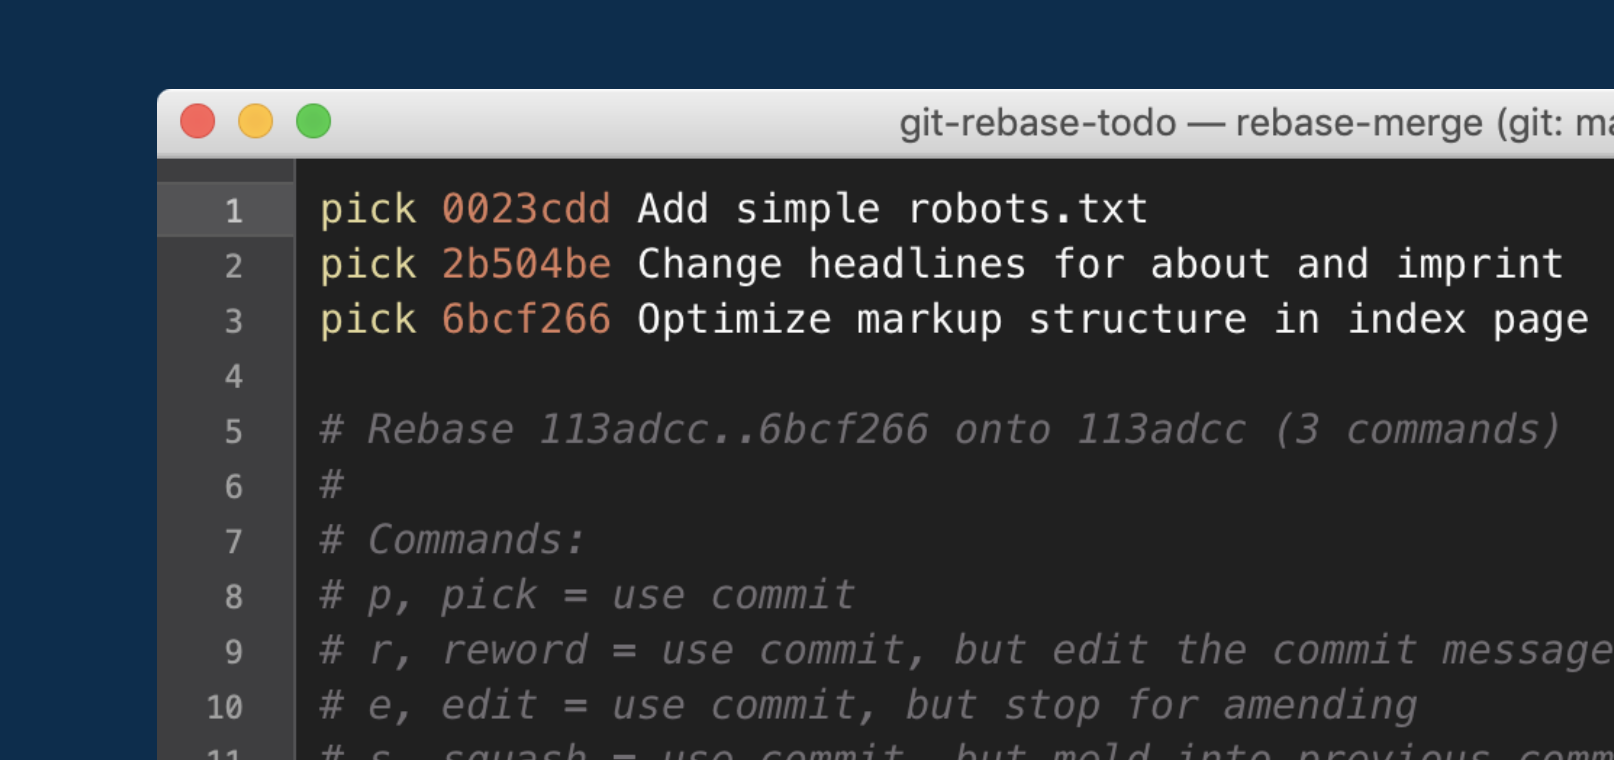
After starting the interactive rebase session, you’ll be presented with an editor window where Git lists a series of commits — from the latest commit, all the way to (but not including) the one you picked as a base commit in Step 1.

There are two important things to keep in mind in this step:
- Commits are listed in reverse order! The newest commit, which we would expect to appear at the top, will appear at the bottom of the list. Don’t worry: your Git repository is fit as a fiddle! ???? Remember that we’re in the process of performing an interactive rebase operation, and this requires Git to reapply the commits from oldest to newest at the end of the operation.
- Don’t make your actual changes in this editor window! Although you might be itching to simply go ahead and change the commit message in this editor window (after all, that’s what we actually want to do …), you have to show some patience. Here, we are only going to tell Git what we want to do — but not make the actual change. I’ll demonstrate this point in practice shortly!
With this theoretical overview out of the way, let’s dive into some practical cases together!
Continue reading A Guide to Git Interactive Rebase, with Practical Examples on SitePoint.


