Are you ready? Let’s get started!
Many WordPress plugins come with fully functional contact forms that can be installed and used right away, but we believe in beautiful design and in your right to style it however you choose. Therefore the first video will focus on how to create, but mainly how to style, your contact form using CSS3.
Your Designer Toolbox
Unlimited Downloads: 500,000+ Web Templates, Icon Sets, Themes & Design Assets
Table of Contents
- 1 Your Designer ToolboxUnlimited Downloads: 500,000+ Web Templates, Icon Sets, Themes & Design Assets
- 2 Contact Form HTML and CSS Tutorial For Dummies
- 3 Challenge: Making Contact Form Responsive and Validation
- 4 How to Make the Contact Form HTML Work
- 5 How To Create a Simple PHP Contact Form
- 6 Taking a Look at Contact Form
- 7 Contact Form PHP: How To Actually Create It?
- 8 Add More Customization To Contact Form
- 9 Customizing the Thank you Message on Contact Form Success
- 10 Download The Contact Form Files

DOWNLOAD NOW
There is not much HTML5 in this video tutorial, as the contact form is built with code available in previous versions of HTML, but you can use this first video tutorial as a way to reinforce many of the things we learned together in the previous tutorials. So without any further discussion, here it is.
Contact Form HTML and CSS Tutorial For Dummies
What you will learn:
- the basics of CSS3 styling
- how to create an HTML5 contact form
- how to create an elegant CSS3 contact form
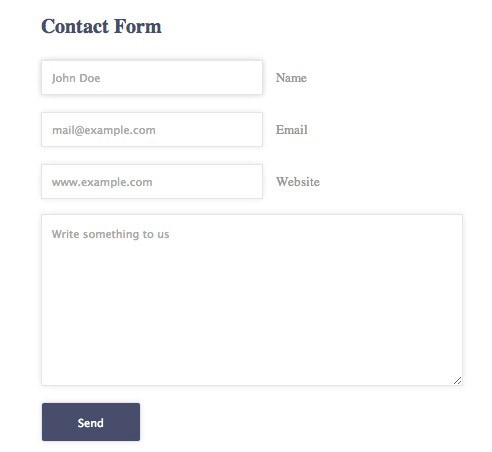
By the end of this HTML contact form tutorial, you will have something similar to the screenshot above. Feel free to view the demo just after the video tutorial to get a feel of what you will be making in under 25 minutes. It’s a good exercise for both beginners and experts alike!
[embedded content]
Challenge: Making Contact Form Responsive and Validation
Can you make this contact form responsive? I will give you a hint, but it will be somewhat irrelevant to a contact form, but surely you are smart enough to work your way through it, yes?
Hint: It’s all about the media queries!
Of course, it is crucial that you validate the fields so that you will not receive any unnecessary information, or secure that all the information you need from your contact form are all useful. In order to do that, you will need to include HTML5 validation in your code. It is pretty easy to do, all you need is patience and the willingness to test new stuff!
How to Make the Contact Form HTML Work
Although making it functional will require a little bit of server-side programming, I’ll be glad to point you in the right direction!
To make this form function for your website, you’ll need to code it with PHP.
Note: the PHP contact form tutorial focuses on just making it work functionally, but you will just need to add security features to it yourself (Google it!).
Good luck!
I am sure that almost everyone can agree on the importance of contact forms for use on everything from static HTML websites to WordPress powered websites. I found myself many times creating custom PHP contact forms for clients and always changing things around to suit the needs of the client.
After going through this tutorial, you should have a better understanding of creating custom PHP contact forms. These can be really useful in your own projects, as well as projects for clients.
I have used these for basic contact forms, surveys, and even to create simple help desk ticket systems for clients. The list is endless, just be creative. I will discuss everything that you will need to know to make your own custom HTML and PHP forms.
View the Demo and Download the Source Files.
How To Create a Simple PHP Contact Form
First things first – To create a form in our HTML document, we will need to select the location we will be placing the form. Generally, most forms will start with:
<form>
and end with the closing tag of:
</form>
The form action will tell this form what to look for when the submit button is pressed. In this example, we will be working with below, this is a second file that we will be creating called mail.php
The beginning line of our code that begins our form shows our action of mail.php – and the method of POST – which will trigger the PHP script to send the email when the forms are filled out, and the submit button is pressed.
Action and Method of mail.php
<form action="mail.php" method="POST">
The last thing we will need to understand before starting our form is the use of INPUT – which will tell browsers to allow an input of text type, to complete a field. Using this along with textarea will allow us to create our form and create a space for users to input information that we will later use PHP to send via email.
Each one of these areas we create on our form will be given a NAME that we will also be using on our PHP document to mark the information being sent.
Taking a Look at Contact Form
Now let’s begin our example. We will create a very simple starting point that I will show you how to modify for your own needs. Understanding the code and how it works will help you use it better and help ensure you have less problems when placing this on a live website.
I will start with a very basic contact form to get us started. Here is the basic HTML that we will use to create our contact form.
HTML Form Code
<form action="mail.php" method="POST">
<p>Name</p> <input type="text" name="name">
<p>Email</p> <input type="text" name="email">
<p>Message</p><textarea name="message" rows="6" cols="25"></textarea><br />
<input type="submit" value="Send"><input type="reset" value="Clear">
</form>
Using the code above – You can insert this directly into your HTML document to create the form itself. Later we will look at modifying this more and creating something a little more custom.
Contact Form PHP: How To Actually Create It?
Now, to make our form work, we will need to use a little PHP. This part is actually easier than most people think. We will be using the PHP $_POST function, and creating labels for each name that we have created in our form. This will allow us to further customize the form later on as well.
Now we will create our mail.php file – This is what will generate the email from the form and actually mail it:
mail.php
<?php $name = $_POST['name'];
$email = $_POST['email'];
$message = $_POST['message'];
$formcontent="From: $name n Message: $message";
$recipient = "[email protected]";
$subject = "Contact Form";
$mailheader = "From: $email rn";
mail($recipient, $subject, $formcontent, $mailheader) or die("Error!");
echo "Thank You!";
?>
Notice our three name tags we have created. We have Name, Email, and Message. These are the three that we created in our form. This is the information that will be sent from our contact form via email.
The $recipient area will need to be modified to fit YOUR email address where you wish to have the email sent to. You can also modify the other information as needed such as the subject, and success message. We will get more into these later when we begin customizing the form even more.
Add More Customization To Contact Form
Now since we have the basic idea of the contact form HTML, and tying it together with our PHP to create a basic contact form, I will begin to go a step further and now show how you can customize this form even more to fit your needs for your project.
I will show how to add a dropdown option box, and explain adding checkboxes or radio buttons for selection items to be chosen, and emailed from the form.
Adding Dropdown Option Boxes
To add a dropdown box, we will need to add the section within our HTML code to create the area for the form, as well as add the proper code to our PHP to recognize the input from the HTML and be able to send it.
Here is a simple example HTML contact form dropdown box:
<p>Dropdown Box</p>
<select name="dropdown" size="1">
<option value="Option1">Option1</option>
<option value="Option2">Option2</option>
<option value="Option3">Option3</option>
<option value="Option4">Option4</option>
</select>
<br />
In the example above, we have created a dropdown box with options 1 through 4. The option value will be what is actually submitted, and the Text within the will be what the user actually sees when making a selection. Remember that this will need to be inserted into your HTML document within the form fields.
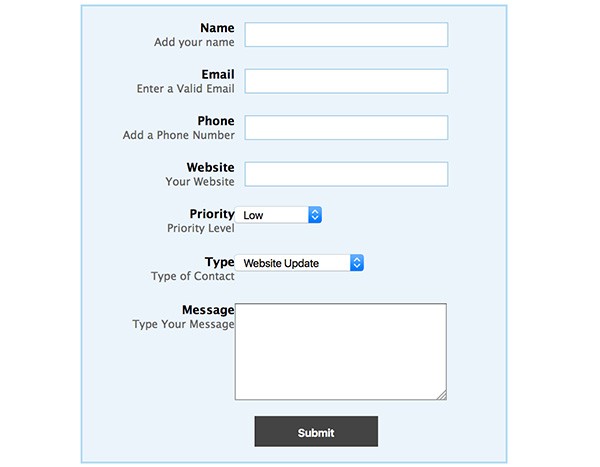
Here is an example of the completed HTML contact form we have created with the dropdown box included:
HTML Contact Form with Dropdown Box
<form action="mail.php" method="POST">
<p>Name</p> <input type="text" name="name">
<p>Email</p> <input type="text" name="email">
<p>Phone</p> <input type="text" name="phone">
<p>Dropdown Box</p>
<select name="dropdown" size="1">
<option value="Option1">Option1</option>
<option value="Option2">Option2</option>
<option value="Option3">Option3</option>
<option value="Option4">Option4</option>
</select>
<br />
<p>Message</p><textarea name="message" rows="6" cols="25"></textarea><br />
<input type="submit" value="Send"><input type="reset" value="Clear">
</form>
Now we will need to change our contact form PHP to make sure the information from the HTML form is rendered and submitted to the provided email address.
Let’s take a look at our modified PHP that will now have the dropdown box readable.
<?php
$name = $_POST['name'];
$email = $_POST['email'];
$dropdown = $POST['dropdown'];
$message = $_POST['message'];
$formcontent="From: $name n Message: $message";
$recipient = "[email protected]";
$subject = "Contact Form";
$mailheader = "From: $email rn";
mail($recipient, $subject, $formcontent, $mailheader) or die("Error!");
echo "Thank You!";
?>
Notice that we have added “dropdown” as a $_POST variable that will now be sent. The dropdown name itself comes from the HTML portion that is labeled as
The size option lets you select how many rows will be viewable at one time. The most general setting for this is “1” but you can change it to more if you would like.
Adding Radio Buttons and Checkboxes To a Contact Form
To add Radio Buttons and Checkboxes, the same will apply as the above. We will need to add it within our HTML code, and then modify the PHP to take the input from the contact form HTML and properly send it.
Here is an example of the HTML code for adding Checkboxes:
<p>Request Phone Call:</p>
Yes:<input type="checkbox" value="Yes" name="call"><br />
No:<input type="checkbox" value="No" name="call"><br />
Full Example Using All Elements In Contact Form
For this example I have changed some of the names to we can create a custom contact form for our completed example now that we have a basic understanding of the way it works.
Our HTML Contact Form Code
<form action="mail.php" method="POST">
<p>Name</p> <input type="text" name="name">
<p>Email</p> <input type="text" name="email">
<p>Phone</p> <input type="text" name="phone"> <p>Request Phone Call:</p>
Yes:<input type="checkbox" value="Yes" name="call"><br />
No:<input type="checkbox" value="No" name="call"><br /> <p>Website</p> <input type="text" name="website"> <p>Priority</p>
<select name="priority" size="1">
<option value="Low">Low</option>
<option value="Normal">Normal</option>
<option value="High">High</option>
<option value="Emergency">Emergency</option>
</select>
<br /> <p>Type</p>
<select name="type" size="1">
<option value="update">Website Update</option>
<option value="change">Information Change</option>
<option value="addition">Information Addition</option>
<option value="new">New Products</option>
</select>
<br /> <p>Message</p><textarea name="message" rows="6" cols="25"></textarea><br />
<input type="submit" value="Send"><input type="reset" value="Clear">
</form>
And again, our PHP that will correspond with this HTML form to make it work:
Our completed PHP Contact Form Code
<?php
$name = $_POST['name'];
$email = $_POST['email'];
$phone = $_POST['phone'];
$call = $_POST['call'];
$website = $_POST['website'];
$priority = $_POST['priority'];
$type = $_POST['type'];
$message = $_POST['message'];
$formcontent=" From: $name n Phone: $phone n Call Back: $call n Website: $website n Priority: $priority n Type: $type n Message: $message";
$recipient = "[email protected]";
$subject = "Contact Form";
$mailheader = "From: $email rn";
mail($recipient, $subject, $formcontent, $mailheader) or die("Error!");
echo "Thank You!";
?>
Customizing the Thank you Message on Contact Form Success
Now for the final part of this tutorial, I will explain how to customize the very last line of our PHP script we have created. The basic way will just echo “Thank You” on our screen, but we need to make a better way so our viewers can easily have a way to get back to another page.
This will be useful in creating a custom page redirect, or a link to bring the user to a different area after completing the form. Remember that when working with PHP, some of the HTML will be different as to not disrupt our PHP code.
We will need to use single quotes “instead of double quotes” within this one, so we don’t end our PHP arg.
We will be adding a space after the “thank you” message, and adding a link back to our “form.html” document (Or whatever link you wish to create) – and also changing the color of the link using inline styles.
Let’s take a look at the modified echo command in our mail.php file:
echo "Thank You!" . " -" . "<a href='form.html' style='text-decoration:none;color:#ff0099;'> Return Home</a>";
You can play around with the example above to create your own thank you message for your site. Inline styles are not required; I just used them for this example instead of including a stylesheet. Remember that the echo command is only seen on a successful send of the message. Otherwise, the error message is sent.
Download The Contact Form Files
I am providing the download for the completed form for you to play with. Feel free to use it any way you wish, and customize it for your own projects. There are still many other things that can be done with PHP for your contact forms.
One that you might want to consider is CAPTCHA, which prevents spam email. You can also customize the other portions of the form and create your own! Have fun, and I hope that everyone has enjoyed the article and finds it useful for their own needs.
You can download the example files by clicking [HERE]
Note: I have included a few styling examples using CSS in the demo download. This will allow you to see the forms styled and understand how to style them using CSS.
This post may contain affiliate links. See our disclosure about affiliate links here.