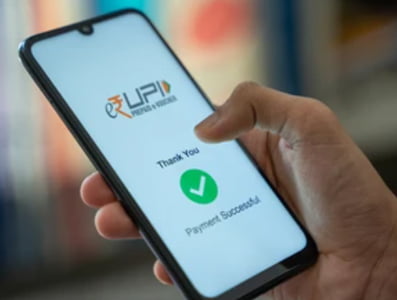
UPI stands for Unified Payment Interface. It is a system that enables the operation of multiple bank accounts into a single mobile application, thereby merging numerous banking features and allowing smooth fund routing and merchant payments. All one requires is a smartphone as your virtual debit card and an active bank account. That’s all you need now for instant mobile payments!
This initiative was brought into action by the Government of India to boost India’s efforts into becoming a cashless economy. The National Payment Corporation of India (NPCI) supervised a pilot launch of the UPI system in April 2016 with 21 member banks. NPCI has also launched Immediate Payment Service (IMPS) and oversees the RuPay payment network, allowing banks to interconnect to enable fund transfers. UPI is regarded as the advanced version of IMPS.
UPI ID is an acronym for Unique Identification for a bank account vital to recognise an individual’s bank account while initiating monetary transactions. UPI ID is a personal identification number that ultimately authorises any money transfer through the UPI platform. You can create your UPI ID by entering your bank account details on the app. The app will send a one-time password (OTP) to your registered mobile number to authenticate the transfer. After you enter the OTP, the app will navigate to create your PIN for the UPI ID. Usually, the format of UPI ID is your mobile number followed by “@” and the app you are using for it.
Also Read: Aadhaar Card Download – Complete Guide to Download for E-Aadhaar
Now, you do not have to follow the traditional money transfer methods by memorising bank details. You can quickly transfer the money through UPI by entering the receiver’s Aadhaar number, registered mobile number, or UPI ID. To initiate a transaction through UPI, you can choose from the provided three methods, i.e.,
- Entering the UPI ID of the sender and receiver, or;
- Adding the receiver’s bank account information, or;
- Scanning the QR code,
There are several benefits that you can benefit from using the UPI. For instance,
- Instant money transfers and transactions are available round the clock with 0% additional charges.
- Simple user interface available at the click of your fingers.
- Easy access to different bank accounts through a single mobile application.
- Safety and security. A 2-factor authentication provides security and seamless single-click payments. Also, the customers will receive prompt notifications if the merchant is an unauthorized dealer. In addition, you will never have to enter your bank or card details while transacting. Instead, enter your virtual UPI ID and PIN to authenticate the transactions.
- You can timely pay your rent and utility bills, avail different services during online shopping or at departmental stores.
- Put forward your complaints directly from your Mobile App.
Also Read: The Udyog Aadhar
As a preliminary step, everyone must register their account on UPI-supported apps to generate their virtual UPI IDs. The guide below will tell you more about the steps for registration as follows:
- Download the UPI app from your App Store or Bank websites.
- Create your profile on the app by providing all the required information, such as name, payment addresses, etc.
- Next, select the option to “Add/manage/link bank account” and connect your bank account with your virtual ID.
- After you have created your virtual IDs, you need to set up a UPI PIN to secure and authorise your transactions later. To set up your UPI PIN,
- Select a bank from which you wish to operate your online transactions. You will receive an OTP from the selected bank to your registered mobile number.
- Next, you must enter the last six digits of your debit/credit card and the expiry date provided on the card.
- Now, enter the OTP and create your numeric PIN. Click on ‘Submit’.
- On the notification, select the option of ‘Success’.
Also Read: How To Check Your CIBIL Score Using Your Pan Card
Transferring money or paying your monthly bills has never been this hassle-free. You can do so within seconds through UPI by following these steps:
- Login to your UPI-supported payment app.
- To make regular payments or transfer money, select the option to ‘Send Money or ‘New Payment’ and proceed to pay either through ‘Scan QR’ or by entering the beneficiary’s registered mobile number. Next, enter the amount you wish to pay or send to the other party and proceed. Next, you will be automatically prompted to enter your UPI PIN and confirm.
- After logging in, move to the ‘Recharge and Bill Payments’ section to pay your monthly or utility bills. Select the bill you wish to pay, such as mobile recharge, electricity, gas cylinder, DTH recharge, credit card bills, etc. Next, select your biller from the provided list and enter your consumer details. Now, select to pay and enter your UPI PIN to authenticate the transaction from your end.
- Login to your UPI-supported payment app.
- Move to the option of ‘Collect Money’ or ‘Payment Request’.
- Enter the payer’s virtual ID and the amount you have to receive, and the account to be credited.
- The payer will receive a notification to make the payment. Next, click on the ‘confirm’ tab.
As official government authorities regulate the UPI system, several apps have associated themselves with allowing UPI access on their platforms. UPI can be accessed on all platforms, such as Android and iOS. The major apps such as Google Pay, Paytm, PhonePe, Mobikwik, and FreeCharge support UPI payments. You only need to verify and link your bank accounts to these apps to generate your UPI ID to start instant online transactions.
Unlike regular bank transactions, where a standard rate is applied for executing monetary transactions, UPI does not charge any additional sum to complete transactions. Even banks that provide UPI facilities do not charge during such transactions.


