Voice commands are not only for assistants like Google or Alexa. They can also be added to your mobile and desktop apps, offering both extra functionality and even fun for your end users. And adding voice commands or voice search to your apps can be very easy to implement. In this article, we’ll use the Web Speech API to build a voice controlled book search application.
The complete code for what we’ll build is available on GitHub. And for the impatient, there’s a working demo of what we’ll build at the end of the article.
Introduction to the Web Speech API
Before we get started, it’s important to note that the Web Speech API currently has limited browser support. To follow along with this article, you’ll need to use a supported browser.
Data on support for the mdn-api__SpeechRecognition feature across the major browsers
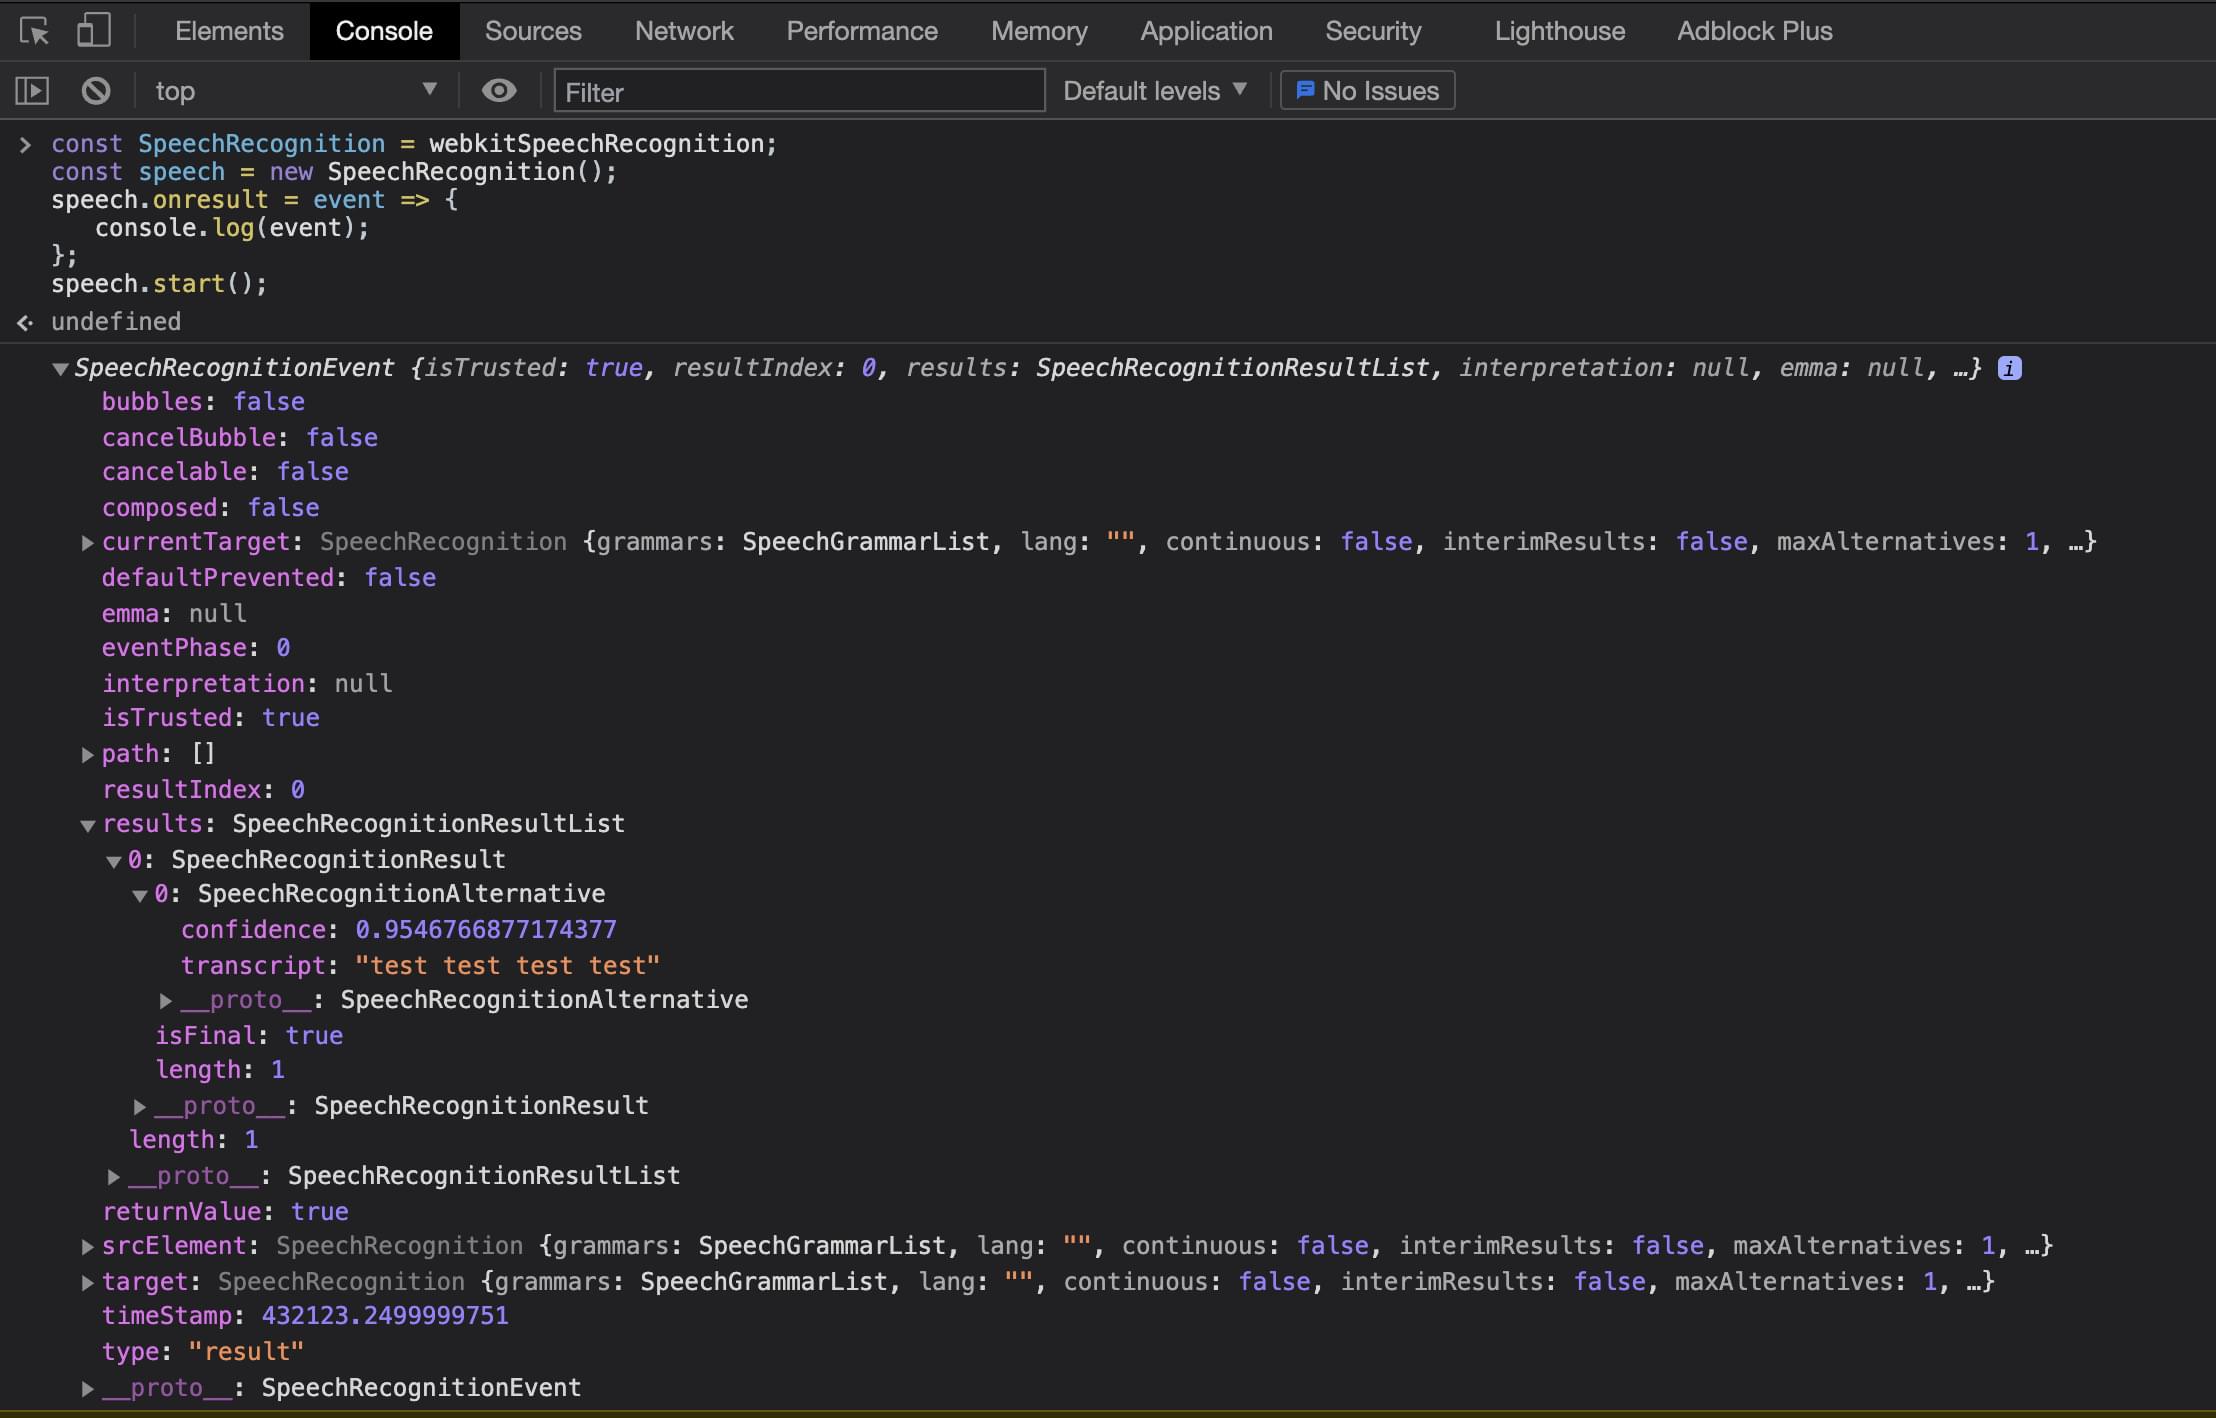
First, let’s see how easy it is to get the Web Speech API up and running. (You might also like to read SitePoint’s introduction to the Web Speech API and check out some other experiments with the Web Speech API.) To start using the Speech API, we just need to instantiate a new SpeechRecognition class to allow us to listen to the user’s voice:
const SpeechRecognition = webkitSpeechRecognition; const speech = new SpeechRecognition(); speech.onresult = event => { console.log(event); }; speech.start();We start by creating a SpeechRecognition constant, which is equal to the global browser vendor prefix webkitSpeechRecognition. After this, we can then create a speech variable that will be the new instance of our SpeechRecognition class. This will allow us to start listening to the user’s speech. To be able to handle the results from a user’s voice, we need to create an event listener that will be triggered when the user stops speaking. Finally, we call the start function on our class instance.
When running this code for the first time, the user will be prompted to allow access to the mic. This a security check that the browser puts in place to prevent unwanted snooping. Once the user has accepted, they can start speaking, and they won’t be asked for permission again on that domain. After the user has stopped speaking, the onresult event handler function will be triggered.
The onresult event is passed a SpeechRecognitionEvent object, which is made up of a SpeechRecognitionResultList results array. The SpeechRecognitionResultList object contains SpeechRecognitionResult objects. The first item in the array returns a SpeechRecognitionResult object, which contains a further array. The first item in this array contains the transcript of what the user had spoken.
The above code can be run from the Chrome DevTools or a normal JavaScript file. Now that we have the basics understood, let’s look at building this into a React application. We can see the results below when running via the Chrome DevTools console.
Using Web Speech in React
Using what we’ve already learned, it’s a simple process to add the Web Speech API to a React application. The only issue we have to deal with is the React component lifecycle. First, let’s create a new project with Create React App, following its getting start guide. This assumes that Node is installed on your machine:
npx create-react-app book-voice-search cd book-voice-search npm startNext, we replace the App file with the code below to define a basic React component. Then we can add some speech logic to it:
// App.js import React from 'react'; const App = () => { return ( <div> Example component </div> ); }; export default App;This simple component renders a div with some text inside it. Now we can start adding our speech logic to the component. We want to build a component that creates the speech instance, then uses this inside the React lifecycle. When the React component renders for the first time, we want to create the speech instance, start listening to results, and provide the user a way to start the speech recognition. We first need to import some React hooks (you can learn more about the core React hooks here), some CSS styles, and a mic image for our user to click:
// App.js import { useState, useEffect } from "react"; import "./index.css"; import Mic from "./microphone-black-shape.svg";After this, we’ll create our speech instance. We can use what we learned earlier when looking at the basics of the Web Speech API. We have to make a few changes to the original code we pasted into the browser developer tools. Firstly, we make the code more robust by adding browser support detection. We can do this by checking if the webkitSpeechRecognition class exists on the window object. This will tell us if the browser knows of the API we want to use.
Then we change the continuous setting to true. This configures the speech recognition API to keep listening. In our very first example, this was defaulted to false and meant that when the user stopped speaking, the onresult event handler would trigger. But as we’re allowing the user to control when they want the site to stop listening, we use continuous to allow the user to talk for as long as they want:
// App.js let speech; if (window.webkitSpeechRecognition) { // eslint-disable-next-line const SpeechRecognition = webkitSpeechRecognition; speech = new SpeechRecognition(); speech.continuous = true; } else { speech = null; } const App = () => { ... };Now that we’ve set up the speech recognition code, we can start to use this inside the React component. As we saw before, we imported two React hooks — the useState and useEffect hooks. These will allow us to add the onresult event listener and store the user transcript to state so we can display it on the UI:
// App.js const App = () => { const [isListening, setIsListening] = useState(false); const [text, setText] = useState(""); const listen = () => { setIsListening(!isListening); if (isListening) { speech.stop(); } else { speech.start(); } }; useEffect(() => { //handle if the browser does not support the Speech API if (!speech) { return; } speech.onresult = event => { setText(event.results[event.results.length - 1][0].transcript); }; }, []); return ( <> <div className="app"> <h2>Book Voice Search</h2> <h3>Click the Mic and say an author's name</h3> <div> <img className={`microphone ${isListening && "isListening"}`} src={Mic} alt="microphone" onClick={listen} /> </div> <p>{text}</p> </div> </> ); } export default App;In our component, we firstly declare two state variables — one to hold the transcript text from the user’s speech, and one to determine if our application is listening to the user. We call the React useState hook, passing the default value of false for isListening and an empty string for text. These values will be updated later in the component based on the user’s interactions.
After we set up our state, we create a function that will be triggered when the user clicks the mic image. This checks if the application is currently listening. If it is, we stop the speech recognition; otherwise, we start it. This function is later added to the onclick for the mic image.
We then need to add our event listener to capture results from the user. We only need to create this event listener once, and we only need it when the UI has rendered. So we can use a useEffect hook to capture when the component has mounted and create our onresult event. We also pass an empty array to the useEffect function so that it will only run once.
Finally, we can render out the UI elements needed to allow the user to start talking and see the text results.
Continue reading Adding Voice Search to a React Application on SitePoint.