In this article, I’ll show how to build a paywalled blog with Shopify using HTML, CSS, and Liquid (Shopify’s template language). Even though Shopify’s blogging features are somewhat basic, and there are other online services that specifically help bloggers to set up blogs that readers can subscribe to for a fee (such as Ghost), I’ll explain why you might rather use Shopify.
Huh? Shopify for content? Why?
Table of Contents
Shopify is arguably leading the ecommerce space. It has the most customers and the highest number of (well-executed) out-of-the-box features compared to its rivals.
Shopify can facilitate the sale of almost anything, including subscription-based services, digital downloads, free swag, and even in-store items thanks to its point-of-sale system.
I would say that most believe Shopify to be number one at ecommerce, and while there are specialized services for selling access to content, I still believe Shopify is the better option.
Let’s compare Shopify with Ghost, for example, since Ghost is the fastest-growing blogging CMS today.
Shopify Basic and Ghost Pro Basic are both $29/month. However, Shopify can sell anything, whereas Ghost can only sell access to subscription-based content. Ghost can’t sell access to content for a one-time fee, or anything else on the side. Shopify wins hands down when it comes to business-model flexibility.
Honestly, the only caveat is that the blogging features are considered to be Shopify’s weak link, but if you enjoy building themes from scratch (which frankly comes with many benefits), then you’d be surprised at how mighty and flexible Shopify’s Liquid template language is. I wouldn’t consider Shopify an ecommerce platform, but rather a CMS with roots in ecommerce.
So, if you’d like to leave a new venture open to additional/alternative business models or you already have a Shopify store with a blog that you’d like to monetize, let’s kick things off.
Prerequisites
You’ll need to be reasonably skilled in web development, understanding HTML and CSS, at least. Some knowledge of the Liquid template language that Shopify uses would certainly be beneficial, but not required, since Liquid is somewhat easy to learn along the way. (I’d recommend checking out the Liquid documentation regardless.)
You’ll also need to create a Shopify account, which is free for 14 days (no card required). Please note, however, that unless you pick a payment plan, you won’t be able to remove the password protection on your store.
Step 1: Define the Theme Structure
First, let’s define the file structure of the theme using a mixture of required and common files. We won’t use all of them in this tutorial, but you can use this structure to kickstart any barebones Shopify store in the future. The files can be blank for now:
. ├── assets ├── config │ ├── settings_data.json │ └── settings_schema.json ├── layout │ └── theme.liquid ├── sections ├── snippets └── templates ├── 404.liquid ├── article.liquid ├── blog.liquid ├── cart.liquid ├── collection.liquid ├── customers │ ├── account.liquid │ ├── activate_account.liquid │ ├── addresses.liquid │ ├── login.liquid │ ├── order.liquid │ ├── register.liquid │ └── reset_password.liquid ├── gift_card.liquid ├── index.liquid ├── list-collections.liquid ├── page.liquid ├── password.liquid ├── product.liquid └── search.liquid If you’re following along on macOS or Linux, you can use the following commands to generate the structure:
mkdir -p assets snippets sections config layout templates/customers touch config/settings_data.json config/settings_schema.json touch layout/theme.liquid cd templates/customers touch account.liquid activate_account.liquid addresses.liquid login.liquid order.liquid register.liquid reset_password.liquid cd .. touch 404.liquid article.liquid blog.liquid cart.liquid collection.liquid gift_card.liquid index.liquid list-collections.liquid page.liquid password.liquid product.liquid search.liquid # back into the project root cd .. Further reading:
- theme file structure
Step 2: Obtain the Theme ID
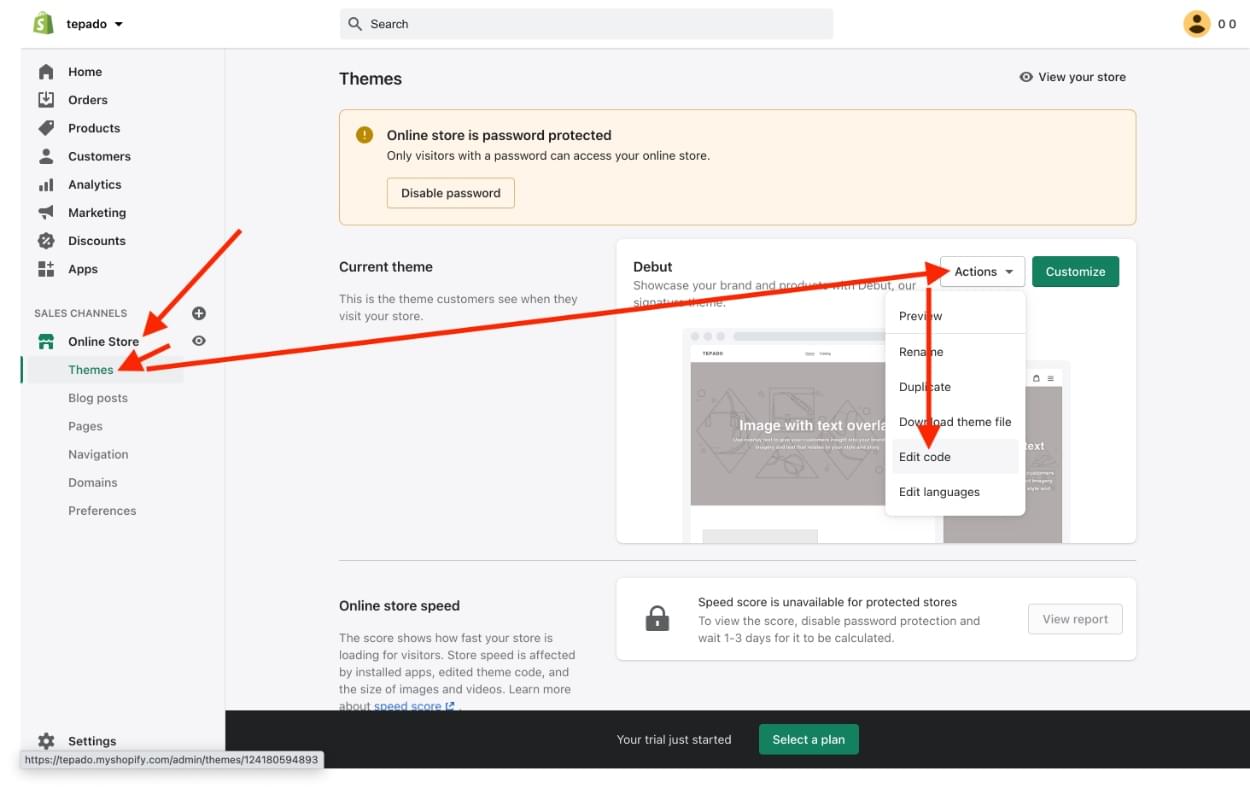
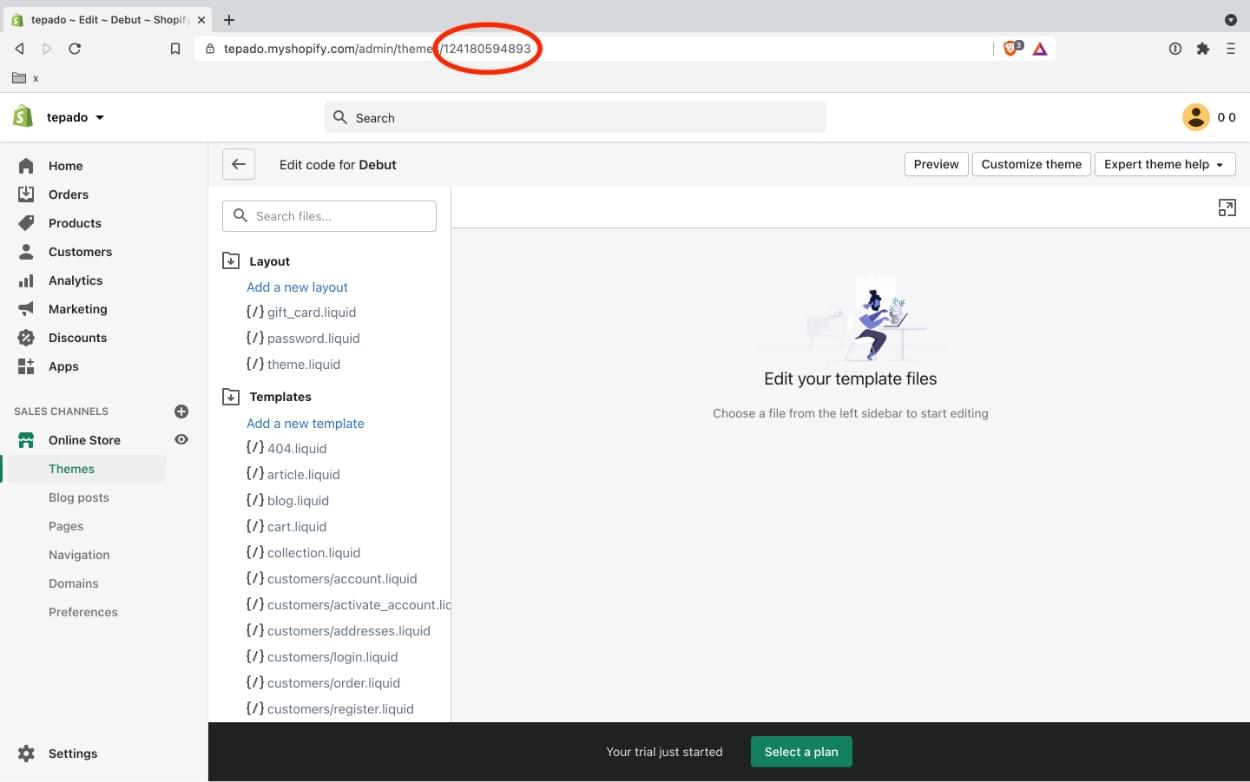
Next, we’ll need to obtain the theme ID of the default theme (“Debut”) that should already be installed. Within the Shopify admin, navigate to Online Store > Themes > Actions > Edit code and then make note of the numeric theme ID in the URL. If you already have a theme set up, use that theme ID instead.


Note: while the default theme — “Debut” — is a fully-functioning coded theme, we’ll be overwriting it with our code.
Step 3: Set up Theme Kit
Theme Kit is a command-line tool for building and managing Shopify themes. In this tutorial, we’ll use Theme Kit to watch for code changes within our theme directory and deploy those changes to our theme.
Theme Kit works on Windows, macOS, and Linux, and works with workflow tools such as Git and Node.js. To keep things fairly simple, we’ll omit workflow tools and just use Theme Kit.
Install Theme Kit
First, install Theme Kit using the command line.
Windows and Chocolately
choco install themekit macOS and Homebrew
brew tap shopify/shopify brew install themekit Linux
curl -s https://shopify.dev/themekit.py | sudo python Create a Shopify “app”
Next, create a Shopify “app” to acquire the necessary credentials that Theme Kit requires in order to authenticate theme changes.
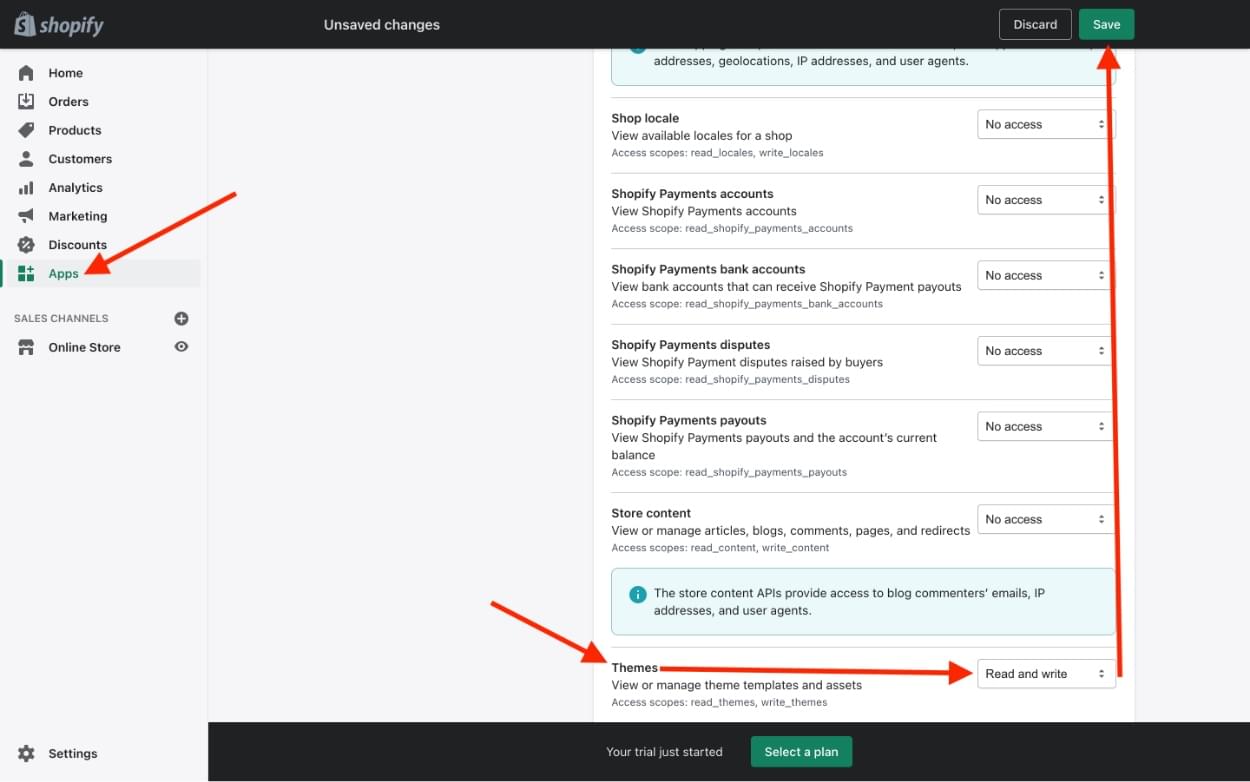
Within the Shopify admin, navigate to Apps > Manage private apps, then tick the three checkboxes to accept the terms and conditions. Next select Enable private app development > Create private app and complete the form.
In this step, you’ll need to give your private app a name and enter an emergency developer email. You’ll also need to enable “Read and write” access for “Themes” before clicking on the Save button. This final point is hidden behind a Show inactive Admin API permissions dropdown.

Finally, click Create app and make note of the “Password” on the next screen.
Continue reading Build Your Own Subscription Blog with Shopify on SitePoint.


