Browse through SaaS communities on Twitter, LinkedIn, Reddit, Discord, you name it and you’ll see a common theme appear in many of them. That theme can go by many names: BI, analytics, insights and so on. It’s natural, we do business, collect data, we succeed or fail. We want to look into all of that, make some sense of the data we have and take action. This need has produced many projects and tools that make the lives of anyone who wants to look into the data just a bit easier. But, when humans have, humans want more. And in the world of BI and analytics, “more” often comes in the form of embedding, branding, customized styling and access and so on. Which ends up meaning more work for developers and more time to account for. So, naturally there has been a need for BI tools that will let you have it all.
Let’s make a list of challenges you may face as the builder and maintainer of these dashboards:
- You want to make the dashboards available to end users or viewers from within your own application or platform
- You want to be able to manage different dashboard collections (i.e. “integrations”)
- You want to be able to grant specific user rights to a collection of dashboards and datasets
- You want to make sure users have access to data only relevant to them
Cumul.io provides a tool we call Integrations which helps solve these challenges. In this article I’ll walk you through what integrations are, and how to set one up. The cool thing is that for most of the points above, there is minimal code required and for the most part can be set within the Cumul.io UI.
Some Background — Integrations
Table of Contents
An Integration in Cumul.io is a structure that defines a collection of dashboards intended to be used together (e.g. in the same application). It is also what we use to embed dashboards into an application. In other words, to embed dashboards into an application, we give the application access to the integration that they belong to. You can associate dashboards to an integration and administrate what type of access rights the end users of the integration will have on these dashboards and the datasets they use. A dashboard may be a part of multiple integrations, but it may have different access rights on different integrations. When it comes to embedding, there are a number of SDKs available to make life simple regardless of what your stack looks like. ????
Once you have a Cumul.io account and if you are an “owner” of an organization in Cumul.io, you will be able to manage and maintain all of your integrations via the Integrations tab. Let’s have a look at an example Cumul.io account. Below you can see the Dashboards that one Cumul.io user might have created:
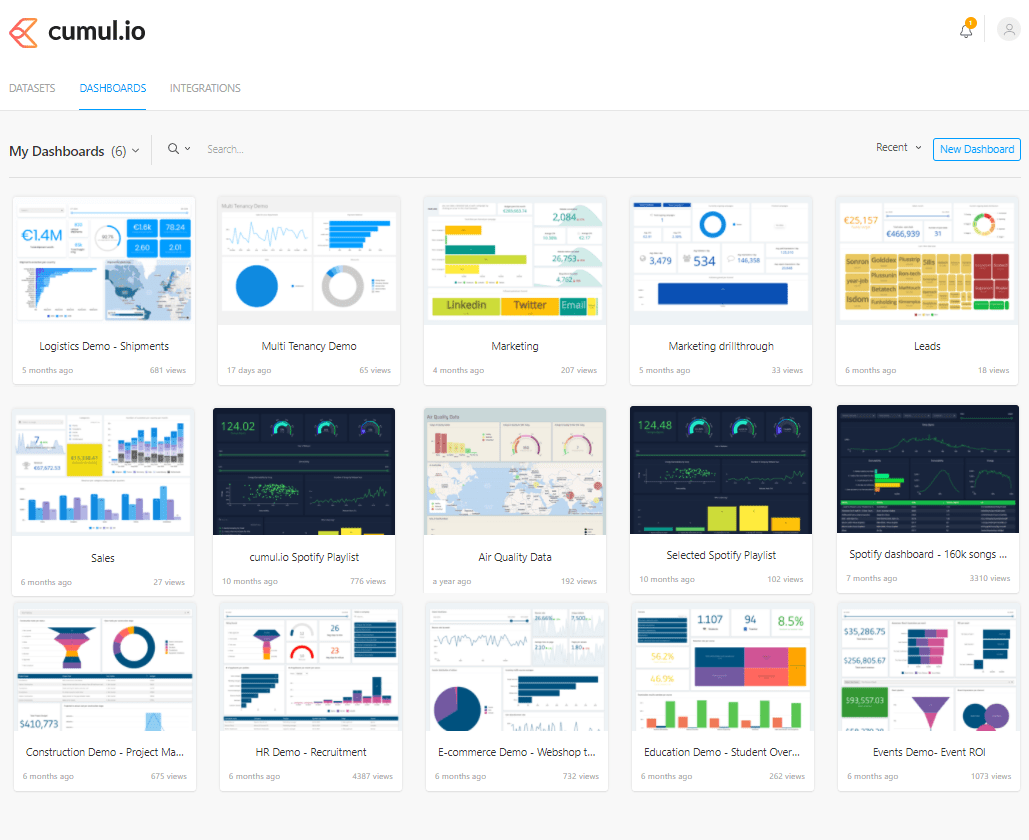
Although these are all the dashboards this user may have created, it’s likely that not all dashboards are intended for the same end-users, or application for that matter. So, the owner of this Cumul.io account would create and maintain an Integration (or more!) ???? Let’s have a look at what that might look like for them:
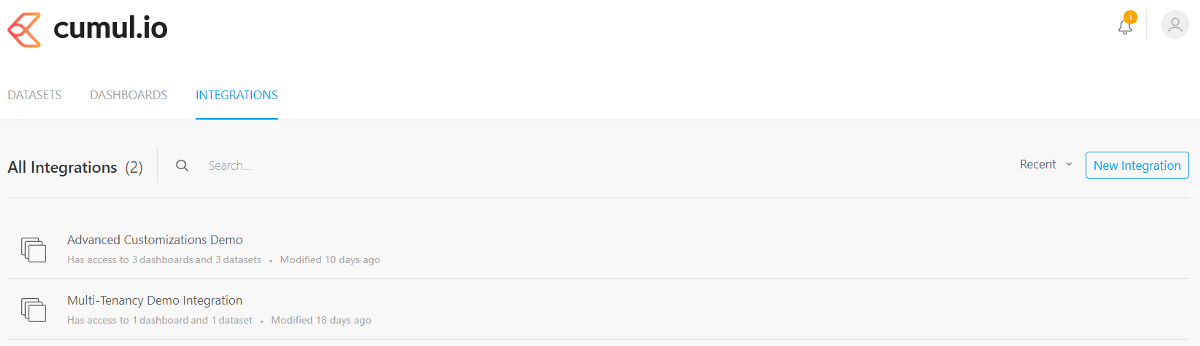
So, it looks like the owner of this Cumul.io account maintains two separate applications.
Now let’s see what the process of creating an integration and embedding its dashboards into an application would look like. The good news is, as mentioned before, a lot of the steps you will have to take can be done within the Cumul.io UI.
Disclaimer: For the purposes of this article, I’ll solely focus on the Integration part. So, I’ll be skipping everything to do with dashboard creation and design and we will be starting with a pre-made set of imaginary dashboards.
What we will be doing:
Creating an Integration
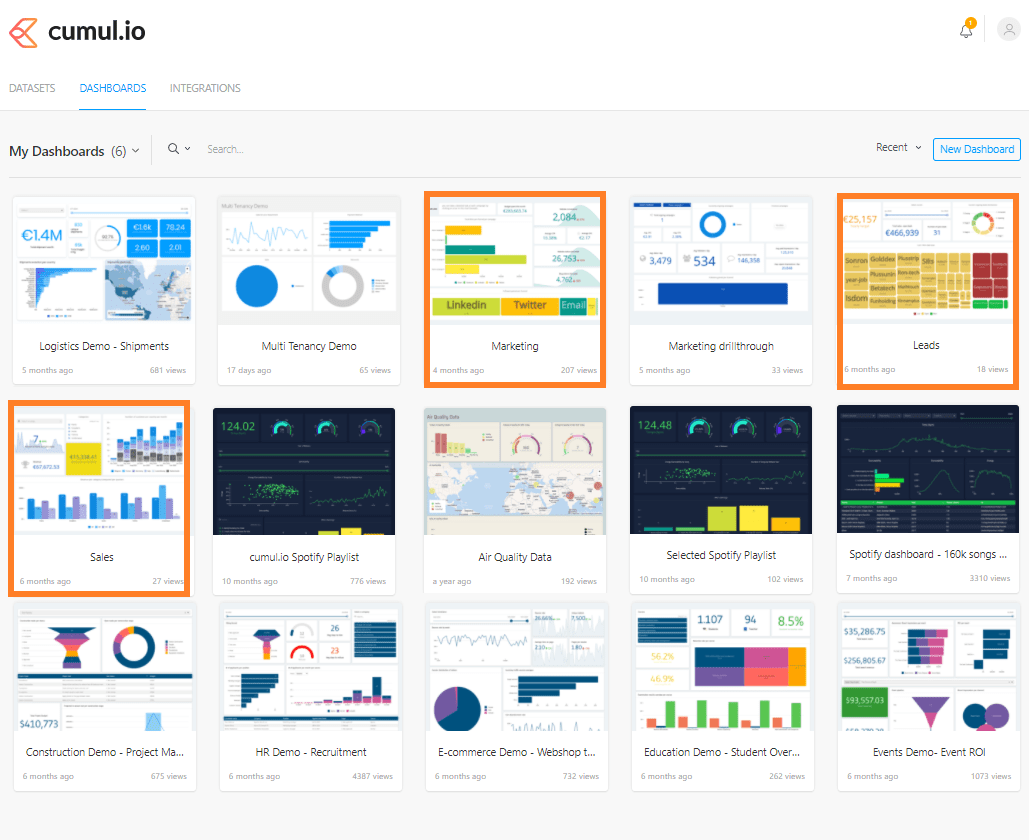
For simplicity, let’s only create one integration for now. Let’s imagine we have an analytics platform that we maintain for our company. There are three dashboards that we want to provide to our end-users: the Marketing Dashboard, the Sales Dashboard and the Leads Dashboard.
Let’s say that out of all the dashboards this account has created or has access to, for this particular project they want to use only the following:
New Integration
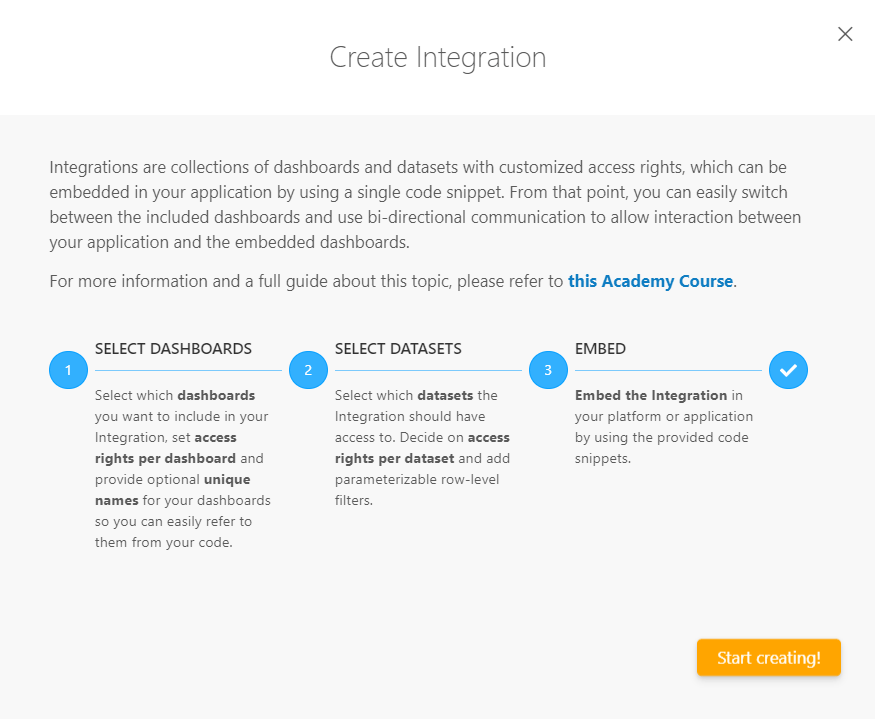
To create the integration, we go to the Integrations tab and select New Integration. The dialogue that pops up will already give you some idea of what your next steps will be:
Selecting Dashboards
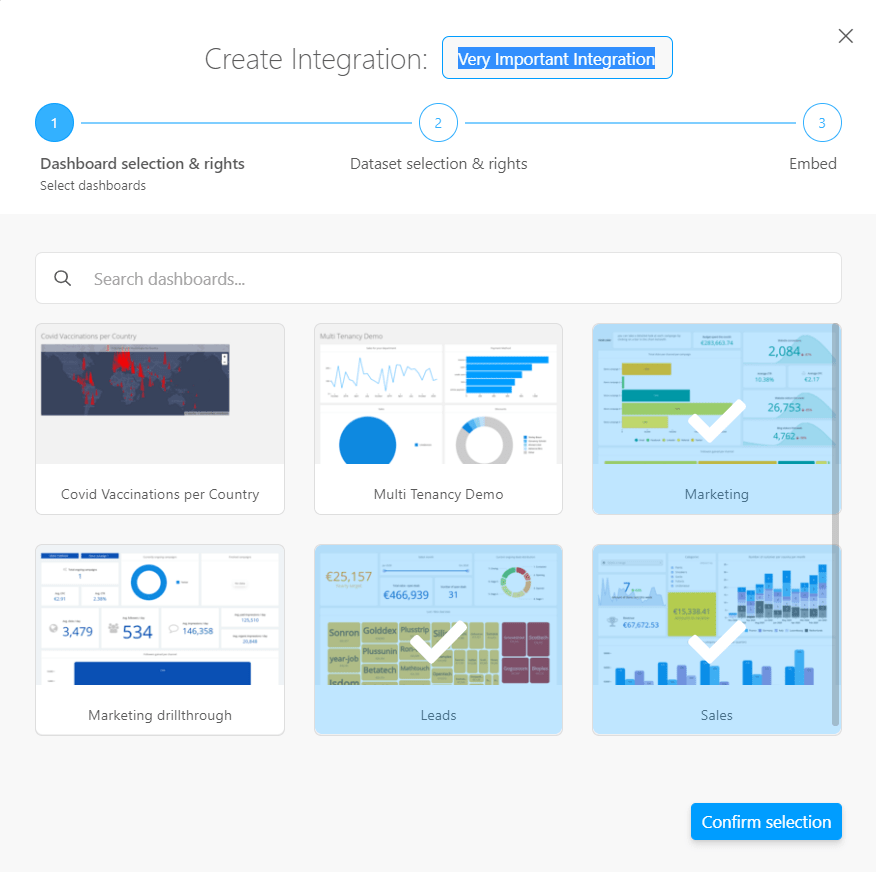
Next up, you will be able to select which of your dashboards will be included in this integration. You will also be able to give the Integration a name, which here I’ve decided will appropriately be “Very Important Integration”:
Once you confirm your selection, you will have the option of defining a slug for each dashboard (highly recommended). These can later be used while embedding the dashboards into your application. You will later see that slugs make it easy to reference dashboards in your front-end code, and make it easier to replace dashboards if needed too (as you won’t need to worry about dashboard IDs in the front-end code).
Access Rights
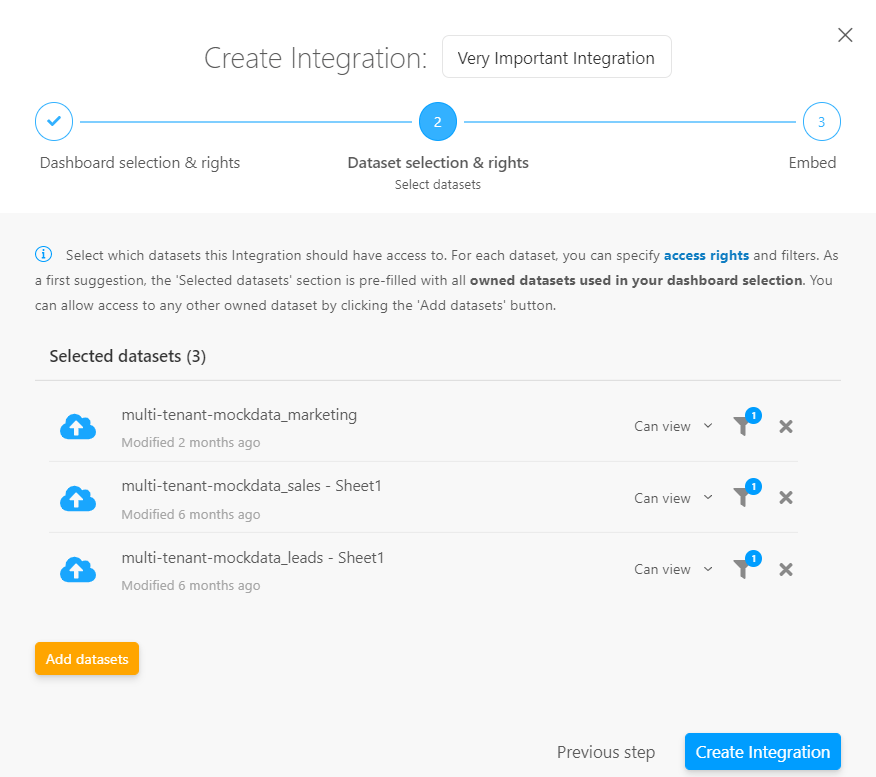
You will then get to set the integration’s access rights for the datasets its dashboards use. Here we set this to “Can view.” For more info on access rights and what they entail, check out our associating datasets to integrations:
Filters and Parameters (and Multi-Tenant Access)
Side Note: To help with multi-tenant access — which would make sense in this imaginary set up — Cumul.io makes it possible to set parameters and filters on datasets that a dashboard uses. This means that each user that logs into your analytics platform would only see the data they personally have access to in the dashboards. You can imagine that in this scenario access would be based on which department the end user works for in the company. For more on how to set up multi-tenancy with Cumul.io, check out our article, “Multi-Tenancy on Cumul.io Dashboards with Auth0”. This can be done within the dashboard design process (which we are skipping), which makes it easier to visualize what the filters are doing. But here, we will be setting these filters in the Integration creation process.
Here, we set the filters the datasets might need to have. In this scenario, as we filter based on the users’ departments, we define a department parameter and filter based on that:

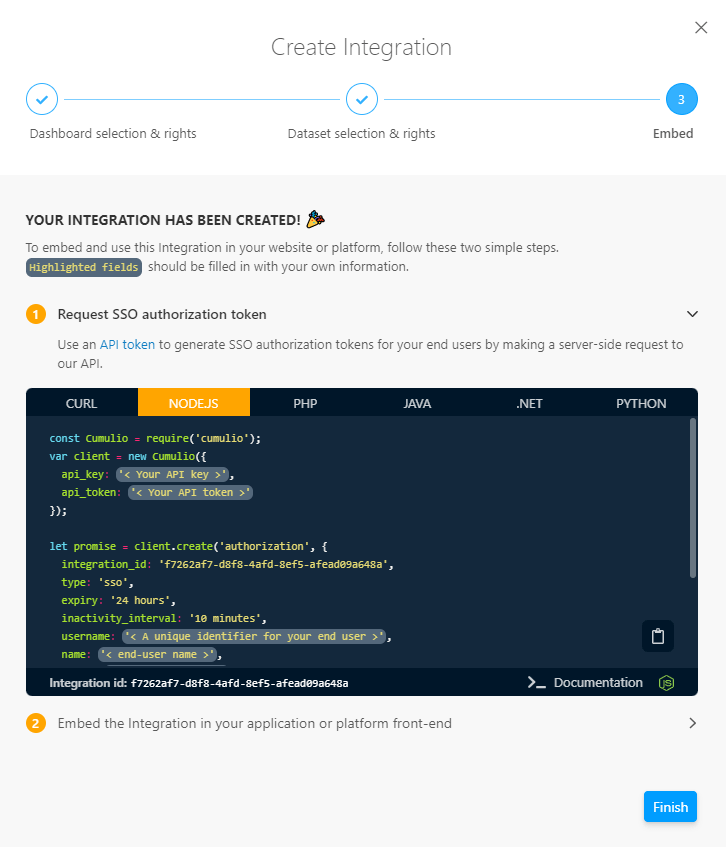
And voilà! Once you’re done with setting those, you have successfully created an integration. The next dialogue will give you instructions for what will be your next steps for embedding your integration:
Now you’ll be able to see this brand new Integration in your Integration tab. This is also where you will have quick access to the Integration ID, which will later be used for embedding the dashboards.
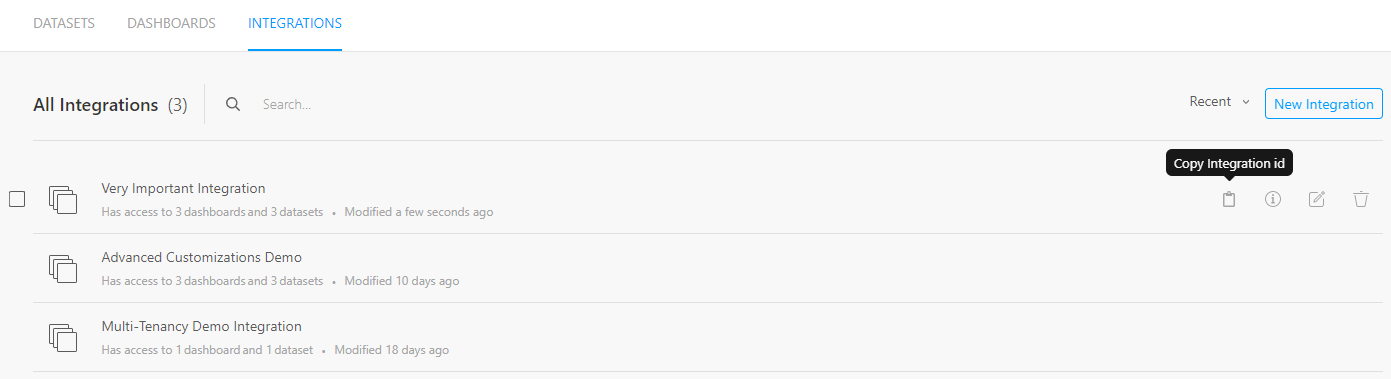
Good news! After your Integration is created, you can always edit it. You can remove or add dashboards, change the slugs of dashboards or access rights too. So you don’t have to worry about creating new integrations as your application changes and evolves. And as editing an integration is all within the UI, you won’t need to worry about having a developer set it all up again. Non-technical users can adapt these integrations on the go.
Embedding Dashboards
Let’s see where we want to get to. We want to provide the dashboards within a custom app. Simple, user logs into an app, the app has dashboards, they see the dashboards with the data they’re allowed to see. It could look like the following for example:

Someone had a very specific vision on how they wanted to provide the dashboards to the end user. They wanted a sidebar where they could flip through each of the dashboards. It could have been something completely different too. What we will focus on is how we can embed these dashboards into our application regardless of what the host application looks like.
Cumul.io comes with a set of publicly available SDKs. Here I’ll show you what you would do if you were to use the Node SDK. Check out our developer docs to see what other SDKs are available and instructions on how to use them.
Step 1: Generate SSO Tokens For Your End Users
Before you can generate SSO tokens for your end users, you will have to make sure that you create an API key and token in Cumul.io. You can do this from your Cumul.io Profile. It should be the organization owner with access to the integration that creates and uses this API key and token to make the SSO authorization request. Once you’ve done this, let’s first create a Cumul.io client which would be done in the server side of the application:
const Cumulio = require("cumulio"); const client = new Cumulio({ api_key: '<YOUR API KEY>', api_token: '<YOUR API TOKEN>',
});
Now we can create the SSO token for the end user. For more information on this API call and the required fields check out our developer documentation on generating SSO tokens.
let promise = client.create('authorization', { integration_id: '<THE INTEGRATION ID>', type: 'sso', expiry: '24 hours', inactivity_interval: '10 minutes', username: '< A unique identifier for your end user >', name: '< end-user name >', email: '< end-user email >', suborganization: '< end-user suborganization >', role: 'viewer', metadata: {}
});
Here, notice how we have added the optional metadata field. This is where you can provide the parameters and values with which you want to filter the dashboards’ datasets on. In the example we’ve been going through we’ve been filtering based on department so we would be adding this to the metadata. Ideally you would get this information from the authentication provider you use. See a detailed explanation on how we’ve done this with Auth0.
This request will return a JSON object that contains an authorization id and token which is later used as the key/token combination to embed dashboards in the client-side.
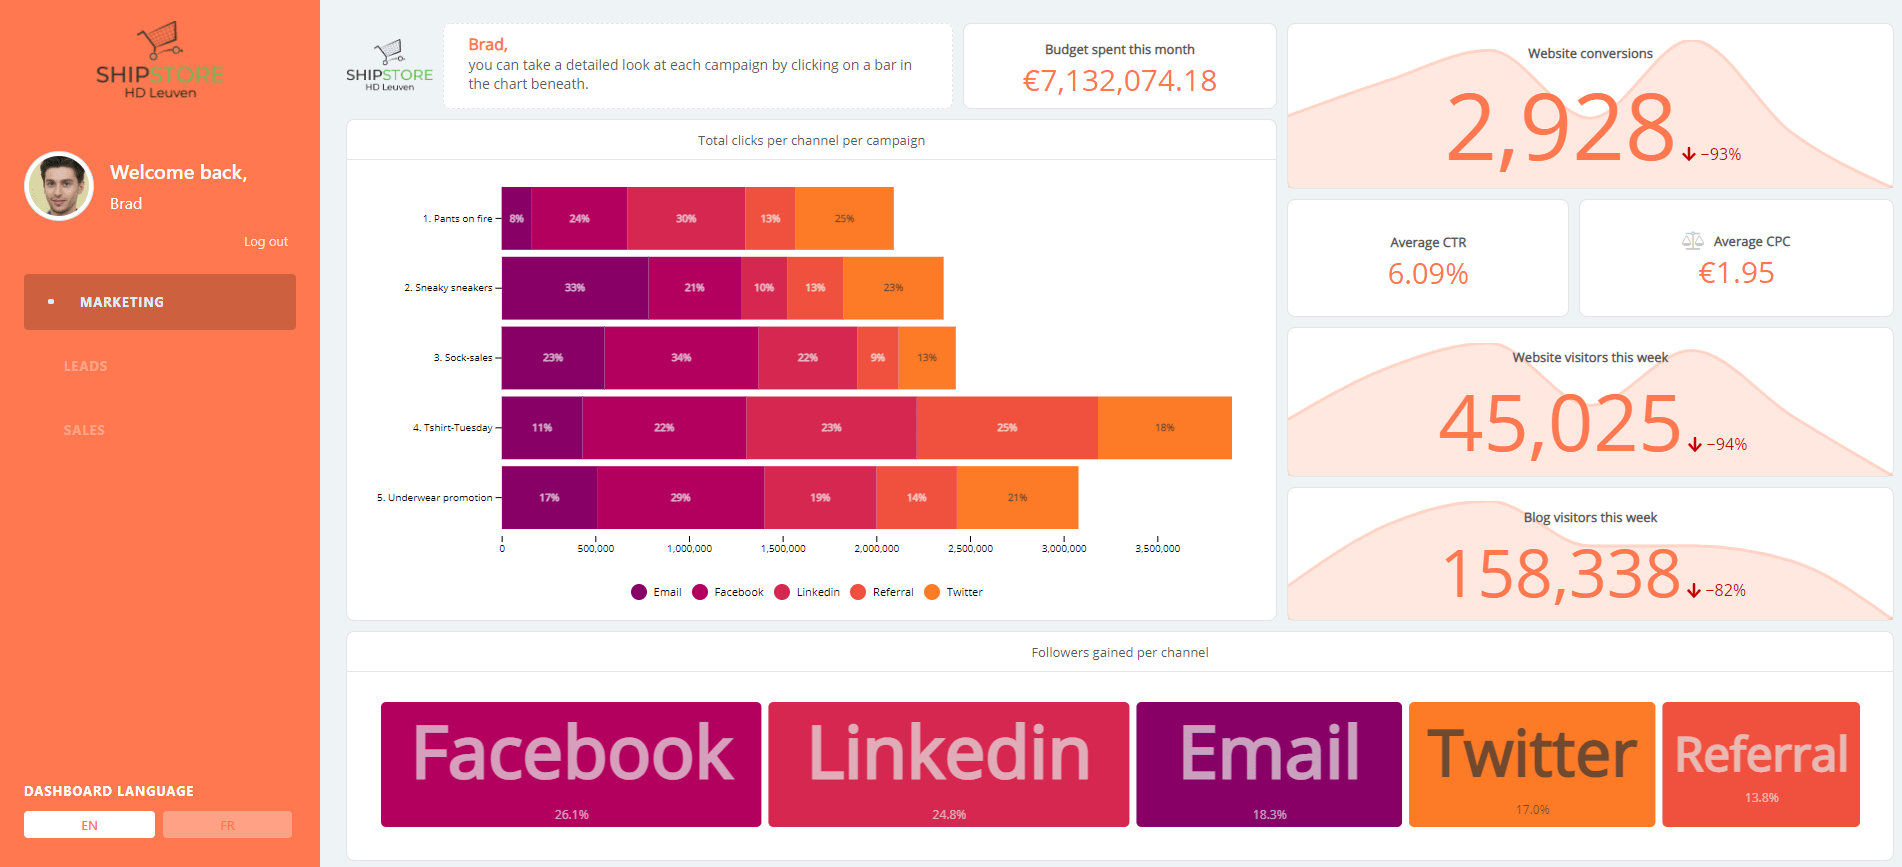
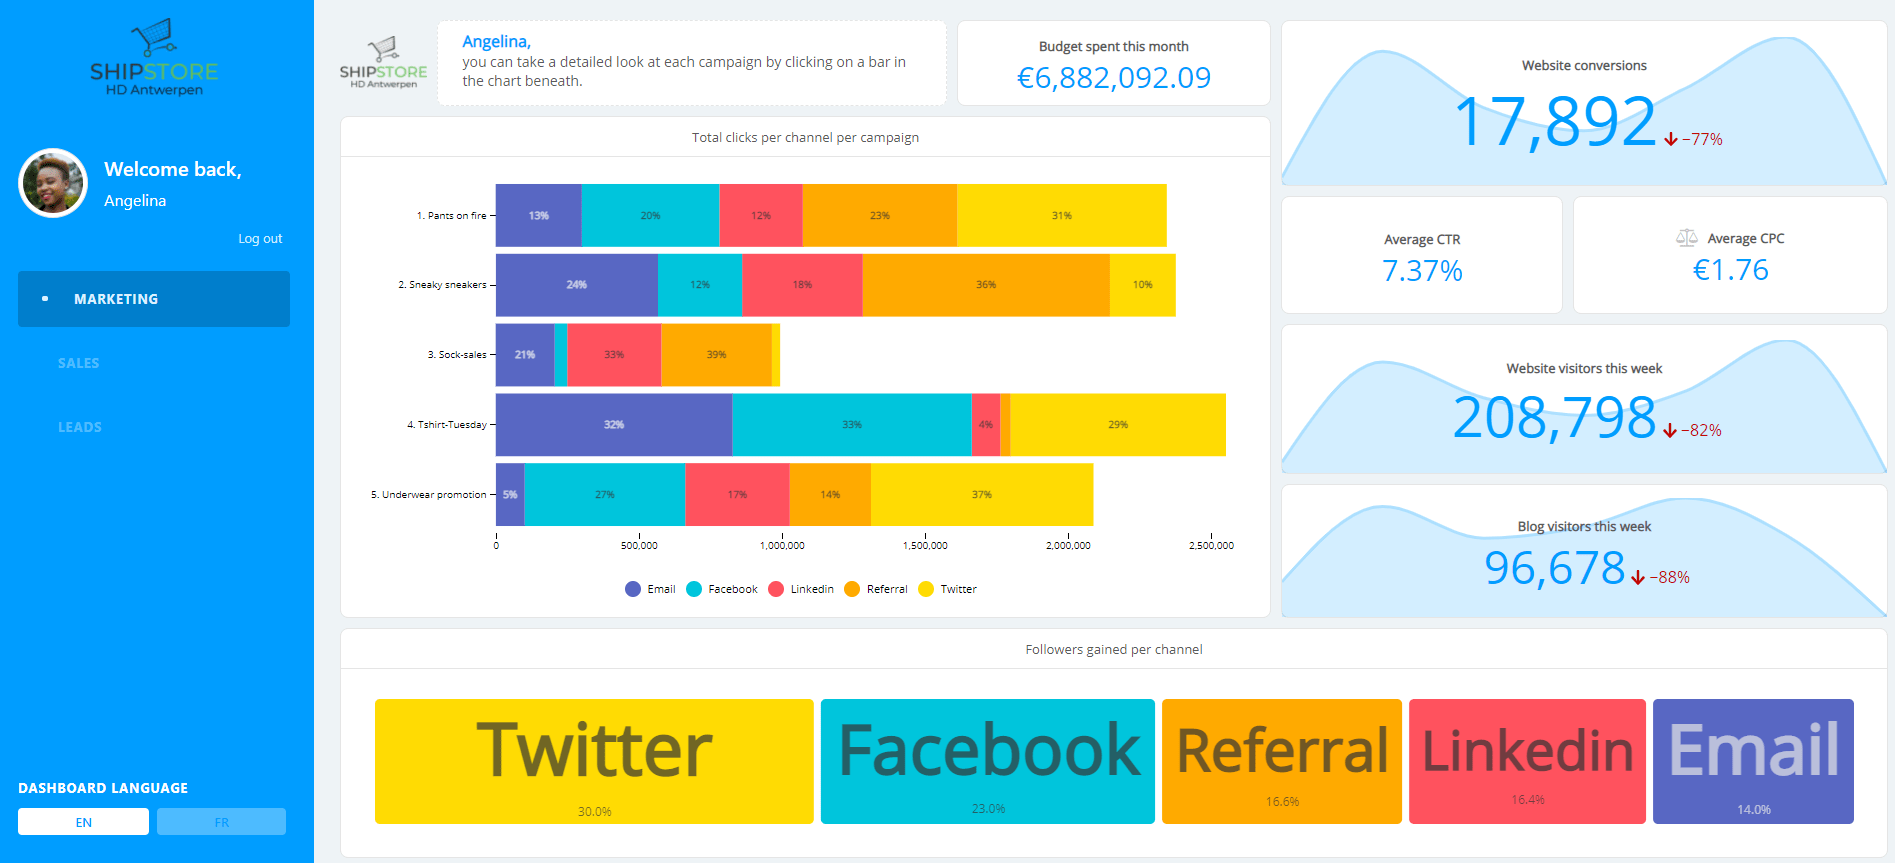
Something else you can optionally add here which is pretty cool is a CSS property. This would allow you to define custom look and feel for each user (or user group). For the same application, this is what the Marketing Dashboard could look like for Angelina vs Brad:
Step 2: Embed
We jumped ahead a bit there. We created SSO tokens for end users but we haven’t yet actually embedded the dashboards into the application. Let’s have a look at that. First up, you should install and import the Web component.
import '@cumul.io/cumulio-dashboard';After importing the component you can use it as if it were an HTML tag. This is where you will embed your dashboards:
<cumulio-dashboard dashboardId="< a dashboard id >" dashboardSlug="< a dashboard slug >" authKey="< SSO key from step 1 >" authToken="< SSO token from step 1 >">
</cumulio-dashboard>
Here you will have a few options. You can either provide the dashboard Id for any dashboard you want to be embedding, or you can provide the dashboard slug which we defined in the Integration setup (which is why I highly recommend this, it’s much more readable doing it this way). For more detailed information on how to embed dashboards you can also check out our developer documentation.
A nice way to do this step is of course just defining the skeleton of the dashboard component in your HTML file and filling in the rest of it from the client side of your application. I’ve done the following, although it’s of course not the only way:
I’ve added the dashboard component with the ID dashboard:
<cumulio-dashboard id="dashboard"></cumulio-dashboard>Then, I’ve retrieved this component in the client code as follows:
const dashboardElement = document.getElementById("dashboard");Then I request the SSO token from the server side of my application which returns the required key and token to add to the dashboard component. Let’s assume we have a wrapper function getDashboardAuthorizationToken() that does this for us and returns the response from the server-side SSO token request. Next, we simply fill in the dashboard component accordingly:
const authorizationToken = await getDashboardAuthorizationToken();
if (authorizationToken.id && authorizationToken.token) { dashboardElement.authToken = authorizationToken.token; dashboardElement.authKey = authorizationToken.id; dashboardElement.dashboardSlug = "marketing|sales|leads";
}
Notice how in the previous steps I chose to define slugs for my dashboards that are a part of this integration. This means I can avoid looking up dashboard IDs and adding dashboardId as one of my parameters of the dashboardElement. Instead I can just provide one of the slugs marketing, sales or leads and I’m done! Of course you would have to set up some sort of selection process to your application to decide where and when you embed which dashboard.
That’s it folks! We’ve successfully created an Integration in Cumul.io and in a few lines of code, we’ve been able to embed its dashboards into our application ???? Now imagine a scenario where you have to maintain multiple applications at once, either for within the same company or separate ones. Whatever your scenario, I’m sure you can imagine how if you have a number of dashboards where each of them have to go to different places and each of them have to have different access rights depending on where they are and on and on we go.. How it can quickly get out of hand. Integrations allow you to manage this in a simple and neat way, all in one place, and as you can see, mostly from within the Cumul.io UI.
There’s a lot more you can do here which we haven’t gone through in detail. Such as adding user specific custom themes and CSS. We also didn’t go through how you would set parameters and filters in dashboards, or how you would use them from within your host application so that you have a multi-tenant setup. Below you can find some links to useful tutorials and documentation for these steps if you are interested.