What is a 404 Page
Table of Contents
- 1 What is a 404 Page
- 2 The Anatomy of a Good 404 Page
- 3 How to Edit a 404 Page in WordPress
- 4 Edit a 404 Page Through an FTP Client
- 5 Edit a 404 Page Through Theme Editor (Not Recommended)
- 6 Edit a 404 Page Through Page Builders
- 7 404 Page WordPress Plugins
- 8 Use a page builder or do it through your theme.
- 9 Over to You
A 404 page, often referred to as a “404 error page” or “Page Not Found” error, is a standard web response that users encounter when they attempt to visit a URL that does not exist on the server. This error is a part of the HTTP status code system, where the first digit “4” represents a client error. The code “404” specifically means that the server is operational and can respond to requests but the specific page requested by the client cannot be found.
Importance of a Custom 404 Page
A well-designed 404 page is crucial for several reasons:
- User Experience (UX): A custom 404 page can provide a much better user experience than a generic server-generated 404 page. By offering links to popular sections of your site or a search function, you help users find what they were looking for, reducing frustration and bounce rates.
- Branding: Custom 404 pages can be designed to match your website’s theme and style, reinforcing your brand identity even in error situations.
- Navigation: By including navigation options, you give visitors an easy way to continue browsing your site instead of leaving.
- SEO: While a 404 page itself does not directly affect SEO, properly managing broken links and guiding users to relevant content helps maintain site engagement, which is beneficial for search engine ranking.
Key Elements of an Effective 404 Page
- Friendly and Clear Message: Inform the user that the page they are looking for cannot be found in a tone that matches your site’s branding.
- Search Box: Including a search box can help users find alternative content or get back on track.
- Navigation Links: Provide links to your homepage, popular products, or content to facilitate easy navigation.
- Visual Design: Use graphics or images that align with your brand, possibly adding a light touch of humor or creativity to lighten the mood.
- Contact Information: Offer a way for users to report broken links or seek further assistance.
Implementing a Custom 404 Page in WordPress
WordPress allows for easy customization of the 404 page through your theme:
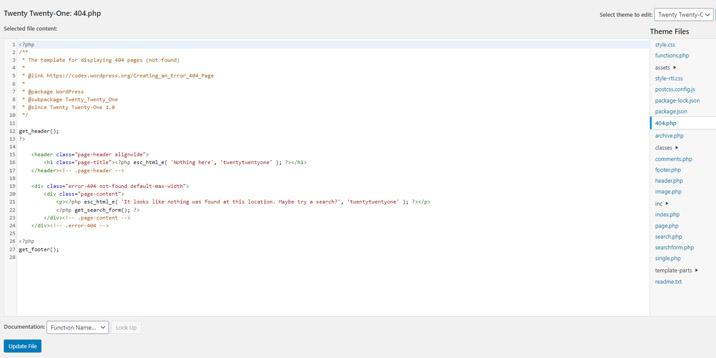
- Edit Your Theme’s 404.php File: If your WordPress theme comes with a
404.phpfile, you can edit this file directly to customize the message and layout of your 404 page. - Create a 404 Page if It Doesn’t Exist: If your theme does not have a
404.phpfile, you can create one by copying theindex.phpfile from your theme’s directory, renaming it to404.php, and then customizing it. - Use Plugins: There are WordPress plugins available that allow you to design custom 404 pages without directly editing theme files. This is especially handy for users who are not comfortable with coding.
Best Practices
- Do Not Redirect All 404s to the Homepage: Automatically redirecting users can create confusion. It’s better to show a custom 404 page that helps them find what they were looking for.
- Monitor 404 Errors: Use tools like Google Search Console to monitor 404 errors on your site and fix broken links.
- Keep It Simple: While creativity is encouraged, ensure the page is not overwhelming and the message is clear.
In conclusion, a custom 404 page is an essential component of any website, turning potential frustration into an opportunity for engagement. By incorporating thoughtful design and helpful resources, you can enhance the user experience even in situations where content cannot be found.
You click on a link or type in an URL address in the browser tab. Next, the browser starts requesting data from the server hosting the website you want to visit. This is a basic explanation of Internet browsing. The information exchange between browser and server implies, amongst many others, a few status codes. In addition, there are statuses to describe the webpage redirection, the client or server errors, or informational purposes.
All the status codes with form 4XX regard client errors. For example, 403 Forbidden is when the server understands the browser’s request but refuses to provide the data. By far, the 404 page is the most famous status code. You get a 404 page when you click on a broken link, type in a wrong URL driving to an inexistent webpage, or if the resource you asked for hasn’t ever existed.
Even essential sites, like huge magazine news or heavily visited stores, might contain a 404 Page error. Of course, it’s unavoidable, but you should know how to pass over the embarrassing situation. Hence, it would help if you did everything possible to create a good-looking 404 error page for your site.
The Anatomy of a Good 404 Page

Some websites earn a backlink and public recognition by mentioning in lists featuring cool 404 pages. Site visitors appreciate a good design or a humorous message on a 404 page. This should convince you that a good-looking 404 error page is a priority for your online businesses. Here is what a good 404 page should include:
● The error message – Users should realize an issue from the moment they land on a 404 page. Make it explicit so that everyone understands.
● Links to your content – You don’t want users to abandon your site. Provide them links to relevant content. Be it your best content or something related to the missing page, it’s totally up to you. What matters is keeping them on your site.
● Apologies – Let people know that you are sorry for their inconvenience. Use humor if possible – it’s the best method to encourage them to give your site a second chance.
● Good design – People are disappointed when they land on a 404 page and tend to overreact. A stunning piece of design, in addition to engaging content, may change their mind. Do your best to craft an excellent 404 page.
How to Edit a 404 Page in WordPress
Luckily, we have various options to edit a 404 page in WordPress. The most experienced users may go for editing the 404.php file. This is the file responsible for displaying the 404-error page. Web admins who prefer using a page builder like Elementor may create a 404 page. Finally, a few plugins to make 404 pages are available for those lacking coding skills. Let’s dissect all the ways to create and edit a 404 page in WordPress.
Edit a 404 Page Through an FTP Client
A good rule of thumb is to perform a backup copy of your site before editing the code. Don’t ever skip this step – in most cases, you won’t need a site backup, but bad things happen when unprepared. So do that backup to rest assured!
Let’s suppose that you performed a complete site backup and you are ready to dive deeper into the matter. Use the FTP client of your choice and connect to the site localhost. Search for a file called 404.php file – it’s the file responsible for displaying the 404-error webpage. Usually, WordPress themes have a dedicated 404.php file, but some might miss this file. Double-check if your theme code includes a 404.php file. If your theme doesn’t have a 404.php file, you will have to build one. Create a new file and copy the following lines of code:
Edit a 404 Page Through Theme Editor (Not Recommended)
A significant number of articles related to editing a 404 page in WordPress mention the theme editor as a viable solution. It’s not! Although it is convenient and straightforward to edit the site code directly from the WordPress admin dashboard, it’s hazardous and may end up a fiasco. Not to mention, it’s not professional at all to edit the site while it’s online and accessible to everyone. Besides, your editing disappears once you update the theme (unless you use a child theme).
Edit a 404 Page Through Page Builders
This method is safe, simple, and effective. You are probably familiar with page builders like Elementor, Divi Builder, Beaver Builder, SeedProd, or Themify Builder. Which you choose isn’t relevant, as long as you have a good grasp on it. These builders let you create an excellent 404 page without writing a single line of code. This is the best solution if you are worried about pasting code snippets into your site files.
Check the blog and the documentation of your favorite page builder, and, most likely, you will find a tutorial explaining how to create a 404 page. In addition, some page builders have dedicated templates for 404 pages. Choose a template and personalize it to match your brand.
404 Page WordPress Plugins
You don’t have many alternatives to create a 404 page with a dedicated plugin. However, a few plugins deserve your attention. Their capital advantage is that you don’t have to write code to create and edit 404 pages. The plugins are simple, effective, and lightweight.
404page
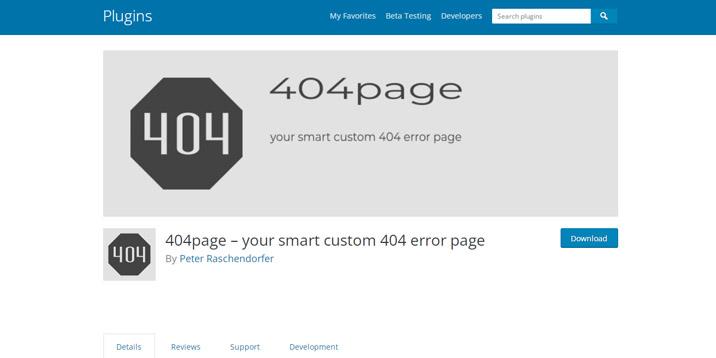
You may be tempted to believe that you have to be a coder to create a good 404 error page. Thanks to this plugin, everyone can conceive an attractive 404 error page. Besides, the 404page plugin isn’t as complex as page builders are. You focus on your final product – a good 404 error page.
Install and activate the plugin. Next, create a 404 page the same as you do the rest of the pages on your site. From your WordPress admin dashboard, go to Appearance > 404 Error Page and choose the page you have just built to be your site custom 404 error page.
This plugin doesn’t allow redirecting webpages; it just tells the search bots that the webpage is missing. 404page is a personal project of a developer, so there is no agency behind this plugin. Take into account that the plugin has 100,000 active installs and an almost perfect rating – 4.9 stars out of 5. Under these circumstances, the plugin developer deserves our appreciation!
All 404 Redirect to Homepage & Broken Images Redirection
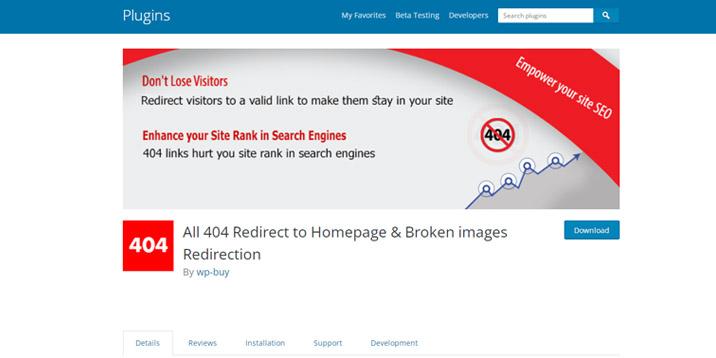
The name of the plugin isn’t quite impressive, but it’s highly suggestive. The plugin handles the 404 Page errors differently than the previous alternative. Instead of delighting visitors with a well-designed 404 page, this plugin redirects all 404 errors to the homepage or other webpage. The biggest advantage of this plugin is that you have control over the broken links on your site. Additionally, you may use this plugin to redirect users. For example, instead of letting people visit an un-updated blog post, use this plugin to drive them to the updated version.
Colorlib 404 Customizer
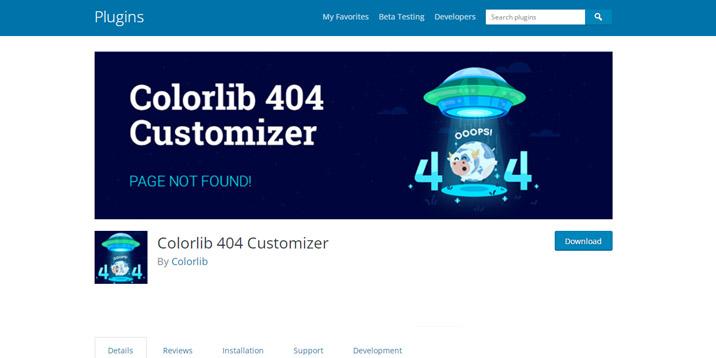
This plugin is simple to use and genuinely helps you create engaging 404 pages. It comes with professionally crafted 404 templates that you can customize to suit your needs. Colorlib 404 Customizer plugin allows inserting social media buttons, changing the background color or image, and configuring the text headings. More advanced users can add custom CSS code. The plugin is open-source, so you can contribute to bettering the plugin.
Use a page builder or do it through your theme.
If you use a page builder already, you’ll already have the option for customizing your 404 through it. Pretty much every page builder allows you to edit your 404 page. Here’s a list of plugins we’re confident that you can do it in:
● Breezy
● Elementor
● Beaver Builder
● Divi Builder
● Site Origin
If you are using a theme such as OceanWP, GeneratePress, or Astra, you can do it through their theme options. You’ll get a finished excellent looking 404 page if you import demo content. The only downside of importing demo content and using pre-built designs is that your website will more or less look precisely like the Demo. Take, for example, this website and the Astra demo. Everybody who has looked through Astra’s library of starter sites will quickly recognize that the website owners haven’t created it themselves. This might harm how much users trust your site.
On the bright side, Astra, OceanWP, and the other themes with 500.000+ users extend their starter site library more every month.
Over to You
You now have a clear idea about how to edit a 404 page in WordPress. There are many solutions to do it, and you should select the one suitable for your skills and needs. What matters is having an exciting 404 error page to delight your viewers. The method and tools you use to design and implement that 404 page don’t concern your customers. You don’t have any excuse to lack an excellent 404 error page! Go to the drawing board and start building a custom error page!
When it comes to creating a website, one of the most important aspects to consider is the user experience. This includes ensuring that your visitors can easily navigate through your site and find the information they are looking for. However, there are times when things don’t go as planned and visitors end up on a page that doesn’t exist – the dreaded 404 error page.
A 404 error page is displayed when a visitor tries to access a page on your website that doesn’t exist. This can happen for a variety of reasons, such as a mistyped URL or a broken link. While it may seem like a minor issue, a poorly designed 404 page can leave a negative impression on your visitors and make them more likely to leave your site.
Fortunately, if you’re using WordPress to power your website, customizing your 404 page is a relatively simple task. By creating a custom 404 page that reflects your brand and provides helpful information to your visitors, you can turn a potentially frustrating experience into a positive one.
Here are some tips for customizing your 404 page in WordPress:
1. Choose a user-friendly design: Your 404 page should be easy to navigate and visually appealing. Consider using a clean layout with clear navigation options to help visitors find their way back to the main site.
2. Add helpful information: Instead of just displaying an error message, consider adding some helpful information to your 404 page. This could include links to popular pages on your site, a search bar, or a contact form for visitors to report the issue.
3. Reflect your brand: Your 404 page is an opportunity to showcase your brand’s personality and style. Consider incorporating your brand colors, logo, and messaging to create a cohesive experience for your visitors.
4. Use humor (if appropriate): Adding a touch of humor to your 404 page can help lighten the mood and make the experience more enjoyable for visitors. Just be sure to keep it tasteful and in line with your brand’s tone.
5. Test and optimize: Once you’ve customized your 404 page, be sure to test it on different devices and browsers to ensure it looks and functions correctly. You can also use tools like Google Analytics to track how visitors interact with your 404 page and make adjustments as needed.
By taking the time to customize your 404 page in WordPress, you can turn a potential negative experience into a positive one for your visitors. With a user-friendly design, helpful information, and a touch of personality, you can create a 404 page that reflects your brand and keeps visitors engaged on your site.