Integrating MailChimp with WordPress is a powerful way to enhance your email marketing efforts, allowing you to capture subscriber details directly from your website and automatically sync them with your MailChimp account. This integration facilitates the growth of your mailing list, improves audience engagement, and streamlines your marketing strategies. Below is an in-depth guide on how to integrate MailChimp with your WordPress website effectively.
Step 1: Sign Up for MailChimp
Table of Contents
- 0.1 Step 1: Sign Up for MailChimp
- 0.2 Step 2: Create a MailChimp API Key
- 0.3 Step 3: Choose a WordPress Plugin for Integration
- 0.4 Step 4: Install and Activate Your Chosen Plugin
- 0.5 Step 5: Configure the Plugin with Your MailChimp API Key
- 0.6 Step 6: Create and Customize Your Forms
- 0.7 Step 7: Monitor and Adjust
- 0.8 Conclusion
- 1 MC4WP: MailChimp for WordPress
- 2 Set Up a Mailchimp Account
- 3 Create an Email List in Mailchimp
- 4 How to Use MailChimp with WordPress Plugin
- 5 Create or Add Signup Forms to Your WordPress Website
- 6 Creating Custom Style for Mailchimp Signup Forms
- 7 MailChimp WordPress Plugins
- 8 Frequently Asked Questions
Before integrating MailChimp with WordPress, you need to have a MailChimp account. If you haven’t already, visit the MailChimp website and sign up. Choose a plan that suits your needs; they offer a range of options, including a free tier for beginners or small businesses with fewer subscribers.
Step 2: Create a MailChimp API Key
- Log in to MailChimp: Access your MailChimp account.
- Navigate to Your Profile: Find your profile or account name, usually located in the bottom left corner, and click on it.
- Access Extras: In the menu, select “Extras” and then “API keys”.
- Create an API Key: Click on the “Create A Key” button. MailChimp will generate a new API key for you. Copy this API key as you will need it to integrate MailChimp with WordPress.
Step 3: Choose a WordPress Plugin for Integration
There are several WordPress plugins available for integrating MailChimp, but some of the most popular include:
- MailChimp for WordPress (MC4WP): Highly recommended for its ease of use and flexibility.
- Easy Forms for MailChimp: Another user-friendly option for integrating MailChimp forms.
- Bloom by Elegant Themes: Offers design-focused email opt-in forms with MailChimp integration.
Step 4: Install and Activate Your Chosen Plugin
- Go to Your WordPress Dashboard: Navigate to “Plugins” > “Add New”.
- Search for the Plugin: Type the name of your chosen plugin in the search bar.
- Install and Activate: Click “Install Now” and then “Activate” once the installation is complete.
Step 5: Configure the Plugin with Your MailChimp API Key
After activating the plugin, you need to connect it to your MailChimp account using the API key:
- Find the Plugin Settings: This is usually under “MailChimp for WP” if you’re using MC4WP, or similarly named sections for other plugins.
- Enter Your MailChimp API Key: Paste the API key you generated earlier into the designated field.
- Save Changes: Ensure you save your settings to establish the connection.
Step 6: Create and Customize Your Forms
With the plugin now connected to MailChimp, you can create and customize your subscription forms:
- Access the Form Builder: Utilize the plugin’s form builder to create your email opt-in forms.
- Customize Your Form: Add fields, customize the layout, and style your forms to match your website’s design.
- Implement Your Form: Most plugins provide shortcodes or widgets to easily place your forms on your site, including in posts, pages, or sidebar widgets.
Step 7: Monitor and Adjust
After your forms are live, monitor the performance through your MailChimp account and the WordPress dashboard. Adjust your forms and marketing strategies based on subscriber behavior and conversion rates.
Conclusion
Integrating MailChimp with WordPress is a straightforward process that can significantly benefit your email marketing strategy. By choosing the right plugin, connecting it via API, and carefully crafting your subscription forms, you can efficiently grow your mailing list and engage with your audience. Always ensure to stay compliant with GDPR and other relevant privacy regulations, providing clear consent options for your subscribers.
MC4WP: MailChimp for WordPress
Mailchimp for WordPress is a plugin that can be added to your WordPress website to connect with Mailchimp, better manage your marketing campaigns, and add users from your websites straight to Mailchimp’s lists.
MC4WP allows users to add forms and custom signup methods for Mailchimp to your WordPress site. Users will need controlling access to a Mailchimp account to get started.
Set Up a Mailchimp Account
To use Mailchimp for WordPress, you must sign up for a Mailchimp account. New users can register on the Mailchimp website, opting for a free or paid version.
If you’ve already got a Mailchimp account confirmed and ready to go, you can log in and skip ahead to the next section.
Before Signing Up for Mailchimp
What you will need for the signup process:
- A browser that meets minimum requirements for Mailchimp to work correctly.
- An email address to be used as the primary communication method with your account.
- A unique Mailchimp username.
- A physical mailing address to be in all emails (can be a P.O. Box).
- Though not required to sign up, a credit card is the only payment accepted for subscription plans and add-ons.
Using Mailchimp to spam end users is against their regulations, and suspicion of spam activities will result in account suspension.

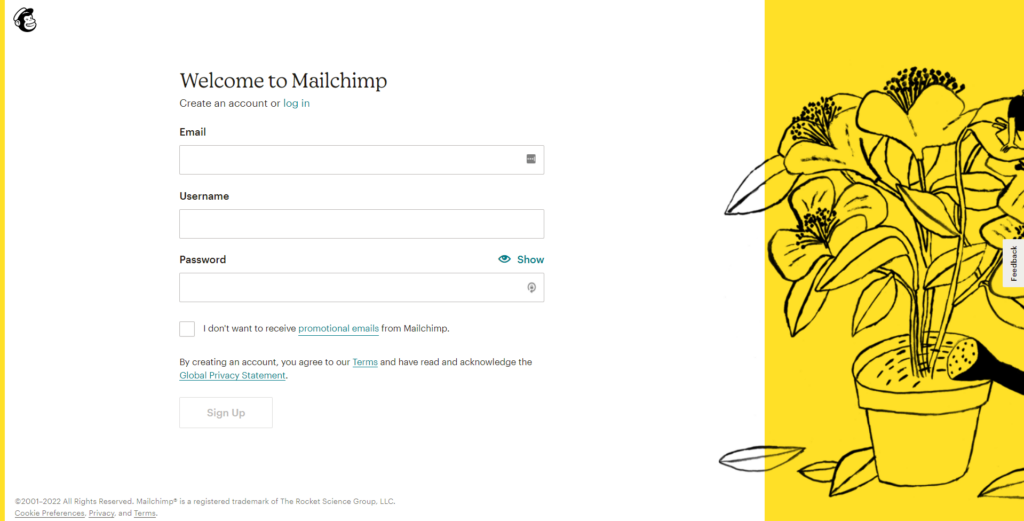
Sign Up for a Mailchimp Account
Creating a Mailchimp account is very simple:
- Visit Mailchimp to sign up for an account.
- Enter your email, a unique username, and password, and then click “Sign Up.”
Note: Emails that start with role-based names like “admin” or “security” get automatically blocked from signing up with Mailchimp.
- Successful registration will display a confirmation message and send an activation email to the email you entered.
- Check your email for the account activation message from Mailchimp.
Note: check your spam folder and review Mailchimp’s activation email troubleshooting tips for more ideas.
Confirm Your Mailchimp Account
Before Mailchimp allows you to use all its features, you must confirm your email address and complete account activation.
- Locate the account activation email from Mailchimp and open it
- Click the “Activate Account” link in the email and allow it to open your browser
- Mailchimp will require you to prove your humanity with a button click to complete the setup.
Suppose you use the Mailchimp application or integrate with WordPress without confirming your email. In that case, you may run into functionality issues that are not explained clearly, including the inability to connect Mailchimp for WordPress to your Mailchimp account.
Mailchimp Account Setup
The first time logging in to Mailchimp, a prompt will have you answer basic questions to complete the setup. The information Mailchimp requires includes:
- Name (for your profile that can access multiple Mailchimp accounts)
- Email Address to contact you at
- Company or Organization Details for content assistance (and targeted ads)
- Website URL
- A physical address is legally necessary for any email sent (can be a P.O. Box)
Take a peek at their signup process to learn more about how Mailchimp uses your information.
Confirm Your Mailchimp Plan
Mailchimp automatically starts everyone off on the Free version, and a free plan is all you need to connect your Mailchimp account to your Mailchimp for WordPress Plugin. If you seek a specific functionality from Mailchimp not available in the Free option, you may need to consider a Mailchimp paid plan.
Create an Email List in Mailchimp
If you did not create or import an email list during setup, you need to create new email lists for your marketing campaigns.

How to Use MailChimp with WordPress Plugin
Before you can use the MC4WP plugin, it needs to connect to your Mailchimp account. Like many plugins, a connection to an external application like Mailchimp uses an API key.
An admin account can set up a Mailchimp account with your WordPress site several ways, but every method requires the use of a Mailchimp API Key.
Create a Mailchimp API Key
You will need to log in to your Mailchimp account to access the area where you create and manage your API Keys.
- With a successful log-in, go to Account > Extras > API Keys.
- Create a New API Key or copy an existing API Key.
- Copy the API Key for your WordPress site or keep this information handy.
Once connected, the API Keys area of Mailchimp will also be where you confirm your connection status to your WordPress site. You can also toggle off the API Key or create other types of Keys for development.
Use the API Key to Connect Mailchimp to WordPress
There are two ways to add the Mailchimp API Key to your WordPress website. If you are not a developer or still getting comfortable with editing code, it is easier to use the Mailchimp for WordPress plugin to set the API.
Add the Mailchimp API Key to the Mailchimp for WordPress Plugin
To configure the plugin on your website to communicate with Mailchimp, you must access the WordPress admin control panel.
- Log in to your WordPress admin dashboard.
- If you haven’t already done so, add the Mailchimp for WordPress plugin MC4WP and activate it.
- Open MC4WP and enter your API key in the input field.
Adding the Mailchimp API Key add a PHP Constant
If you are comfortable altering the code of your website, you also have the option to define a Mailchimp API through the definition of the MC4WP_API_KEY PHP Constant.
define(‘MC4WP_API_KEY’, ‘your-api-key-here’);
The PHP Constant needs defining in a loaded area like your functions.php file. If you’re unfamiliar with editing a functions.php file, see our Beginner’s Guide on how to Edit Functions.php in WordPress.

Create or Add Signup Forms to Your WordPress Website
There are essentially three types of Mailchimp signups to create and add to your WordPress site, and those include a popup, an inline-block, and sidebar signup. The signup form style best for your site will depend on your marketing and user experience goals.
Without a paid subscription, you get limited to using the Mailchimp block or custom code. Code Snippets can be accessed using HTML blocks in the visual builder. Mailchimp offers the opportunity to create a form on their site and copy and paste the form code into your WordPress blocks for use.
Mailchimp Forms
Before you can sign users up for marketing communications, a form is required to collect their information. Mailchimp comes with some mobile-optimized default forms, and admins can update form fields to match your preferred labels.
Mailchimp forms are single opt-in by default. People who subscribe using your forms get immediately added to the Mailchimp list.
Double opt-in signup through Mailchimp requires email verification before users get automatically added to a list. The double opt-in is especially handy for websites with many unsubscribes, complaints, or bounces.
Add a Mailchimp Signup in a Popup
Mailchimp has the functionality to be used in a popup window. If you want your guests to get a popup invitation related to a Mailchimp campaign,
Where to Paste MailChimp Popup Code
Mailchimp offers additional functionality through the use of code snippets. For code snippets to work correctly, they will need to be in a file that gets loaded, like a theme’s functions.php file or a specified code block.
Add an Inline Mailchimp Signup
WordPress.com offers a free Mailchimp block in the default visual block editor. You can add the Mailchimp block to any post or page by selecting it from the list of available blocks.
Some plugins also have a built-in Mailchimp visual block, such as Jetpack version 7.1 or higher. Any plugin that offers integration with Mailchimp through WordPress is accessing your Mailchimp API Key to help build your pages and run your campaigns.
The sidebar and footer can house various widgets for custom work in a standard WordPress theme. To use a custom Mailchimp signup in one of these areas, create a dedicated “Mailchimp for WP Form” widget.
A developer can build a custom widget using the Mailchimp API Key created, or developers can save time using the “Mailchimp for WordPress” plugin.
- Log in to your WordPress Admin dashboard and ensure the MC4WP plugin is active.
- Navigate to Appearance > Widgets and select Mailchimp for WP Form widget.
- Drag the widget into the desired widget area.
- Select the form you would like to use from your Mailchimp options and give it a unique Title.
- Save your changes
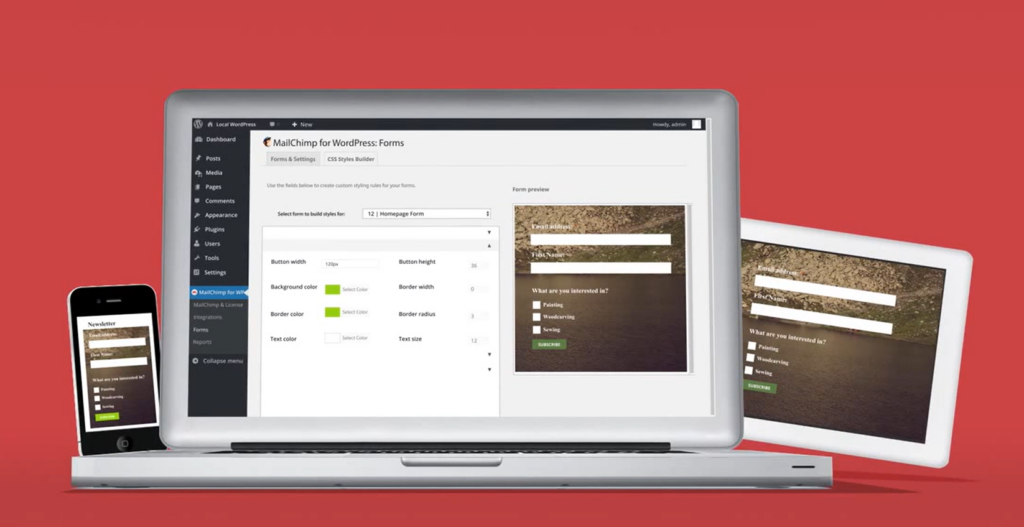
Your form should be visible in the sidebar where it is present. If you want to customize or create a unique format, you can edit the signup forms in the MailChimp For WordPress form settings.

Creating Custom Style for Mailchimp Signup Forms
If you want to customize your Mailchimp forms in WordPress, Mailchimp provides a reference table of CSS Selectors to call. If your visual builder has issues overwriting the form code, you may need to add custom code to your site that calls the CSS Hooks.
If there is an absolute need to use custom style code, it may be best to code your forms from scratch or have a professional from WP Buffs do it for you.
MailChimp WordPress Plugins
In addition to Mailchimp integrating with WordPress directly, several plugins are available to automate your marketing with your website.
The MC4WP plugin has base forms available for use, but WordPress also allows the environment to integrate with the following plugins:
- Default WordPress Forms
- Contact Form 7
- WooCommerce
- Gravity Forms
- Ninja Forms 3
- WPForms
- BuddyPress
- MemberPress
- Events Manager
- Easy Digital Downloads
- Give
- UltimateMember
It also offers the following add-ons and integrations:
- Google reCAPTCHA
- WPBruiser anti-spam
- Mailchimp for WordPress Premium
- Mailchimp Top Bar
- Mailchimp ACtivity
- Boxzilla Pop-ups
More on Managing Email Campaigns from WP Buffs
Mailchimp can go even further with automation programs like Zapier or in the hands of a quality WordPress developer. Access to an API Key will give a good developer the ability to automate a large portion of your marketing campaigns.
Developers and programs can access that API to integrate your favorite plugins and programs.
If you would like to hear more from our experts about email deliverability, open rates, and personalization from the WP Buffs, listen to our Podcast with special guest Rene Morozowich to do just that. You can also subscribe to our newsletter to keep updated on the latest from WP Buggs.
If WP Buffs has caught your attention and you’re interested in finding out more about our WordPress services, contact us. Our team of skilled professionals can decrease the stress around growing your online presence.
Frequently Asked Questions
How Do I Use MailChimp in WordPress?
If you are struggling with how to use mailchimp with wordpress, all you need is a Mailchimp account and WordPress website. With a successful Mailchimp account creation, you can connect it to your WordPress site using the Mailchimp API Key, the WordPress admin dashboard, and some development or the Mailchimp for WordPress plugin (MC4WP).
Can You Connect WordPress to MailChimp?
WordPress connects to Mailchimp using a Mailchimp API Key created using Mailchimp. Even after you install Mailchimp for WordPress or make use of built-in Mailchimp blocks, it requires a unique API Key created from your Mailchimp account to work.
Is MailChimp free with WordPress?
Mailchimp and WordPress are separate companies that control unique products. Mailchimp’s starter account is at no cost to everyone, as is the use of the WordPress web development platform. The Mailchimp for WordPress (MC4WP) plugin is free and can easily connect the Mailchimp services to your WordPress website.
Is MailChimp a plugin for WordPress?
Mailchimp is a marketing software used with WordPress to streamline your website marketing campaigns. Mailchimp can be connected with WordPress using a variety of plugins, but the most popular option is to use Mailchimp for WordPress (MC4WP). MC4WP is a free WordPress plugin that makes connecting your Mailchimp account and your WordPress websites quick and easy.
Mailchimp is a powerful marketing campaign tool that allows users to easily manage their email subscribers. However, its functionality extends beyond just emails, and integrating it with your WordPress site can result in streamlined marketing for your business.
One of the top WordPress email plugins mentioned on the WP Buffs blog is Mailchimp for WordPress (MC4WP). This plugin allows users to connect their Mailchimp account to their WordPress site, better manage their marketing campaigns, and add users from their website straight to Mailchimp’s lists.
To use Mailchimp for WordPress, you must first sign up for a Mailchimp account. You can choose between a free or paid version, and the signup process requires a browser that meets minimum requirements, an email address, a unique username, a physical mailing address, and a credit card for subscription plans and add-ons. It’s important to note that using Mailchimp to spam end users is against their regulations and can result in account suspension.
Once you have a Mailchimp account, you can create an email list for your marketing campaigns. You will also need to create an API key to connect your Mailchimp account to your WordPress site. This can be done by logging into your Mailchimp account and navigating to the API Keys section.
There are two ways to add the Mailchimp API key to your WordPress site – through the Mailchimp for WordPress plugin or by defining the MC4WP_API_KEY PHP constant in a loaded area like your functions.php file.
Once connected, you can create or add signup forms to your WordPress site. There are three types of Mailchimp signups – popup, inline block, and sidebar signup. The style you choose will depend on your marketing and user experience goals.
Mailchimp forms are single opt-in by default, but you can also enable double opt-in signup, which requires email verification before users are added to a list. This is useful for websites with many unsubscribes, complaints, or bounces.
If you want to customize your Mailchimp forms in WordPress, Mailchimp provides a reference table of CSS selectors to call. However, if you need custom style code, it may be best to have a professional from WP Buffs do it for you.
In addition to integrating with WordPress directly, several plugins are available to automate your marketing with your website. These include default WordPress forms, Contact Form 7, WooCommerce, Gravity Forms, Ninja Forms 3, WPForms, BuddyPress, MemberPress, Events Manager, Easy Digital Downloads, Give, and UltimateMember. There are also add-ons and integrations like Google reCAPTCHA, WPBruiser anti-spam, Mailchimp for WordPress Premium, Mailchimp Top Bar, Mailchimp Activity, and Boxzilla Pop-ups.
Mailchimp can also be used with automation programs like Zapier or in the hands of a quality WordPress developer. Access to an API key will give developers the ability to automate a large portion of your marketing campaigns.
If you’re interested in learning more about managing email campaigns or finding out more about WP Buffs’ WordPress services, you can listen to their podcast with special guest Rene Morozowich or subscribe to their newsletter. You can also contact WP Buffs for assistance in growing your online presence.


