Impress is a jQuery plugin that uses CSS3 functionality to create beautiful presentations. All modern browsers support the stunning visualizations created by this plugin.
Your Designer Toolbox
Unlimited Downloads: 500,000+ Web Templates, Icon Sets, Themes & Design Assets
Table of Contents

DOWNLOAD NOW![]()
Downloading and Setup
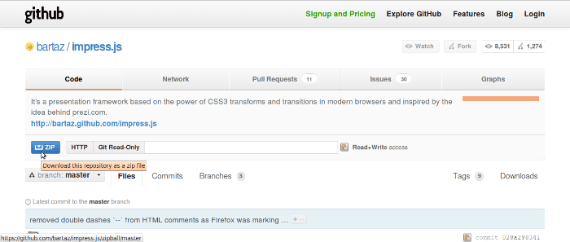
Download it by visiting github. Click on the zip button as shown in the following screenshot and Impress jQuery library will be downloaded with the examples.

Once the download is completed extract the zip folder and you will find sample files used for the Impress demo. Since our purpose is learning to use the plugin, we should start coding from scratch. First create a basic html document as shown in the code below and include impress.js file.
Basic HTML document with impress library included
<html lang="en"> <head> <title>Impress Demo</title> </head> <body> <script src="js/impress.js"></script> </body>
</html>
Initializing the library
In order to use Impress.js you need to use syntax defined by the library. The plugin searches for an element with the ID impress to create slides of your visualization. So we will create a div with the ID “impress”. Then you can initialize the library using the impress().init() function as shown in the code below.
<html lang="en"> <head> <title>Impress Demo</title> </head> <body> <div id="impress"> </div> <script type="text/javascript">impress().init();</script> <script type="text/javascript" src="js/impress.js"></script> </body>
</html>
Now we are ready to explore the powerful features of Impress.js. Lets move onto creating slides.
Lets Start Creating Slides
Impress powered slides can be anything and any size as long as it matches the criteria defined by the library. I have created 2 simple slides in the following code to get us started on our presentation.
<html lang="en"> <head> <title>Impress Demo</title> </head> <body> <div id="impress"> <div id="start"> Creating Stunning Visualizations Impress.js </div> <div id="slide2" data-x="-1200" data-y="0"> First Slide Moves From Left To Right Impress.js </div> </div> <script type="text/javascript">impress().init();</script> <script type="text/javascript" src="js/impress.js"></script> </body>
</html>
Explaining Slide Creation
- I have created two DIV elements with ID start and slide2. Those are going to be our first two slides. It’s important use meaningful ID values for the slides.
- If ID values are not provided, the library will auto include ID values as step-1,step-2 etc.. Once you run the presentation you will be able to see these ID values change on the URL when a slide transition is done.
- Value of class attribute is the only basic requirement for an element to be identified as a slide. Each of your slides should use the class value as step.
- In first slide we don’t have to define data-x and data-y values. It will show up in the default browser window with given size.
- If we specify data-x value that means the center of the slide will be positioned at the data-x value we have provided. Same goes for data-y value. So data-x of -100 and data-y of 300 means that center of the slide will be positioned at (-100px, 300px).
- In the above example, the second slide will move 1200px to the right of the screen on key press (space bar, tab, arrows)
- Also I have used some styles for each slide. It’s not mandatory and you can define your own styles as you wish. This example is built for 1024px,768px resolution.
- So open the HTML file in the specified resolution and press space bar to see the visualization in action.
Effects Supported In Impress Library
Currently there are several effects you can use in creating visualizations. If you are a CSS expert you will be able to find unlimited effects using these features supported by the library,
- data-x– Moves your slide in x-axis left->right or right->left direction depending on the current position. Example: If current x value is 100, data-x=’200′ will move right->left and data-x=’-200′ will move left->right
- data-y– Moves your slide in y-axis top->bottom or bottom->top direction depending on the current position. Example: If current y value is 100, data-y=’200′ will move bottom->top and data-y=’-200′ will move top->bottom
- data-z– Moves your slide in z-axis away from screen or towards the screen depending on the current position. Example: If current z value is 100, data-z=’200′ will move away from screen and data-z=’-200′ will move towards the screen.
- data-scale– Scales your slides in respect to the other slides. Example: If current scale value is 1, data-scale=’4′ will scale the slide 4 times bigger than other slides and data-scale=’-4′ will reduce the scale of the slide to 4 times smaller.
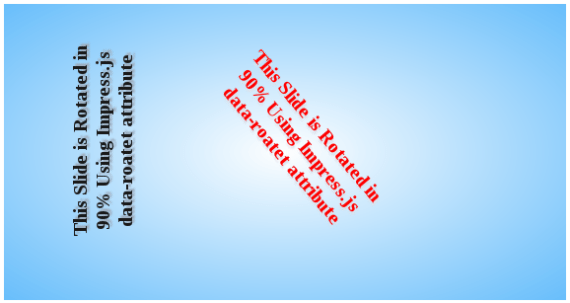
- data-rotate-x Rotates the slide around x axis by given degrees. Example: data-scale-x=’90’ will rotate the slide 90 degrees clockwise and data-scale-x=’-90′ will rotate the slide 90 degrees counterclockwise.
- data-rotate-y Rotates the slide around y axis by given degrees. Example: data-scale-y=’90’ will rotate the slide 90 degrees clockwise and data-scale-y=’-90′ will rotate the slide 90 degrees counterclockwise.
- data-rotate-z Rotates the slide around z axis by given degrees. Example: data-scale-z=’90’ will rotate the slide 90 degrees clockwise and data-scale-z=’-90′ will rotate the slide 90 degrees counterclockwise .data-rotate is equal to data-rotate-z
Now we have learned everything necessary to create a stunning visualization. Lets stop talking and make the visualization using combined impress.js features.
Creating a Complete Visualization using Supported Effects
We have already created two slides in our presentation. Lets make more slides with combining the effects of the plugin. I’ll show you the code for each slide and explain what it does exactly in the following section.

Slide 3
This slide has both data-x and data-y values defined. So it will move both x and y direction and hence will have a diagonal transition.
<div id="slide3" data-x="2200" data-y="500"> This Slide Moves From Right To Left and Bottom To Top </div>
Slide 4
This slide has same x value as previous and y value as -500. So the data-y value is reduced compared to previous slide. Hence it will move from top to bottom. If you want to move it from the bottom to the top, just increase the data-y value compared to the previous slide.
<div id="slide4" data-x="2200" data-y="-500"> This Slide Moves Top To Bottom </div>
Slide 5
This slide has data-rotate value of 150 and increase data-x value. Hence it will rotate 150 degrees clockwise while moving on x-axis.
<div id="slide5" data-x="3200" data-rotate="150"> This Slide Rotates Clockwise Around z-axis </div>
Slide 6
This slide has data-scale value of 3. Hence this slide will be 3 times bigger than the previous slides.
<div id="slide6" data-x="6200" data-scale='3'> This Slide Scales 3 Times </div>
Slide 7
This slide has x, y and z values defined. So it will move away from the screen while traveling in x and y directions.
<div id="slide7" data-x="4200" data-y='1500' data-z='1500'> Away </div>
Slide 8
This slide has decreased data-z value compared to previous slide. So it will move towards the screen.
<div id="slide8" data-x="4900" data-y='1500' data-z='100'> Towards </div>
Slide 9
This slide will move further towards the screen since it has a decreased data-z value.
<div id="slide9" data-x="5600" data-y='1500' data-z='-1500'> Futher Towards </div>
Slide 10
Finally we make the last slide as data-scale=10 .Hence it will be 10 times bigger than the other slides. You will be able to see the positioning of all 10 slides in this view.
<div id="slide10" data-x="6600" data-y='3000' data-scale='10'> Visualization Slide Positions </div>
Now we are done with our presentation and full source code is given in the following section. I have used slide specific CSS styles in this example. Feel free to add your own styles and change the look and feel of your visualization.
<html lang="en"> <head> <style> body{ width:1024px; font-size:20px; background: rgb(215, 215, 215); background: -webkit-radial-gradient(#FFFFFF, #68BEFB); background: -moz-radial-gradient(#FFFFFF, #68BEFB) repeat scroll 0 0 transparent; background: -ms-radial-gradient(#FFFFFF, #68BEFB); background: -o-radial-gradient(#FFFFFF, #68BEFB); background: radial-gradient(#FFFFFF, #68BEFB); } #start{ text-align:center; width:1024px; font-size:80px; } #slide1{ text-align:center; width:1024px; font-size:80px; } #slide2{ text-align:center; width:1024px; font-size:80px; } .step{ text-align:center; width:1024px; font-size:80px; } #slide7{ width:400px; } #slide8{ width:400px; } #slide9{ width:400px; } .hint_text{ font-size:30px; background-color:#EEE; padding:15px; } .fallback-message { font-family: sans-serif; line-height: 1.3; width: 780px; padding: 10px 10px 0; margin: 20px auto; border: 1px solid #E4C652; border-radius: 10px; background: #EEDC94; } .fallback-message p { margin-bottom: 10px; } .impress-supported .fallback-message { display: none; } </style> </head> <body> <div id="impress"> <div id="start" > Creating Stunning Visualizations Impress.js Press Spacebar or Tab To Get Started </div> <div id="slide1" data-x="-1200"> This Slide Moves From Left To Right </div> <div id="slide2" data-x="1200"> This Slide Moves From Right To Left </div> <div id="slide3" data-x="2200" data-y="500"> This Slide Moves From Right To Left and Bottom To Top </div> <div id="slide4" data-x="2200" data-y="-500"> This Slide Moves Top To Bottom </div> <div id="slide5" data-x="3200" data-rotate="150"> This Slide Rotates Clockwise Around z-axis </div> <div id="slide6" data-x="6200" data-scale='3'> This Slide Scales 3 Times </div> <div id="slide7" data-x="4200" data-y='1500' data-z='1500'> Away </div> <div id="slide8" data-x="4900" data-y='1500' data-z='100'> Towards </div> <div id="slide9" data-x="5600" data-y='1500' data-z='-1500'> Futher Towards </div> <div id="slide10" data-x="6600" data-y='3000' data-scale='10'> Visualization Slide Positions </div> </div> <div> Your browser <b>doesn't support the features required</b> by impress.js, so you are presented with a simplified version of this presentation. For the best experience please use the latest <b>Chrome</b>, <b>Safari</b> or <b>Firefox</b> browser. </div> <script type="text/javascript" src="js/impress.js"></script> <script type="text/javascript">impress().init();</script> </body>
</html></pre>
<div></div>
<pre>
Checking Browser Compatibility
Apart from Opera, Impress.js visualizations are supported in all new versions of major browsers like Firefox, Chrome, Safari and Internet Explorer 10. If the browser is not supported, we can use the fallback message defined by the library. I have included it in the full source code above. Additional styles have to be defined in order to show it properly. All the code required for a browser fallback message is given below:
<style> .fallback-message { font-family: sans-serif; line-height: 1.3; width: 780px; padding: 10px 10px 0; margin: 20px auto; border: 1px solid #E4C652; border-radius: 10px; background: #EEDC94; } .fallback-message p { margin-bottom: 10px; } .impress-supported .fallback-message { display: none; }
</style> <div> Your browser <b>doesn't support the features required</b> by impress.js, so you are presented with a simplified version of this presentation. For the best experience please use the latest <b>Chrome</b>, <b>Safari</b> or <b>Firefox</b> browser. </div>
What Next?
This tutorial provides a basic visualization which is used to explain the Impress effects. You can use CSS3 features like transition, shadows and gradients in the content of slides to create much more creative visualizations. Also make sure to change and use suitable x and y values for your slides to avoid overlapping of content.
Check out some Impress jQuery plugin powered visualizations given below.
This post may contain affiliate links. See our disclosure about affiliate links here.


