Remote development is simply development on a remote server. An SSH connection is made from your local machine to a server in the cloud. SSH stands for secure shell or secure socket shell — a protocol for securely communicating between two computers via a terminal.
 Image source: code.visualstudio.com
Amazon Elastic Compute Cloud (EC2) provides scalable computing resources to build applications (servers) without needing to handle the responsibilities of managing a physical computer. In our case, we’ll be using the Visual Studio Code editor and connecting it via an SSH connection to the EC2 instance.
In this article, we’ll create an AWS EC2 free tier instance and connect it to the VS Code editor via the Remote SSH plugin.
Prerequisites
Table of Contents
To follow along with this tutorial, you’ll need the following:
- A Linux-based OS or Windows 10 with WSL2 installed.
- An SSH client installed on your machine. This should come as standard on most Linux machines. If not, please consult this list of supported clients.
- An activated AWS account. If you don’t have one, follow the official tutorial.
Pros and Cons of Remote Development
But before we get into the how, let’s look at the why. Here are some pros and cons of developing on the server.
Firstly, the pros:
-
Portability: you can code from any device with internet access. Your code isn’t tied to your local machine, as such, you can code from anywhere using any device available at the moment.
-
Power: you can easily scale up your remote server based on your workloads. It’s pretty straightforward to boot up a 32GB RAM AMD EPYC instance for some data science workloads.
-
Prod-Dev Synchrony: by having a remote dev environment similar to your production environment you can minimize any deployment issues.
-
Seamless Development: remote coding gives you the ability to create environments specially tailored to the project at hand. For example, a project might require different versions of MySQL, C++, and system libraries like LibPng and ImageMagick. Managing different versions of these might prove rather hectic, as any bugs that crop up because of this can’t be easily replicated.
-
Reliability: a cloud server is far more reliable than your local machine can ever be. Depending on your configurations, your server data can be replicated to servers in different parts of the world.
Now let’s look at the cons.
The main reason to avoid coding on a remote environment is the internet connection requirement to access your remote server. With a fast internet connection, the remote development experience feels native when opening, creating and typing in files, and interacting with the remote server’s command line. But with a slow 3G network, you might have disconnections to the server, which could potentially lead to lost work ranging from a few seconds to a few minutes.
With that out of the way, let’s get to the meat of the article — setting up a free tier EC2 instance and connecting it to our local VS Code editor.
Creating and Configuring the AWS server
Let’s go through the steps for creating and configuring your cloud instance.
Log into the AWS Management console.

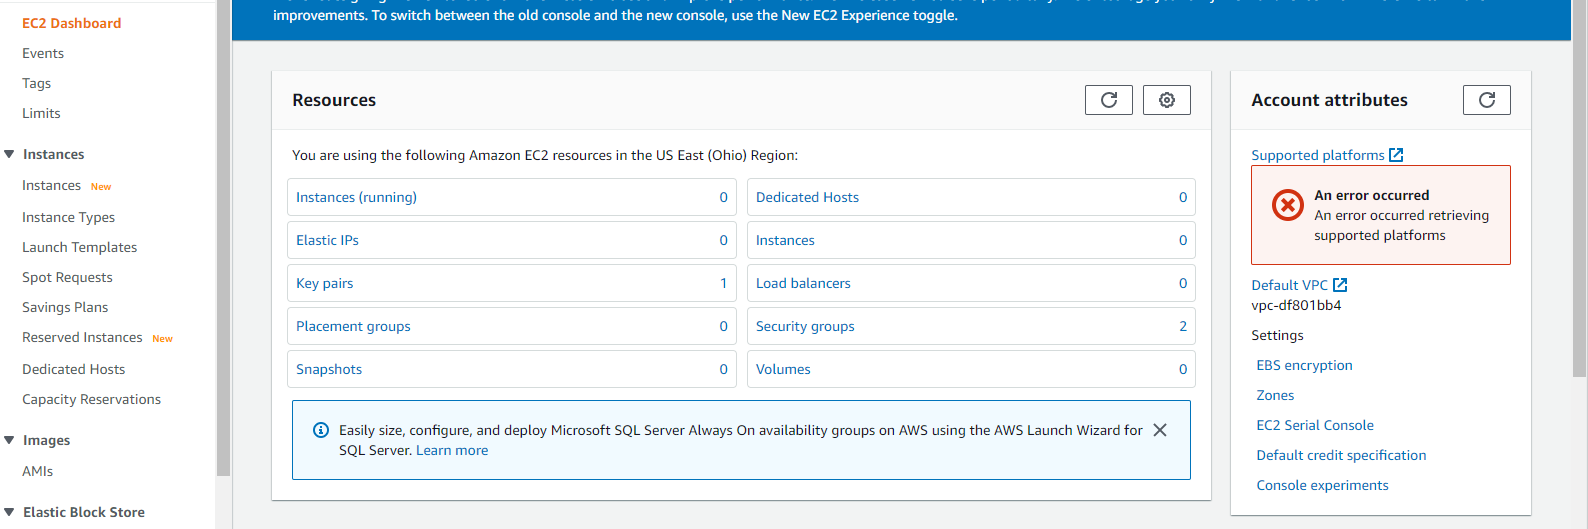
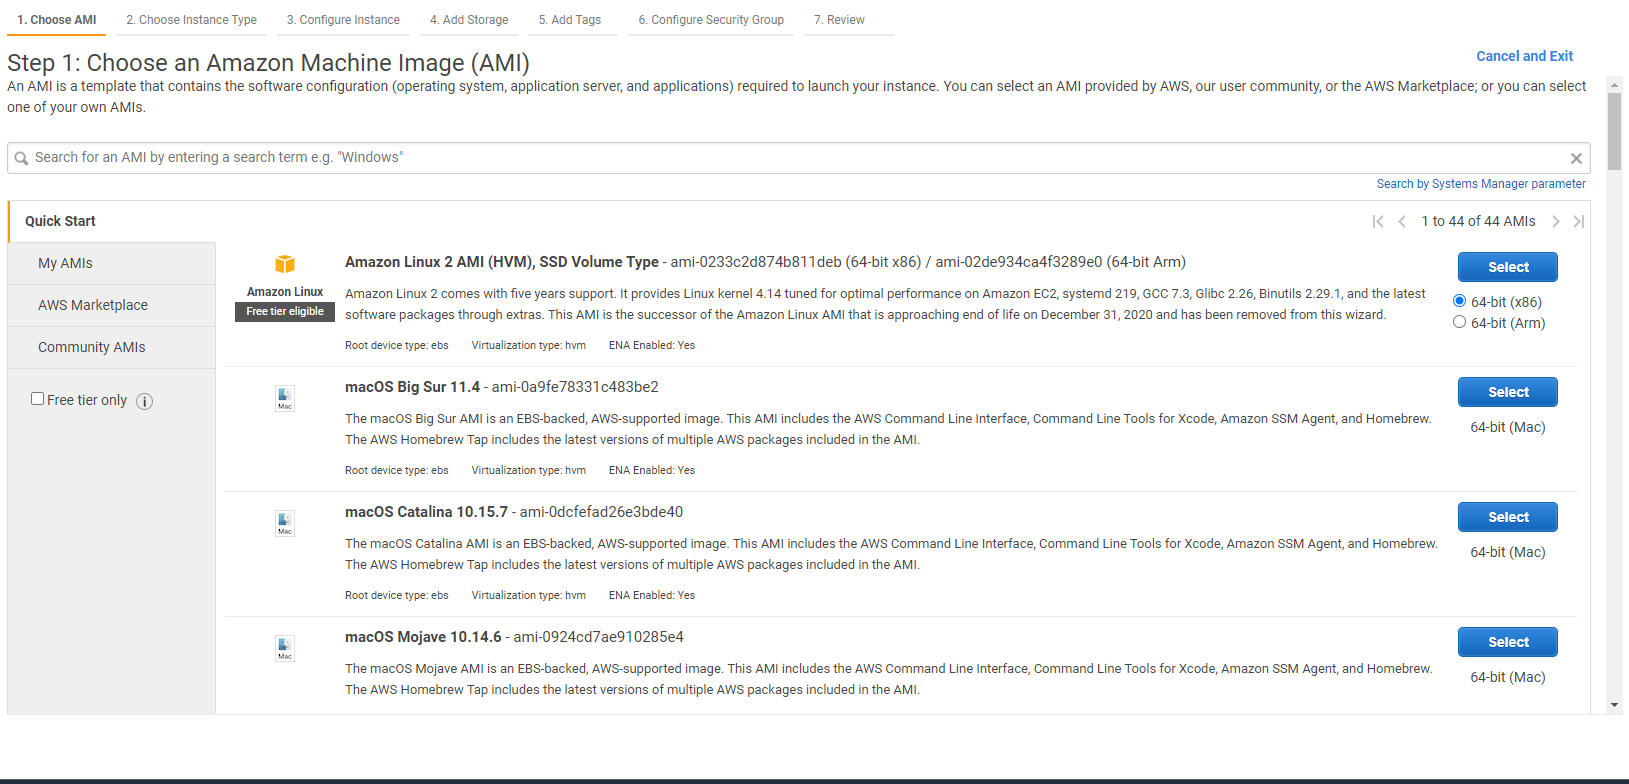
Click EC2 to head over to the EC2 dashboard. Click the Launch Instance button. You’ll be directed to the AMI choosing page.
On the AMI choosing page, search for Ubuntu and select your preferred version. Make sure the architecture is set to x86. We’ll be using the x86 architecture because it has the wider range of software support compared to ARM.
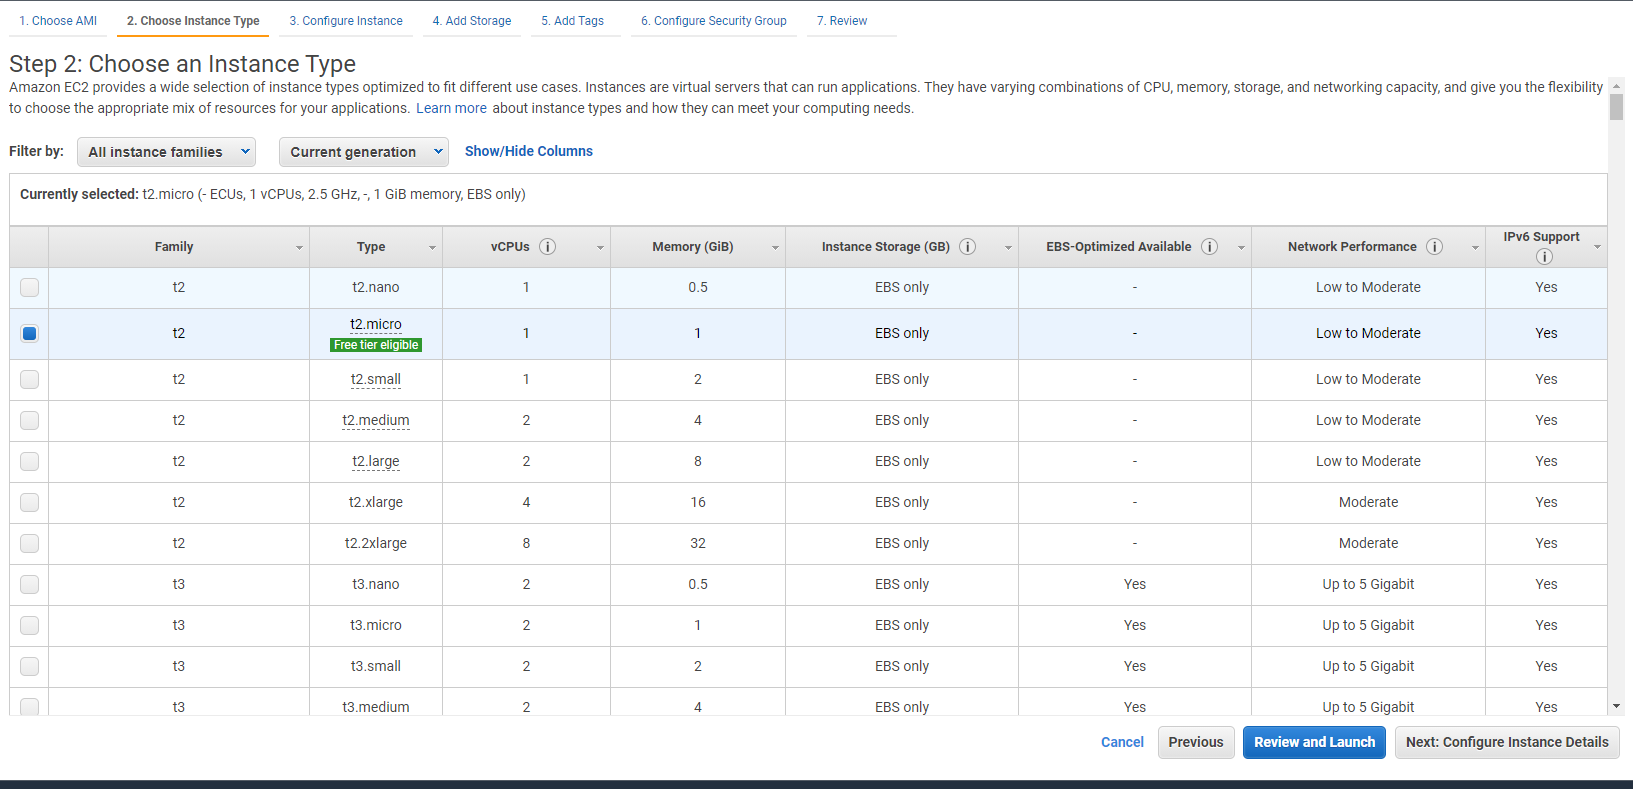
Select t2.micro as the instance type.
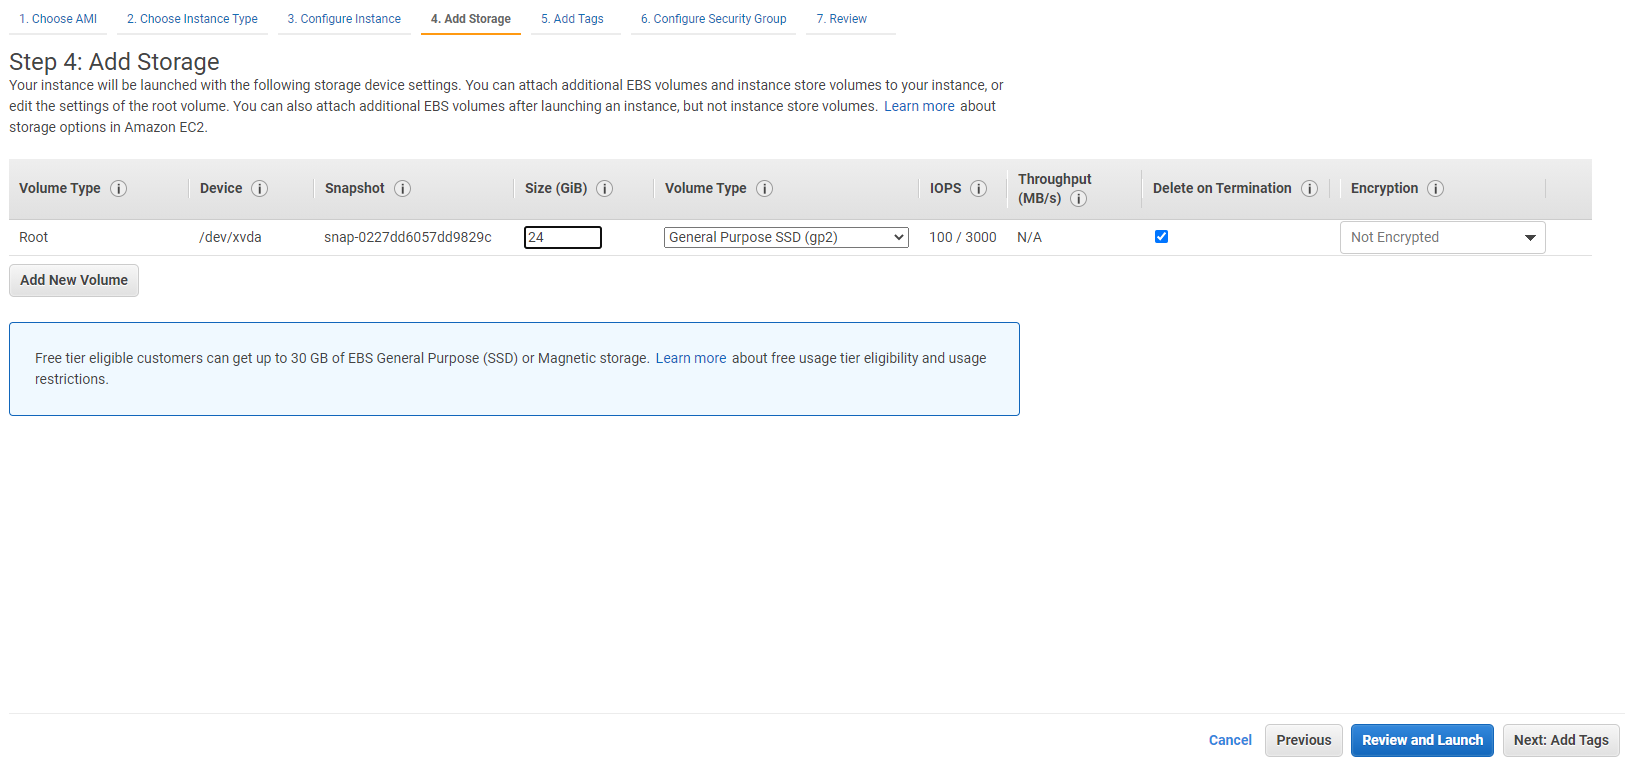
Leave the rest of the steps on their default settings until you get to the add storage step. I recommend you use a minimum of 24GB. If you’re developing for Node.js, npm libraries take quite some space, and using less could put you in a difficult position, so it’s safer to err on the side of caution.
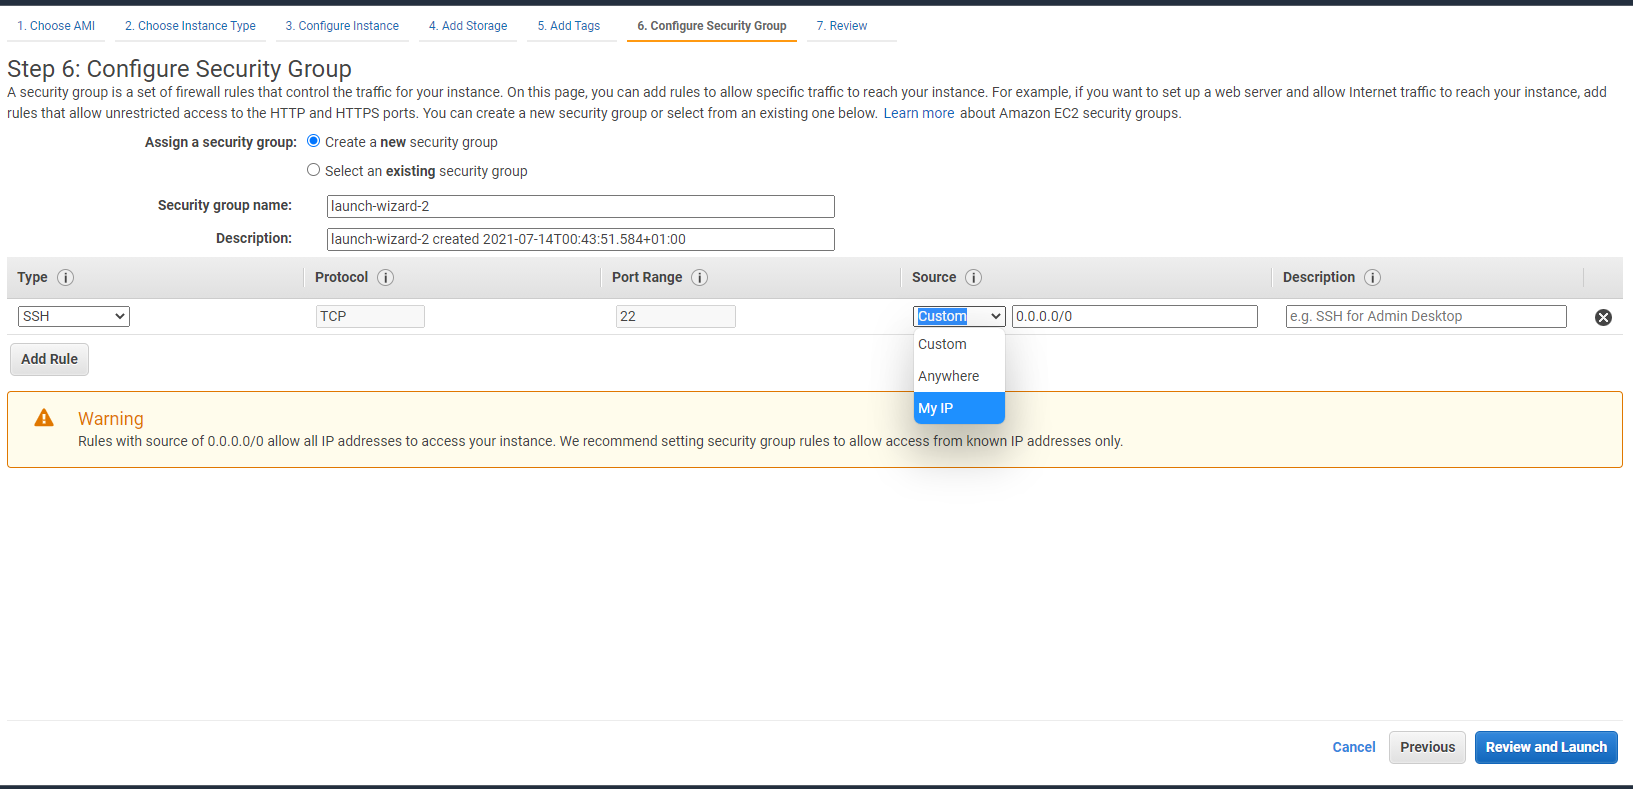
Once you get to the Configure Security Group step, you’ll need to allow incoming SSH connections, you have two options:
-
Enable all incoming IP addresses: selecting this will allow any IP address to access your SSH port, if your situation calls for convenience over security choose this.

-
My IP: if security is more important, choose this option from the dropdown to restrict the IP address to yours only.
Once you click launch, you’ll be asked to either select or create an SSH key pair. Select Create a new key pair. Name the key pair.
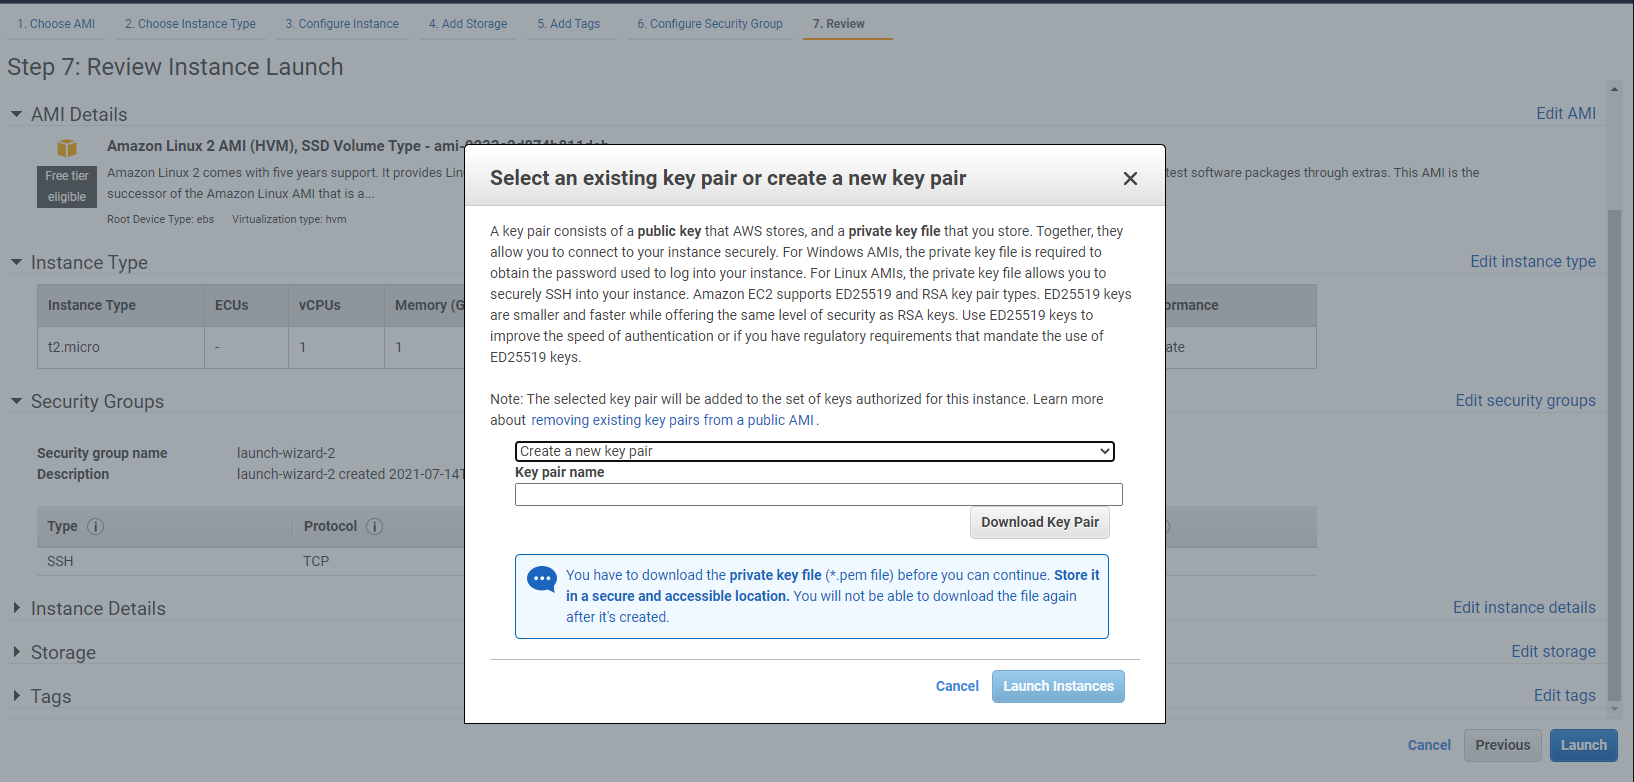
Clicking the Download Key Pair button will obtain you the private key file. This will download a pem file, which you should store in a convenient directory and take note of its directory path.
Next, click Launch Instances button and your EC2 instance will start the creation process. Head to the instances page and you should find your newly created instance.
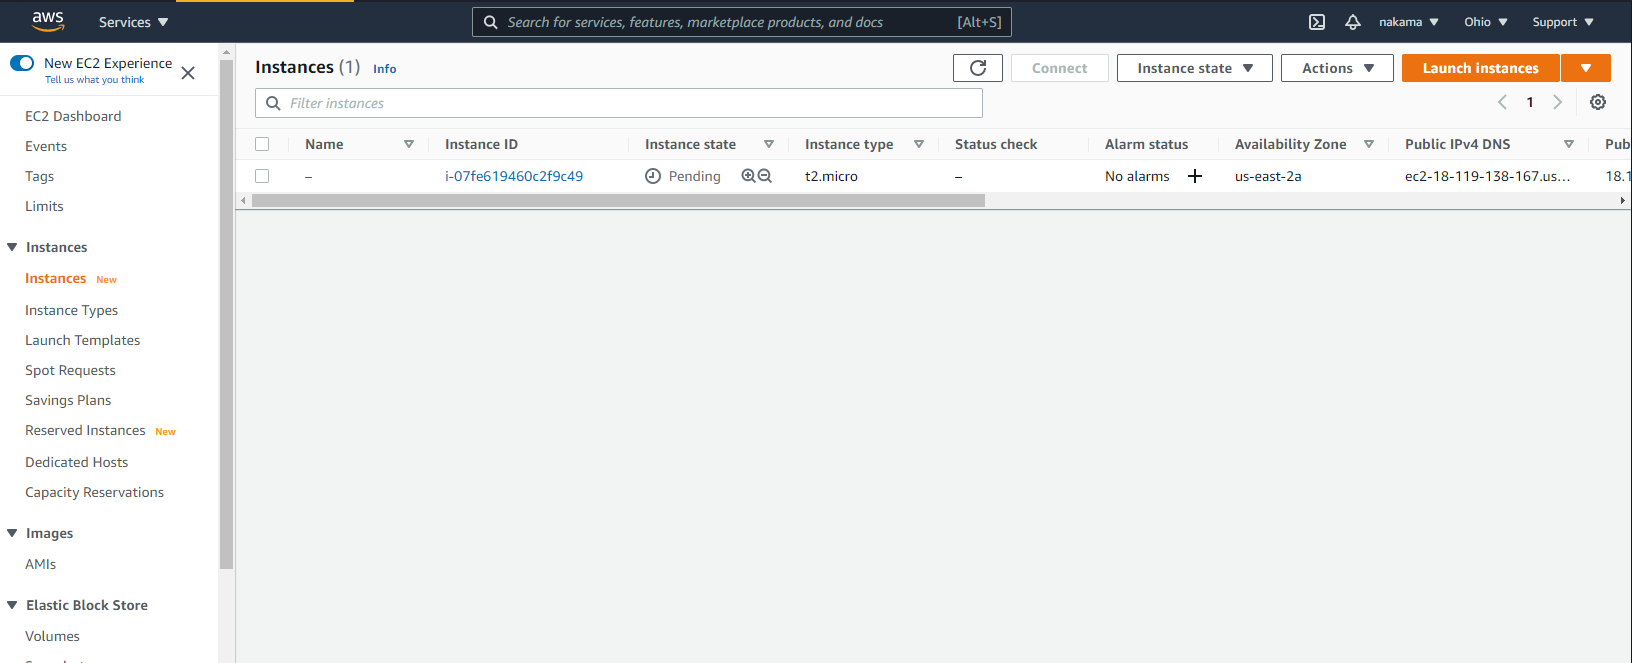
Lastly, click the instance to navigate to its details page and take note of its public IPv4 DNS address.
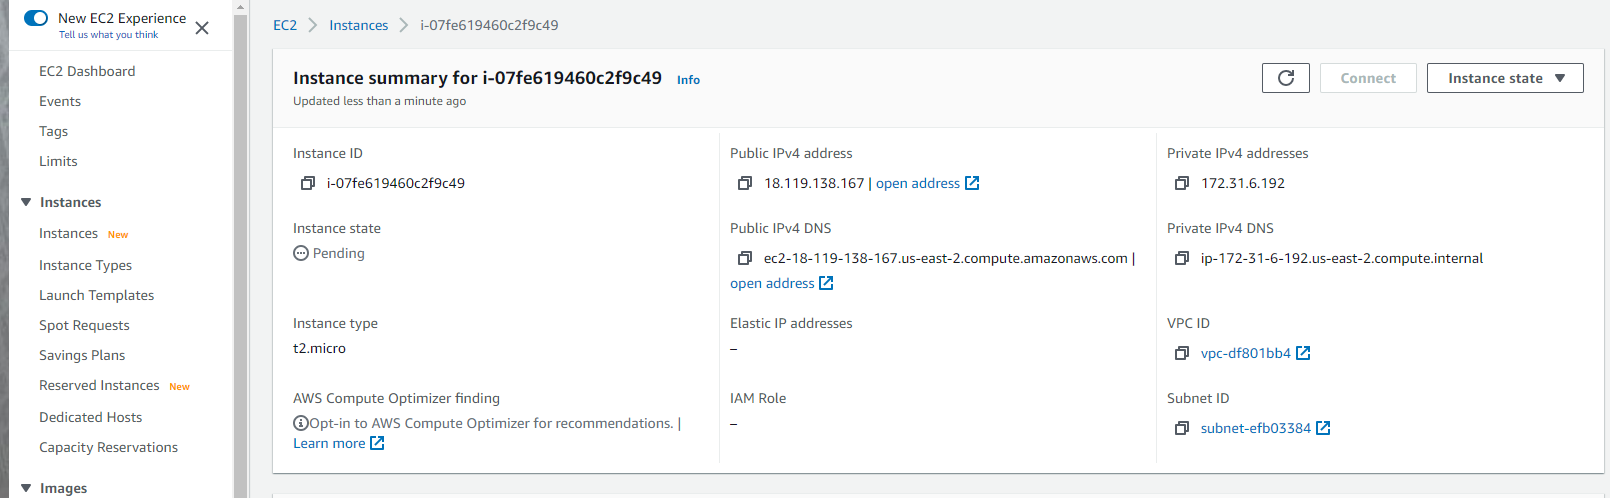
We’ll refer to this address as the instance’s “hostname”.
Continue reading How to Set Up VS Code Remote Development for Free on Amazon EC2 on SitePoint.