When prototyping an idea, it’s recommended that you simplify and build only the minimum core features required to launch a product into the market. This helps you determine if there’s market fit for your application before wasting time and money on a product nobody’s interested in. This is known as a “minimum viable product” (MVP). In this tutorial, you’ll learn how to build an MVP using React and Firebase, a backend-as-a-service platform.
In order to provide the most value, we won’t be developing the React + Firebase application step by step. Instead, I’ll break down a working prototype and explain the key concepts using pseudo-like coding language. The actual code is quite verbose, as it’s mostly front-end logic designed to deal with many aspects such as state management, responsive UI design and accessibility.
My goal is to show you the architectural design of building web interfaces that are linked to a serverless back end. The complete Firebase project we’ll use is located in our GitHub repository. At the end of this tutorial, you should be able to apply these concepts in your own MVP web projects.
Why Firebase?
Table of Contents
If you’re looking to build a web application on a serverless platform, you’ll come across a myriad of providers that offer all the essential services you need to build your product. These services include authentication, database, cloud functions, storage, analytics and many more.
If you were to pick the best of class for each service, you’d have a pretty high learning curve figuring out how to make all these services work together in your application. You also expose your product to a number of security risks as there are multiple end-points that your product connects to in order to work. There are measures to protect your application, but most developers are unaware of what security issues need to be plugged.
Firebase is a back-end-as-a-service platform that conveniently provides a number of essential services under one roof. This reduces the learning curve and also makes it easier to build secure web and mobile applications.
These Firebase services include:
- authentication
- database
- storage
- cloud functions
- analytics
- hosting
Prerequisites
Take note that this tutorial is written for intermediate to advanced React developers who want to quickly learn how to use Firebase for their projects. I’ve provided a few additional topics that you need to be familiar with before proceeding:
- React and TailwindCSS
- React Query
- Vite — a better alternative to
create-react-app
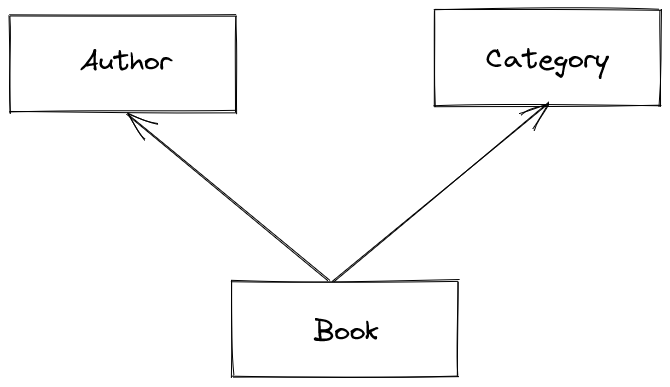
Firebase Project Plan
The project we’ll be looking at is a simple online library that organizes data into books, authors and categories. Below is an entity relationship diagram.
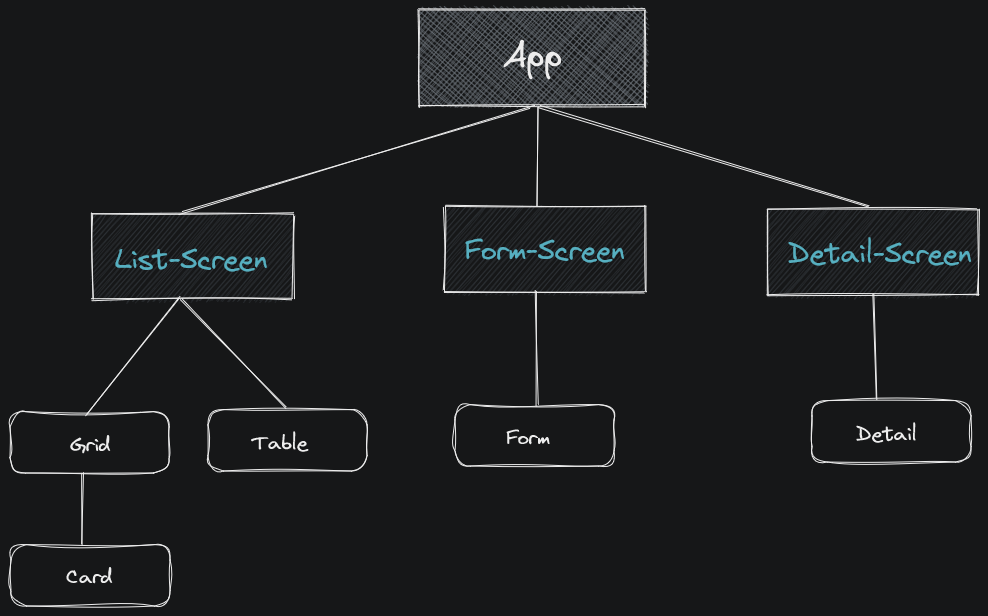
The application logic has been organized into:
- screen containers (pages or views)
- presentational components (forms, tables)
- layout components (footer, navbar)
- shareable UI components (alerts, modals, page headers)
- Firebase services (database, storage)
- Firebase config scripts (back-end connectors)
Below is an illustration of the main project’s architecture:
We’ll be using the following folder structure to organize our code:
├── components │ ├── entity (e.g. book) │ │ ├── Card.jsx (-> BookCard) │ │ ├── Detail.jsx (-> BookDetail) │ │ ├── Form.jsx │ │ └── List.jsx │ └── ui │ └── Component.jsx (e.g. PageHeader, Alert) ├── layout │ ├── Footer.jsx │ └── Navbar.jsx ├── screens │ ├── entity │ │ ├── Detail.jsx (-> ScreenBookDetail) │ │ ├── Form.jsx (-> ScreenBookForm) │ │ └── List.jsx │ ├── category │ │ ├── Form.jsx │ │ └── List.jsx │ ├── Home.jsx │ └── NotFound.jsx └── services └── Service.js (e.g. Database, Storage) The -> symbol denotes an example of how a functional component is named. Check out this guide for more information on naming conventions for front-end applications.
Firebase Project Setup
The project we’ll use was scaffolded using a Vite + React template. To set up the project in your workspace, simply open a terminal and execute the following:
# Clone project git clone git@github.com:sitepoint-editors/sitepoint-books-firebase.git cd sitepoint-books-firebase # Install dependencies npm install # Prepare environment config file cp env.example .env.local Don’t launch the dev server just yet, as we need to set up our Firebase back end first, which we’ll do in the next step.
Firebase Setup
Head over to Firebase and sign in with your Google account. Then:
-
Create a new Firebase project and call it
SitePointBooks. -
Don’t enable Google Analytics for this project. Hit the Create project button.
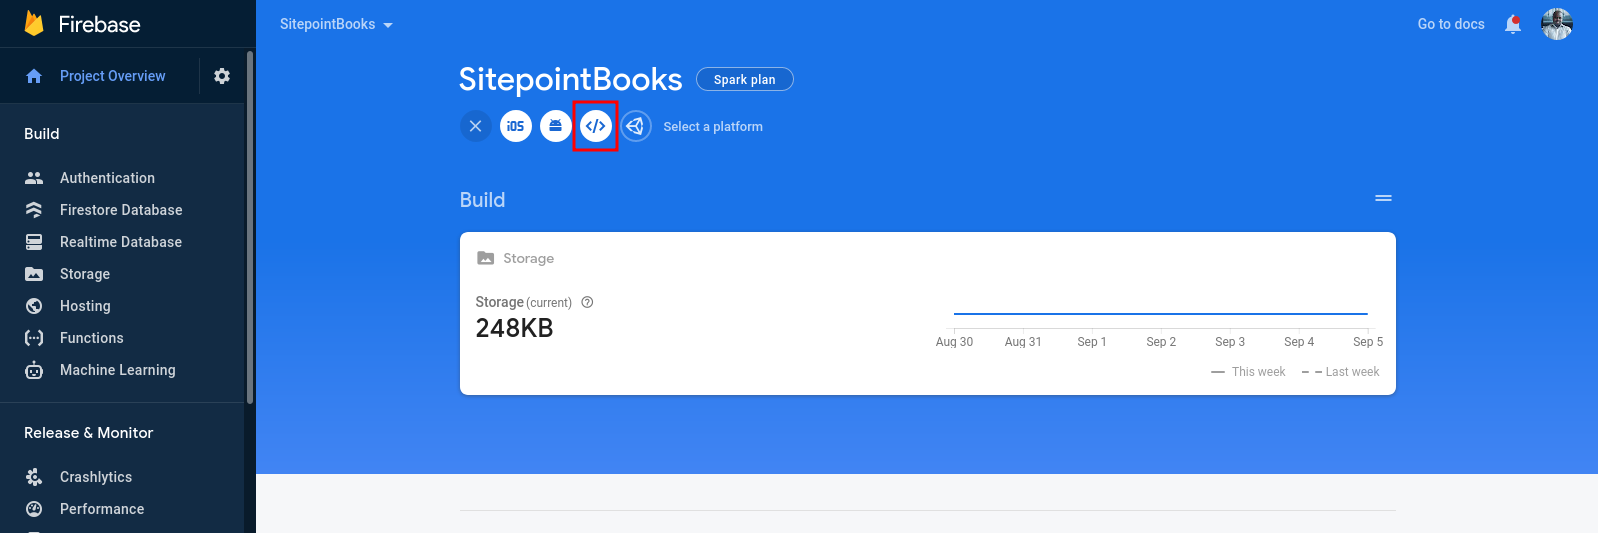
-
In the Firebase console, create a new Web App and call it
sitepoint-books-app. You can access the Firebase console as demonstrated in the screenshot below.
-
In the next step, give your app a name (this can be the same as the project name) and then click Register app.
-
In the Add Firebase SDK section, select Use npm and copy the output.
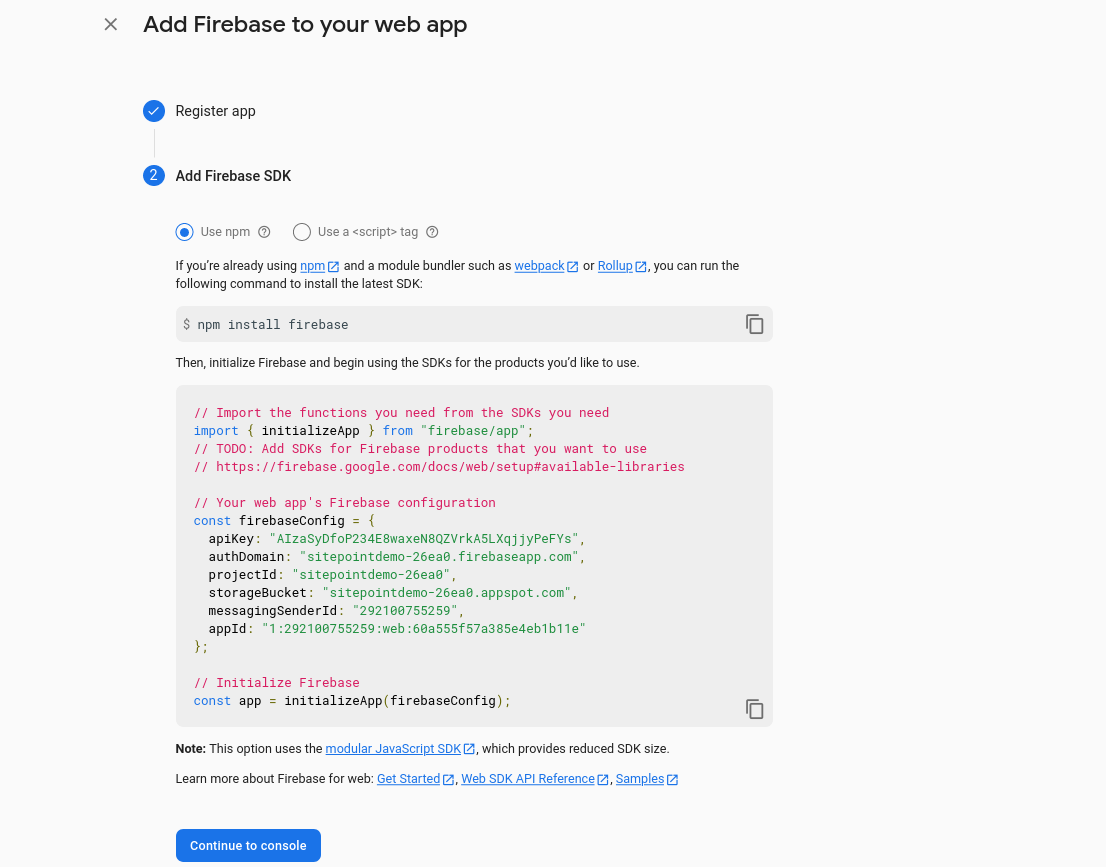
There are a wide number of Firebase SDKs available. You can find out more about these here. -
Finally, make a note of your Firebase config and click Continue to console.
Do note that Firebase API keys are safe to expose to the public, as access to back-end resources is guarded via Firebase security rules. That is, they can only be accessed by an authenticated user. Unfortunately for this tutorial, we’ll need to disable them, since we won’t deal with Firebase authentication.
For a quick setup, you can simply copy the provided script into a firebase.js file. However, I prefer saving the Firebase configuration settings using an .env.local file. Here’s a Firebase configuration example:
VITE_API_FIREBASE_API_KEY=AIzaSyDfoP234E8waxeN8QZVrkA5LXqjjyPeFYs VITE_API_FIREBASE_AUTH_DOMAIN=sitepointdemo-26ea0.firebaseapp.com VITE_API_FIREBASE_PROJECT_ID=sitepointdemo-26ea0 VITE_API_FIREBASE_STORAGE_BUCKET=sitepointdemo-26ea0.appspot.com VITE_API_FIREBASE_MESSAGING_SENDER_ID=292100755259 VITE_API_FIREBASE_FIREBASE_APP_ID=1:292100755259:web:38be20c9ab080b4ab1b11e Don’t use these Firebase configuration settings, as they were created for a temporary project.
Do note that this only prevents storing of Firebase config keys in your repository. Once you build and deploy your application, it’s quite easy for a malicious attacker to gain access to these keys via the browser inspection tools. This demonstrates the importance of setting up authentication.
Currently, our Firebase back end is empty. In the next steps, we’ll populate it with data.
Cloud storage
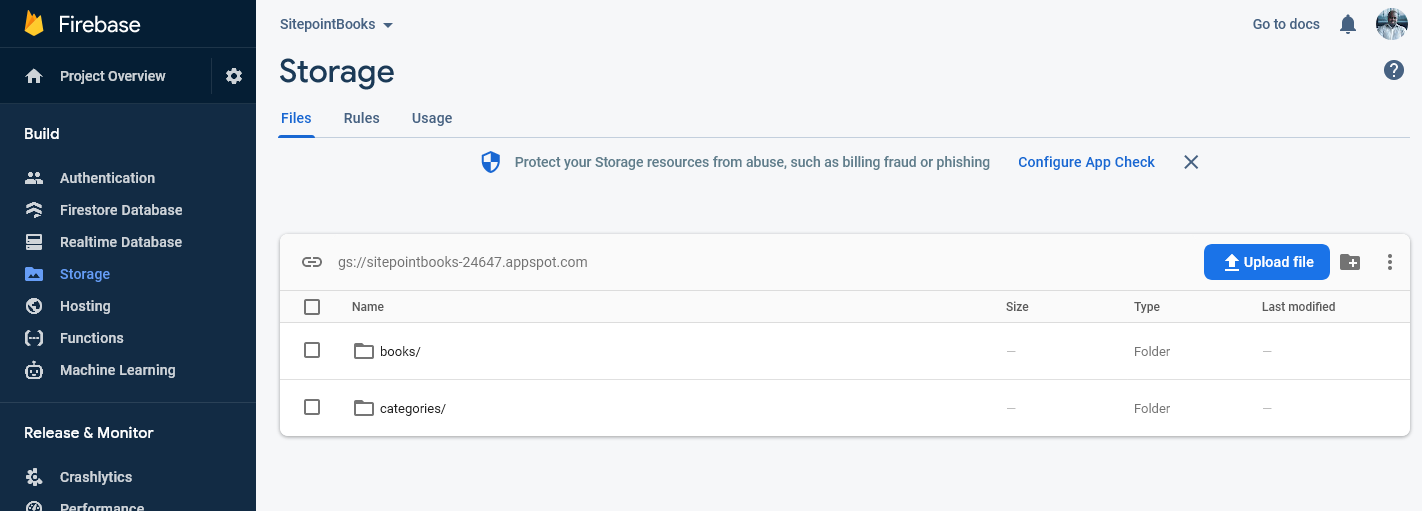
Firebase’s Cloud Storage is a service that allows developers to store images, video, audio and other user-generated content. For this tutorial, we’ll only use it to store images. Head over to the Storage page and click the Get Started button. A popup wizard will appear. Simply accept the default rules and choose a location for your default bucket. After clicking done, a storage bucket will be created for you in a short while.
On the next page, perform the following actions:
-
Create the following folders:
categoriesbooks
-
Upload the images I’ve provided via this zip file. You should have the following structure:
-
Click on the Rules tab and update the security rules to allow our unauthenticated app to access these files. Do note the following settings will expose your storage back end to the public:
rules_version = '2'; service firebase.storage { match /b/{bucket}/o { match /{allPaths=**} { allow read, write: if true; } } }
Firebase uses a custom language based on Common Expression Language to define its security rules. Due to the learning curve involved, we won’t be able to discuss it in this article. Check out the official docs on this topic.
Once you’ve completed populating your Cloud Storage with the provided images, you can proceed with the next step.
Cloud Firestore
For the database, we’ll use Cloud Firestore, which is a scalable NoSQL database that allows developers to structure data using collections. The older Firebase Realtime Database is also a NoSQL database, but it stores all your data in a flat nested JSON structure that’s difficult to query.
In your console, head over to the Firestore Database page and click the Create Database button. A popup wizard should appear:
- On the first page, set Start in test mode to allow insecure access to the database for the next 30 days.
- On the next page, set the database region then click Enable button.
Once the database is initialized, we can proceed with populating the database. Before you start populating, you should be aware that the Firestore database UI doesn’t support automatic linking and validation when linking two collections. So you’ll need to open a second browser tab and copy an ID from one record to a reference field, as shown below.
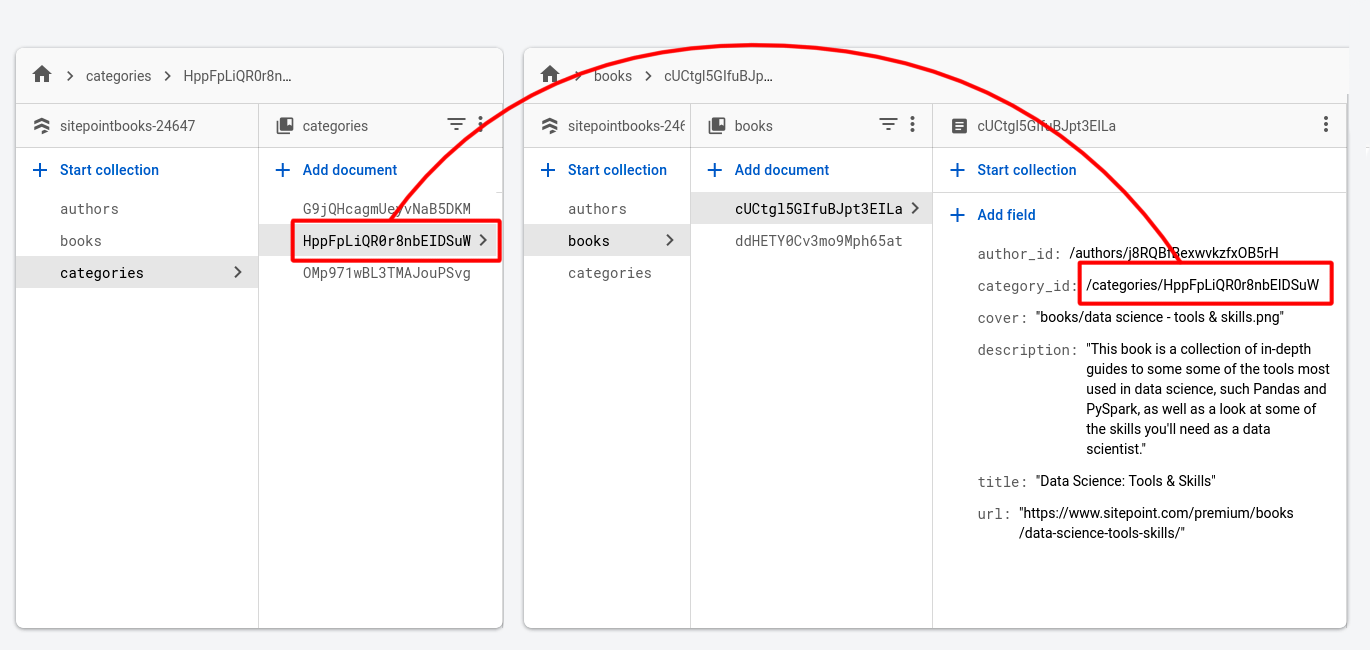
You’ll also need to make sure there’s no white space around the ID value when you paste it in a reference field. Otherwise, a null object will be returned when you perform a query. With that out of the way, you can begin creating and populating your Firestore database as follows:
authorscollection, all field types are string:
| Name |
|---|
| Darren Jones |
| Mike Aboagye |
categoriescollection, all field types are string:
| Name | Cover |
|---|---|
| javascript | categories/javascript.png |
| python | categories/python.png |
| react | categories/react.png |
bookscollection, all field types are string exceptauthor_idandcategory_id. You’ll have to manually copy the relevant unique ids(place_id) into the reference fields as demonstrated in the screenshot above:
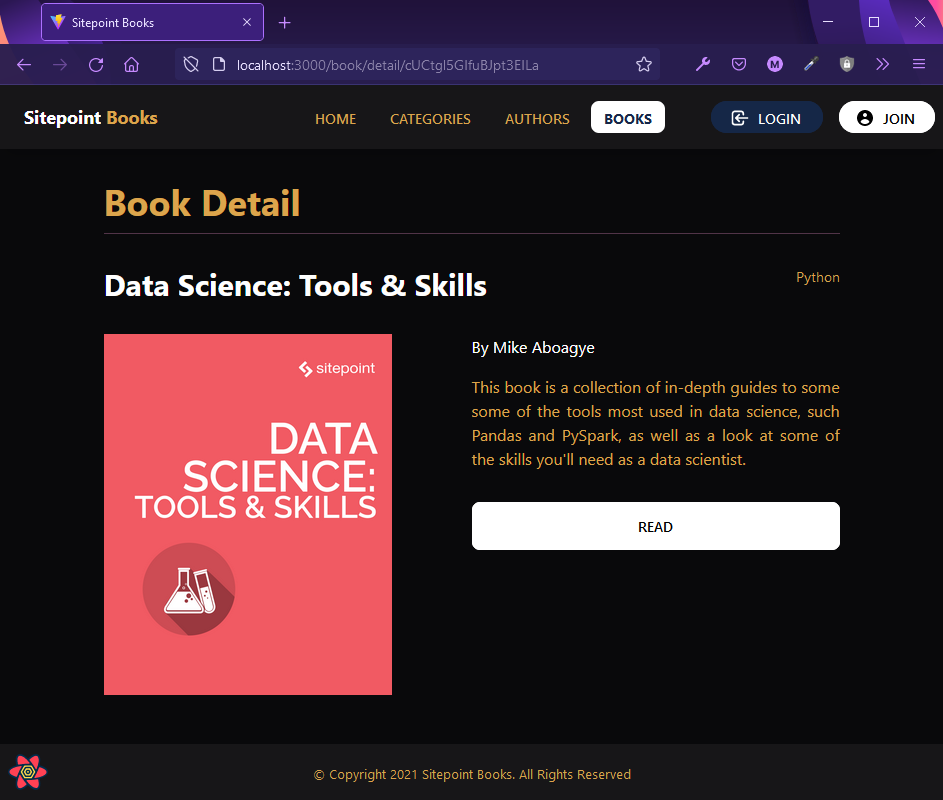
| Title | Learn to Code with JavaScript | Data Science: Tools & Skills |
|---|---|---|
| Cover | books/learn-to-code-with-javascript.jpg | books/data science – tools & skills.png |
| author_id (reference) | /authors/{place id} | /authors/{place id} |
| category_id (reference) | /categories/{place id} | /categories/{place id} |
| Description | This easy-to-follow and fun guide is the perfect place to start on your coding journey. You’ll be learning to program with JavaScript—the most popular programming language on Earth—but the techniques that you’ll master will provide you with a foundation to go on and use in other languages, too. | This book is a collection of in-depth guides to some some of the tools most used in data science, such Pandas and PySpark, as well as a look at some of the skills you’ll need as a data scientist. |
| URL | https://www.sitepoint.com/premium/books/learn-to-code-with-javascript/ | https://www.sitepoint.com/premium/books/data-science-tools-skills/ |
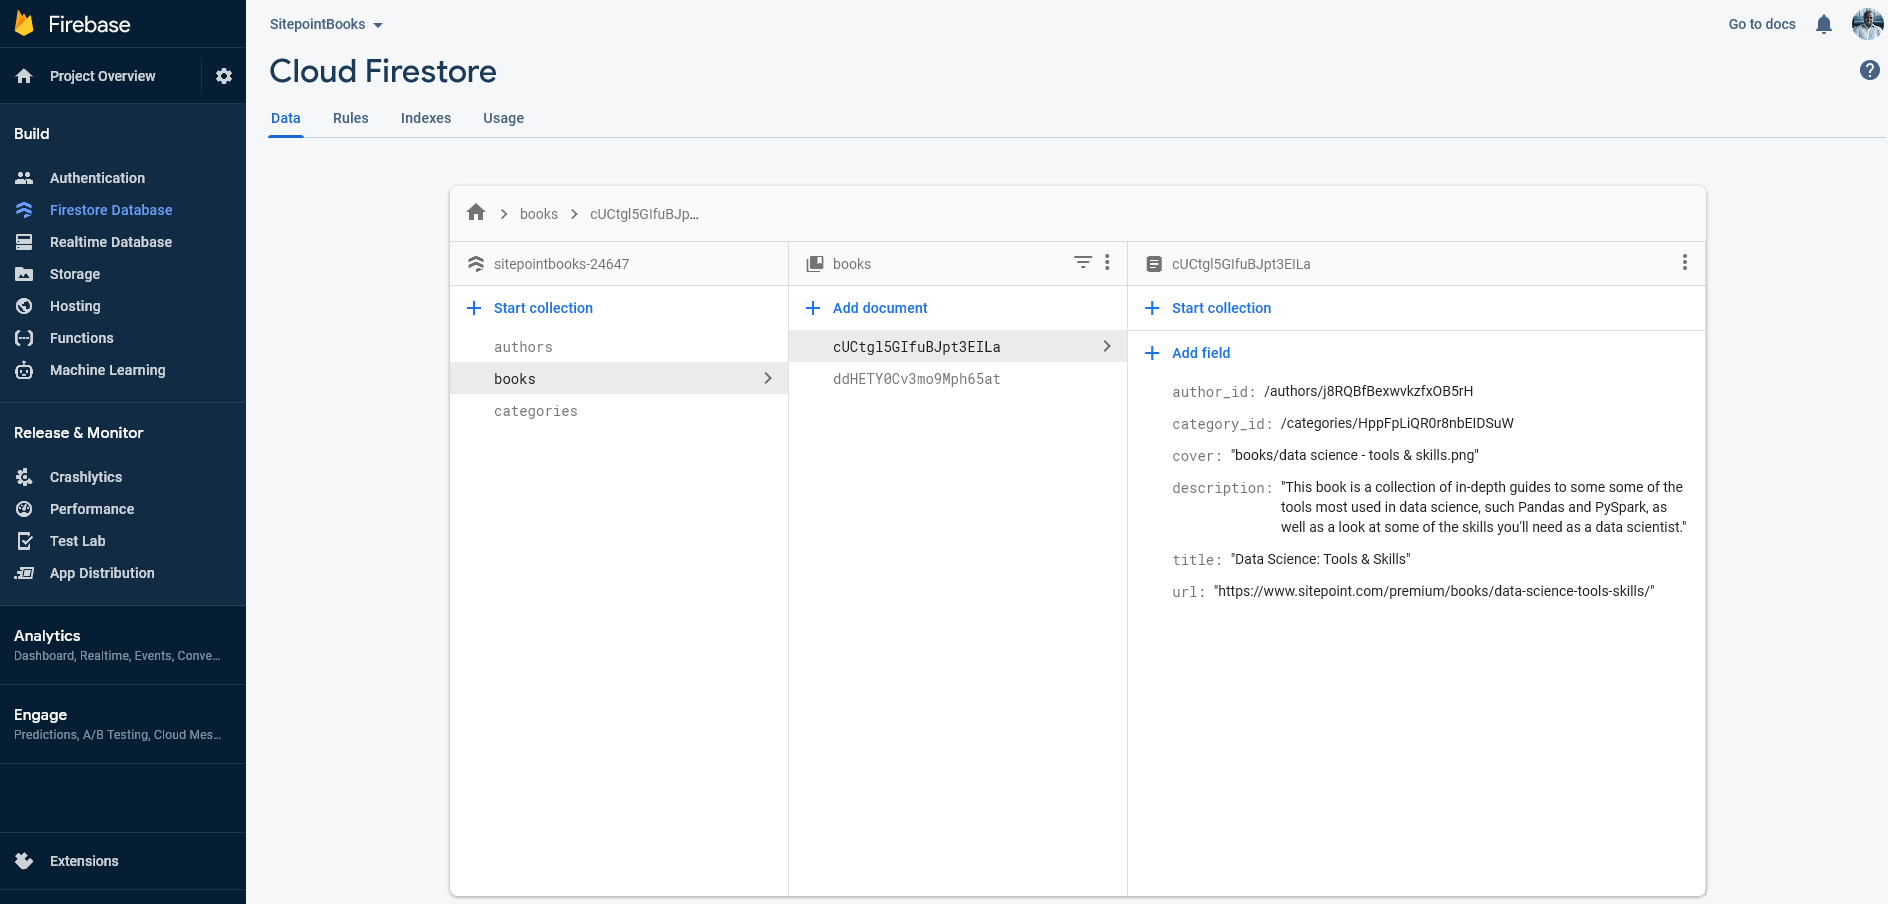
See the screenshot below as an example of how to set up your database structure.
Launching Dev Server
With the database populated, we can now execute npm run dev and browse to localhost:3000 to interact with the project. Do note that it’s a prototype application built for learning and not all features are fully implemented.
Firebase Project Logic
Let’s now start breaking down the project so that you can learn how the front-end interfaces are built to connect and interact with the Firebase back end. The focus will mainly be on state management logic for this tutorial. If you’re unfamiliar with the user interface code used in this Firebase project, please refer to the following documentations for the UI libraries used in the project:
- TailwindCSS and plugins: primary CSS framework
- HeadlessUI: small collection of unstyled UI components
- HeroIcons: collection of handcrafted SVG icons by Tailwind CSS team
- DaisyUI: TailwindCSS component library
- React Hook Form: form state library
- Yup: form validation library
Routing
Building a CRUD interface for a project that involves more than two entities can quickly get complicated. For routing, I used React Router and implemented a routing structure using a standardized syntax. That is:
- list route:
/{entity} - create route:
/{entity}/create - edit route:
/{entity}/edit/:id - detail route:
/{entity}/:id
Here’s a simplified view of how routing has been implemented in App.jsx:
import React from "react"; import { Route, Switch } from "react-router-dom"; // Layout components import Footer from "@/layout/Footer"; import Navbar from "@/layout/Navbar"; // Screen(pages or views) containers import Home from "@/screens/Home"; import NotFound from "@/screens/NotFound"; import ScreenBookList from "@/screens/book/List"; import ScreenBookForm from "@/screens/book/Form"; import ScreenBookDetail from "@/screens/book/Detail"; function App() { return ( <div> <header> <Navbar /> </header> <main> <Switch> <Route exact path="/"> <Home /> </Route> <Route exact path="/book"> <ScreenBookList /> </Route> <Route path="/book/edit/:id"> <ScreenBookForm /> </Route> <Route path="/book/detail/:id"> <ScreenBookDetail /> </Route> <Route path="/book/create"> <ScreenBookForm /> </Route> <Route component={NotFound} /> </Switch> </main> <Footer /> </> ); } Take note that ScreenBookForm has been re-used for both create and edit routes. You’ll later see how a single form container can be used to handle both use cases. Next, we’ll look at how the React app connects to the Firebase back end.
Continue reading How to Build an MVP with React and Firebase on SitePoint.