React Native is presently one of the best-known frameworks for developing cross-platform mobile apps capable of running on Android, iOS, macOS, Windows, and other platforms. ClojureScript, on the other hand, is slightly less mainstream, being most popular among functional programming enthusiasts.
In recent years, however, more developer teams have begun adopting ClojureScript to create dynamic web applications. The increasing popularity of the language is largely due to its concise, compact, and elegant syntax.
If you’re wondering how React Native and ClojureScript can be integrated together for mobile development, then this article is for you.
Read on to discover:
A brief review of how React Native works
Table of Contents
React Native is an open source framework used to develop cross-platform native applications that run on both Android and iOS. Today, thanks to contributions from developers around the world, React Native now works with major mobile platforms and Linux, macOS, Windows, etc.
The core element of React Native’s architecture is the “bridge,” which it utilizes to convert JavaScript code into native platform components and vice versa. This bridge allows it to access platform-specific features, such as the camera or geolocation, which enables the application to render those features natively.
React Native relies on some external tools and frameworks to run smoothly. An example of such a tool is Node.js.
The role of Node.js in React Native apps
React Native uses JSX to let developers create their components in a similar way to writing HTML markup. However, before JSX can be interpreted, it needs to be transpiled to regular JavaScript that can be interpreted by the JavaScript Virtual Machine (JVM) in your app.
Note that, for bundled applications, the transpilation process automatically happens during the build process. During development, you also need a tool to transpile your JSX to JavaScript on the fly so it can then be executed by the JVM. This is the role Node.js plays.
Node.js transpiles your code, resolves the dependencies, and feeds the code and required modules to the React Native app. These processes take place when you launch the Metro Bundler. Both React Native and React use npm or Yarn to install third-party packages and manage project dependencies.
Benefits of using ClojureScript for React Native apps
ClojureScript has a number of features that make it particularly well-suited for React Native applications. Let’s take a look at some of these features.
Awesome language features
ClojureScript is a functional programming language, which means that it uses functions as its primary building blocks, instead of objects. This is a huge advantage if you come from a functional background.
It also supports immutable data structures that let you define data that cannot be changed after it has been created. This makes it easier to reason about code and helps to prevent bugs.
All data types in ClojureScript are checked for validity before the code is executed. This helps to prevent bugs and create maintainable code.
Finally, ClojureScript is designed to be interoperable with other languages. Internally, it compiles down to JavaScript, so it can be integrated with React and React Native easily.
Easily readable code
ClojureScript is an expressive language that takes advantage of functional programming techniques. This makes it easier for developers to read and understand code, and also quickly find and fix bugs. Take a look at the following example:
(defn add-two [x] (+ x 2)) (add-two 3) ;; 5
With just one look, most people could easily decipher that the above function is adding 2 to the parameter x. The code is also very concise, which leads to a leaner codebase that’s easier to maintain.
Smaller codebase size
Due to ClojureScript’s concise syntax, programs written with it tend to be smaller in volume than those written in other languages, such as JavaScript.
For example, here’s a JavaScript function for adding together two numbers:
const addTwoNumbers = (x, y) => { return x + y;
} console.log(addTwoNumbers(1, 2));
The above code occupied five lines. The function declaration occupies three lines, the console.log statement occupies one line, and there’s an empty line to space the code. Now compare that to the same program written in ClojureScript:
(defn add-two-numbers [x y] (+ x y)) (println (add-two-numbers 1 2))
In ClojureScript, the entire code takes up just four lines. This might seem like a negligible difference, but it adds up quickly when you’re building big projects with a large volume of code.
Using ClojureScript for your React Native application will significantly reduce the volume of code you’ll have to write, resulting in a leaner and more compact codebase, which is always a good thing for maintainability.
Outdated methods for integrating React Native and ClojureScript
Like React Native, ClojureScript compiles to regular JavaScript under the hood. This makes it possible to integrate both tools for mobile app development. There are quite a few ways to achieve this integration. Some older methods include Re-Natal, Krell, and React Native Figwheel Bridge.
The Re-Natal command-line utility is the first and best-known tool for building with ClojureScript and React Native, but it’s no longer being actively maintained.
Krell is a stand-alone approach that uses minimal deps.edn and build.edn config to set up a REPL-based workflow that is clean and understandable.
The react-native-figwheel-bridge library takes a simple approach to setting up React Native with ClojureScript, Figwheel, and REPL on top of a standard React Native project.
These methods are either no longer supported or require too many installations and configurations. As a result, any mistake can leave you lost with an app that isn’t working well.
In the next section, I’ll demonstrate the easiest way to set up a React Native app that uses ClojureScript — a simple method that only takes about three minutes.
Using a starter template to integrate ClojureScript with React Native
In this section, you’ll learn how to create a React Native application that uses ClojureScript as the primary development language in less than five minutes.
To achieve this, we’ll use the rn-rf-shadow template. This method is the easiest and fastest way to bootstrap apps that use ClojureScript with React Native.
Prerequisites
Note that there are different toolchains you can use to run this example project:
- VS Code with Calva
- Emacs with CIDER
- IntelliJ with Cursive REPL
In this guide, I use VS Code and Calva to run the application because VS Code is the most popular IDE and the setup process is super straightforward. I also recommend doing the same to follow without issues, but if you want to use any of the other two, check out the instructions in the official GitHub repo.
To follow this guide, you’ll also need to install the Chrome browser on your computer to run the project on the web. If you want to run on an emulator instead, make sure you have either XCode or Android Studio installed.
Cloning the project
Go under the code section in the official code repository and copy the project’s GitHub URL. Then open a command terminal, cd into your preferred directory, and download the repo as shown below, replacing <repo-url> with the URL you copied:
>git clone <repo-url)
Once the process is complete, open the project with VS Code.
Install dependencies:
Launch your VS Code terminal and run the following command to install shadow-cljs, React Native, Expo, reagent, re-frame, and other dependencies:
npm i
It might take a while for all the packages to finish installing, so be patient.
Install and set up Calva
In VS Code, go to the Extensions tab, search for the Calva extension, and install it. Once installed:
- Press
ctrl+shift+pon your keyboard to bring up the command palette - Search for “Calva: Start a Project REPL and Connect (aka Jack-in)”
- Click it, then select the
Hello RN Shadowproject
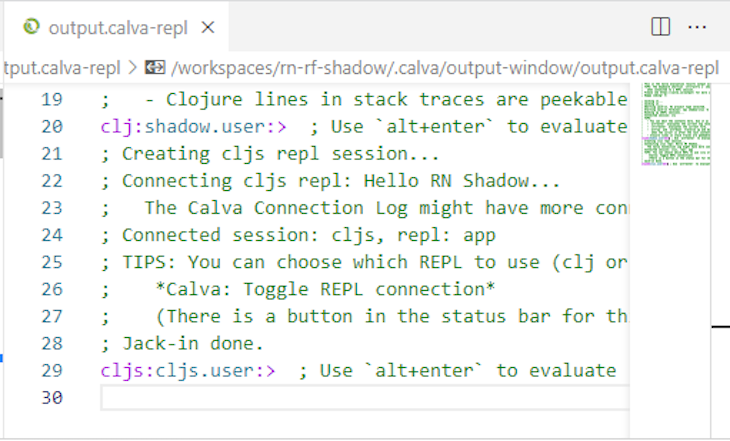
The last step in the list above starts shadow.js in watch mode, meaning that source code changes are compiled in real time. Wait for the process to finish in the output-calva.repl terminal. You should see something like the below:
Start the app
Now that the REPL has been connected to your project, it’s time to run the build task. Follow the steps below:
- Press
ctrl+shift+pon your keyboard to bring up the command palette - Search for “Tasks: Run build task” and click it to start up Expo
- On the Metro Bundler UI, choose “Run on Android device/Emulator”
- If you’re using XCode, choose the “Run in iOS device” option
- Wait for your application to start
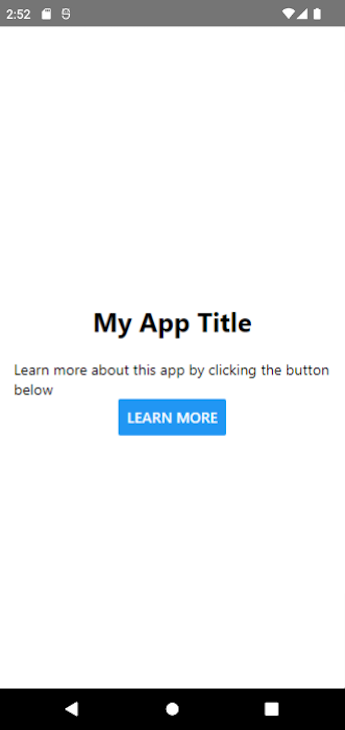
If you see a UI that looks like the one below, then everything went well:

If you run into an error, it’s most likely because you do not have Android Studio, Android SDK, or XCode installed or properly set up on your machine to run the emulator.
You can also run the application on your web browser via react-native-web instead of an emulator. Just choose the “Run in web browser” option and the app will open in a new window.
Customize the app
Inside the src/main/example/app.cljs file, you can find the source code responsible for what is rendered on the app’s UI. The app makes use of React Native UI components as well as four modules — db.cljs, events.cljs, subs.cljs, and widgets.cljs.
To customize your app, you have to update the app.cljs file with your custom code. For demonstration purposes, replace the code in your app.cljs file with the following:
(ns example.app (:require [expo.root :as expo-root] [re-frame.core :as rf] ["react-native" :as rn] [reagent.core :as r]))
(defn root [] ( [:> rn/View {:style {:flex 1 :justify-content :center :align-items :center :background-color :white}} [:> rn/Text {:style {:font-weight :bold :font-size 25 :margin-bottom 20}} "My App Title"] [:> rn/Text {:style {:font-weight :bold :font-size 25 :margin-bottom 20}} "Learn more about this app by clicking the button below"] [button { :style {:background-color :blue}} "Learn More"] ]))
(defn start {:dev/after-load true} [] (expo-root/render-root (r/as-element [root])))
(defn init [] (rf/dispatch-sync [:initialize-db]) (start))
In the code above, we placed two pieces of text and a button that says “Learn More” inside a React Native <View> component. We styled all the components using the style property.
This will be the result:
Conclusion
In this introductory article, we dove into the internal workings of React Native and explored ways in which ClojureScript can be integrated into React Native apps. Then we used the rn-rf-shadow template to bootstrap an app in a few minutes.
If you need more information, you can read our article on Getting Started with ClojureScript as a JavaScript developer.
The post Getting started with React Native and ClojureScript appeared first on LogRocket Blog.
from LogRocket Blog https://ift.tt/gUI4NK3
Gain $200 in a week
via Read more