Ideation is more than just brainstorming. It’s about getting your creative juices flowing, using your imagination, and taking time to develop unique ideas. In technical terms, the final idea that results from the completion of the ideation process is considered the solution to a problem. The problem is the project or assignment itself. Regardless as to whether you’re a freelance designer, part of a design team within a large organization, or a design company, ideation should be a vital part of your design process.
The graphic design software process is necessary for any project you develop. Typically the process consists of five stages: stage one is to “Empathize”; stage two is “Define (the problem)”, stage three is “Ideate (ideation)”, stage four is “Prototype”, and stage five is to “Test (the idea/solution)”. This process helps you generate innovative ideas and maintain order, organization, and structure from the beginning to the end of a design project.
This post will take a look at how you can optimize the third stage of the design process: ideation.
Let’s get to it …
Table of Contents
What is ideation?
Ideation is the process of generating ideas and solutions through methods such as sketching, brainstorming, fat-marker sketching… the list goes on. Ideation typically follows empathizing, whereby you research your user’s needs, and defining which involves clarifying the problem which is in need of a solution.
4 tips to optimize your ideation process
Before you start ideating, take into consideration these 4 top tips that will help you generate the next great, consumer relevant, and revenue driving idea and solution.
Remember that as a designer it is important to do what works best for you. If you already have a flawless ideation process then stick to it. However, if at times you struggle to spark your creative torch – then this post is for you.
1: Be clear about the problem you’re solving
Designers are often said to be problem solvers. Why? Because every project is a challenge that requires a solution and … a designer unveils that solution. It’s up to designers to build a brand that engages and stimulates the end users of a solution. The project could be building a website or designing a pair of dungarees – regardless of what you are designing, the goal remains the same: to design something that end-users will love and that aligns with your brand.
However, it’s not just designers who are involved in the ideation process. Often creative writers and members of the marketing/ advertising team also play a part. So, before thinking about design solutions to a problem (or project) be clear on exactly who will be working on the project. Then with the design team defined begin working and deciphering the problem together.
The customer may not know precisely what the problem is, nevertheless, it’s up to you as a team to devise questions to ensure everyone is on the same page. This will ensure that you don’t encounter any problems or delays during the design process.
At the end of the day, if you don’t fully understand a problem then how can you hope to solve it?
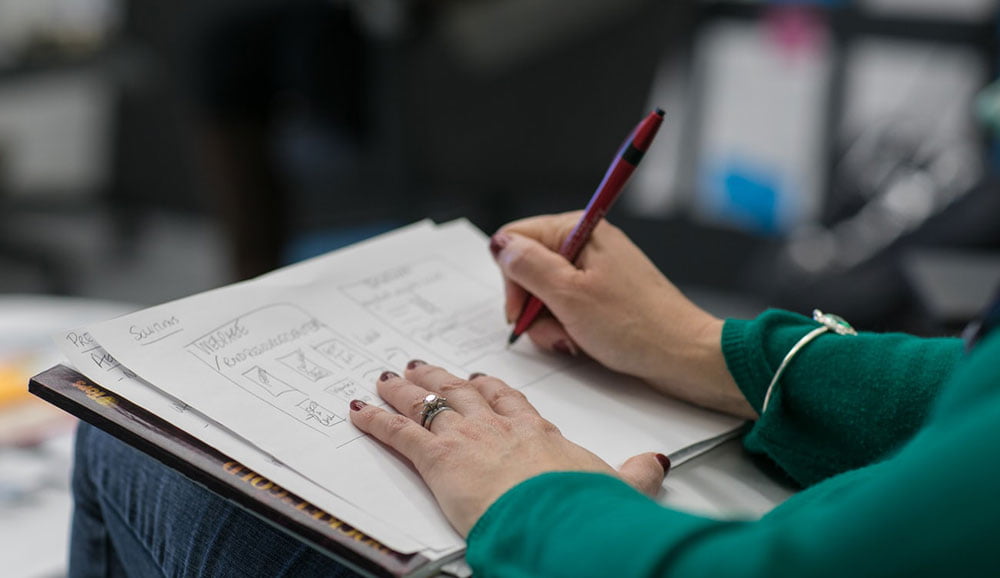
2: Create a vision board
Visualize yourself interacting with the final product. Two of the more popular techniques for creating a mockup version of what you visualize include: creating a vision board this can be made up of sketches, image cut outs or printed designs, fabrics, textures, and so on; using sticky notes, writing down your ideas on sticky notes and rearranging/ adding to them as your idea develops. There are heaps of tools out there to help you bring your designs to life.
Ultimately you want to picture yourself interacting with the final product. Imagine the end user interacting with the design. Then ask yourself what it looks like? How does it work? What does it feel like? And, what is the usefulness of the design?
The vision board should mimic how the end user will interact with the design in the hope of gauging the effectiveness of the overall solution and design concept. When creating a vision board consider the actual use and function of your design first and then the aesthetics second.
3: Get your ideas down & keep hold of each idea
Ever had the feeling that you’ve already had an idea, and noted it down – but have absolutely no idea where you noted it down .. or even how you noted it down? I certainly have. What’s worse is having an idea and not noting it down at all and then the idea coming back to you at a later date when the project is already underway.
To stop this happening you can do two things. Number one: write down/ sketch down all of your ideas. Number two: have a structured system to store the ideas. Now you may be thinking … but that is incredibly time consuming. It doesn’t have to be. The trick is to have a method that takes as little time as possible.
At Process Street, where I work as part of the marketing team, we recently made the move from Scrum (an agile framework) to Shape Up (a development framework). One method used to find solutions within Shape Up’s framework is fat marker sketching. Fat marker sketching involves sketching with such broad strokes that adding detail is difficult or near impossible. You could use large tipped Sharpies for this. This technique is a big time saver as it doesn’t allow room for you to worry over the details of a design.
When it comes to storing your ideas in a structured way one trick is to create a photo folder on your smartphone and take snapshots of your ideas or fat marker sketches. That way all of your ideas are saved in one place and, more often than not, that place will conveniently be in your pocket.
4: Accept constructive criticism
After hours of research and ideation it is likely that one idea will begin to stand out from the others. Often this idea will be an evolution of an older idea or even the combination of a several. The effort that goes into developing your winning idea means that it is often easy to form attachments to it. However, for your idea truly develop into a functioning solution to a problem it must continue to evolve.
Remember tip number one? “Be clear about the problem …” In this section I mentioned the importance of interacting with your team in the design process. Team input is particularly valuable in this phase, well, actually it’s valuable in all phases. Nevertheless, it is in this phase that the value of a diverse team really pays off. Each member will have their own perspective and can offer valuable input to your existing idea. It is important to be open to the suggestions and criticisms from your team.
On a side note: If you’re working on a project alone then this is the point where you’d ask for input from the client.
Wrapping up
Once you have a solid idea of a solution to the problem it is time to make the solution actionable. Consider whether the idea can be delivered in a suitable time frame, if it’s financially viable, is consistent with the brand, meets customer’s requirements and fits with the company’s mission and vision. Refine the solution to ensure it covers all of these bases. Once refinement is complete you can move on to the next stage of the design process: Prototyping.
Author bio
I’m Molly, a Content Writer at Process Street with a First-Class Honors Degree in Development Studies & Spanish. I love writing so much that I also have my own blog where I write about everything that interests me; from traveling solo to mindful living. Check it out at mollystovold.com.